Overview
This article provides detailed instructions on managing existing AI Agents in Bizagi Studio, including options to edit, remove, move, and clone AI Agents.
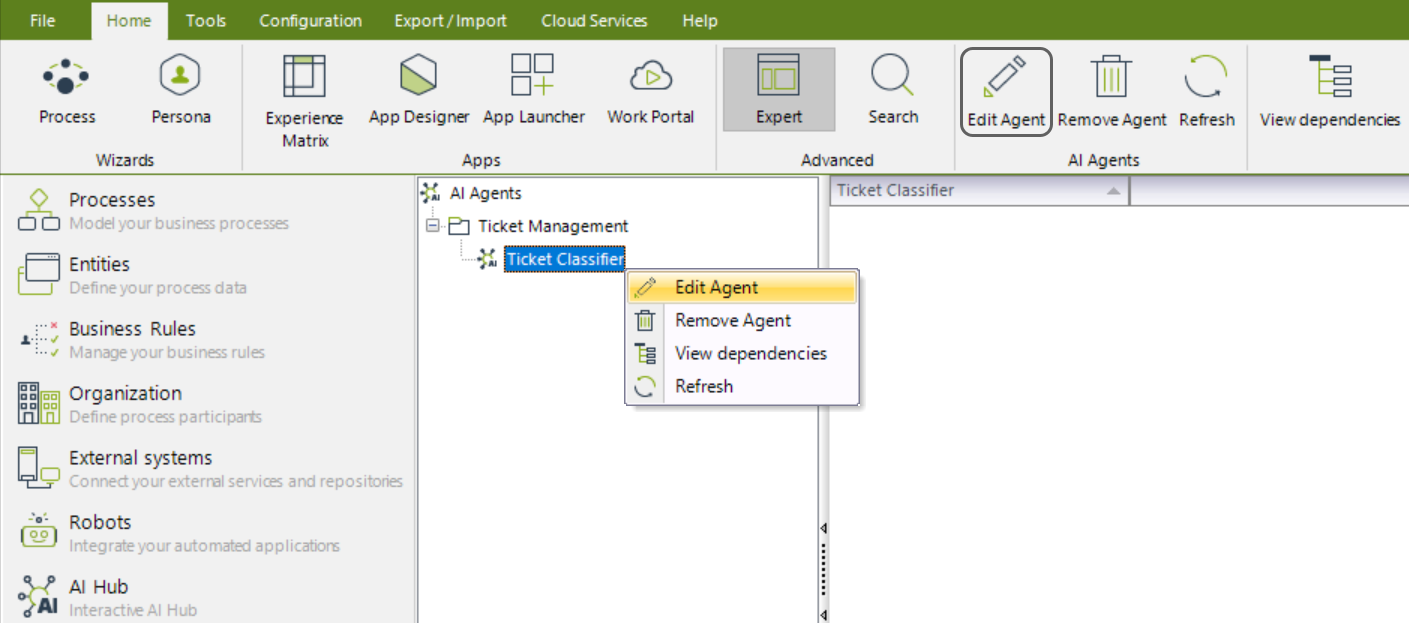
Edit an AI Agent
Once you have established and configured an AI Agent, you can adjust the information provided during its setup following these steps:
1.Right-click the node containing the current name of your AI Agent and select Edit Agent. Alternatively, use the corresponding button in the top ribbon.
This opens the Edit AI Agent window, which mirrors the layout of the New AI Agent window, but with the details of the selected AI Agent already filled in.
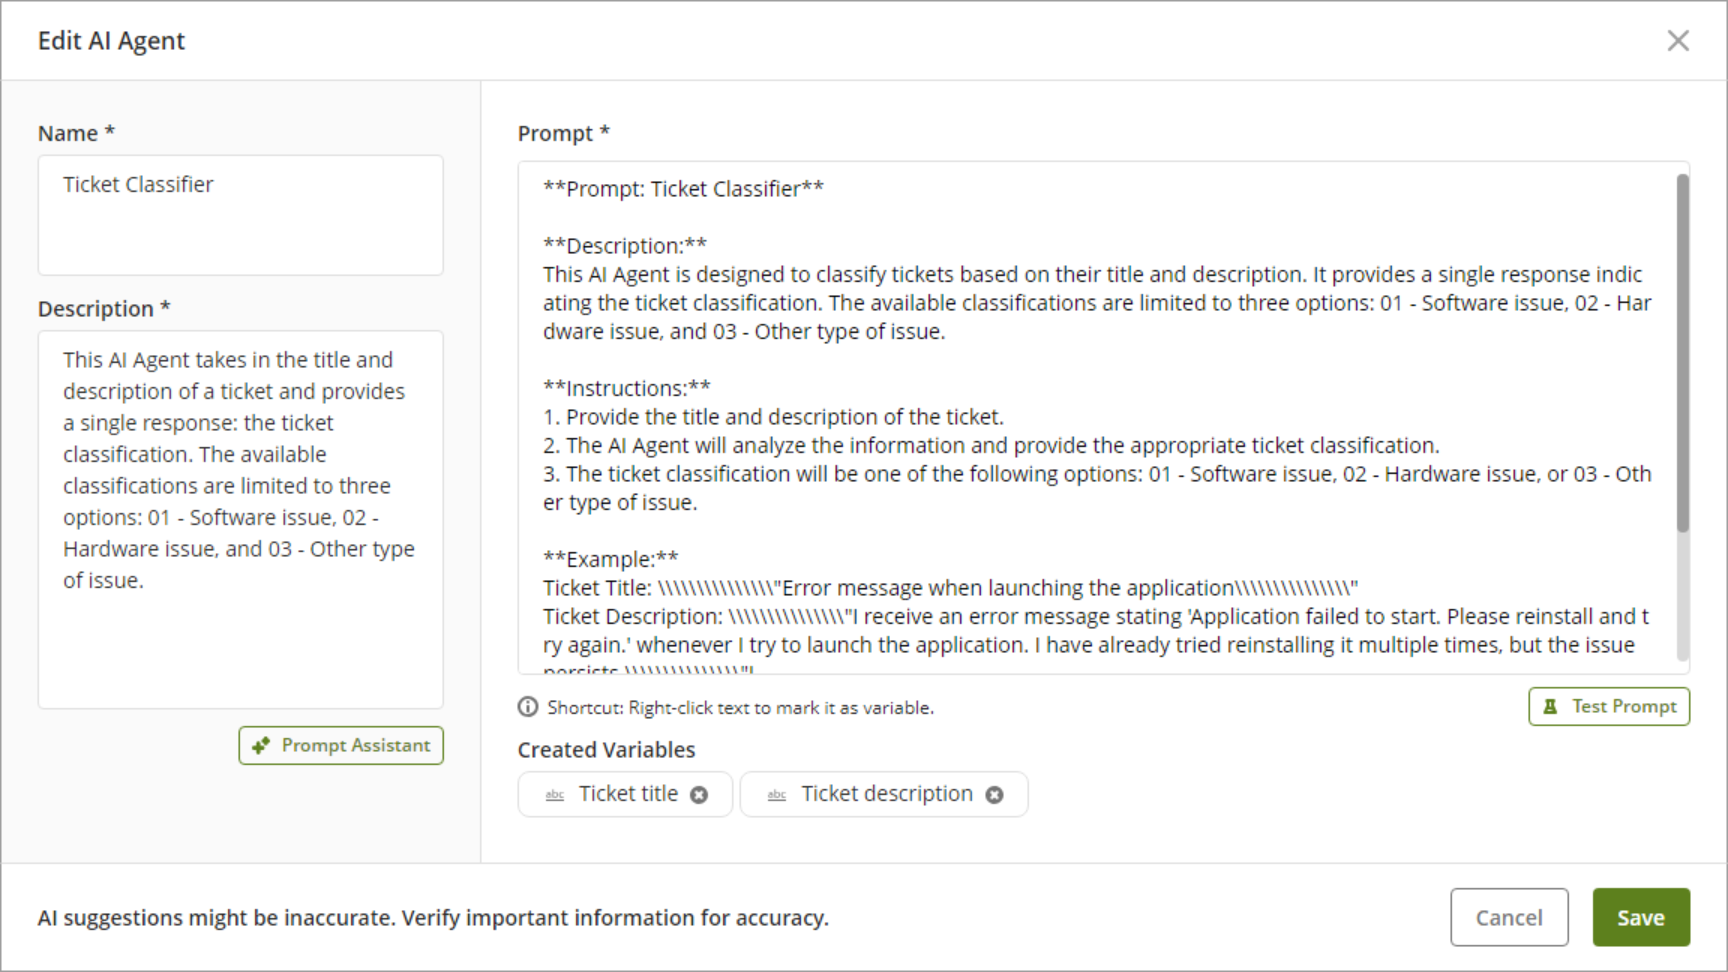
2.Make any required modifications, and once finished, save the changes to your AI Agent by clicking the Save button.
Remove an AI Agent
To remove an AI Agent, follow these steps:
1.Right-click the node containing the current name of your AI Agent and select Remove Agent. Alternatively, use the corresponding button in the top ribbon.
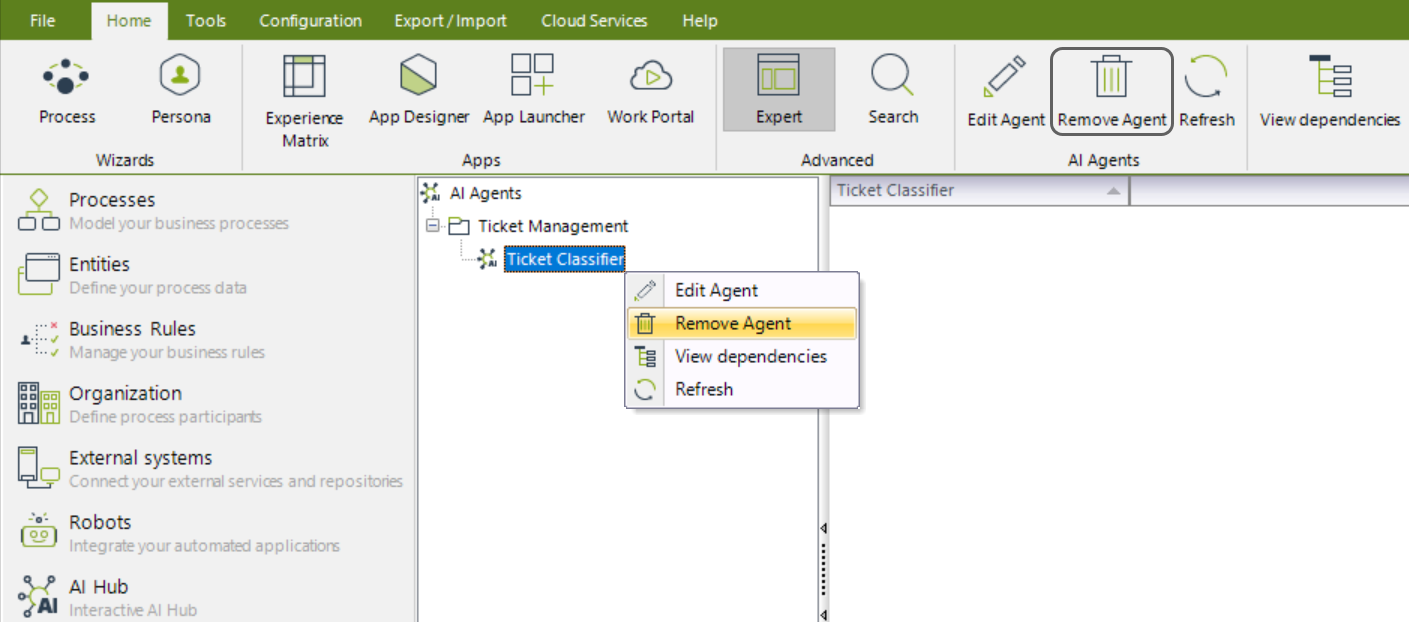
2.Click the Yes button to confirm the AI Agent removal action.
|
Once removed, the AI Agent will no longer appear under the Category node, and its information will be inaccessible.
If you are currently using the AI Agent in any processes, you will not be able to remove it immediately. You must first check its dependencies by clicking the View dependencies option, ensure that the AI Agent is no longer in use, and then proceed with the removal. |
Move an AI Agent
Once you have created and configured an AI Agent, you can move it to another Category by following these steps:
1.Right-click the node containing the AI Agent’s name and select Move Agent. Alternatively, use the corresponding button in the top ribbon.
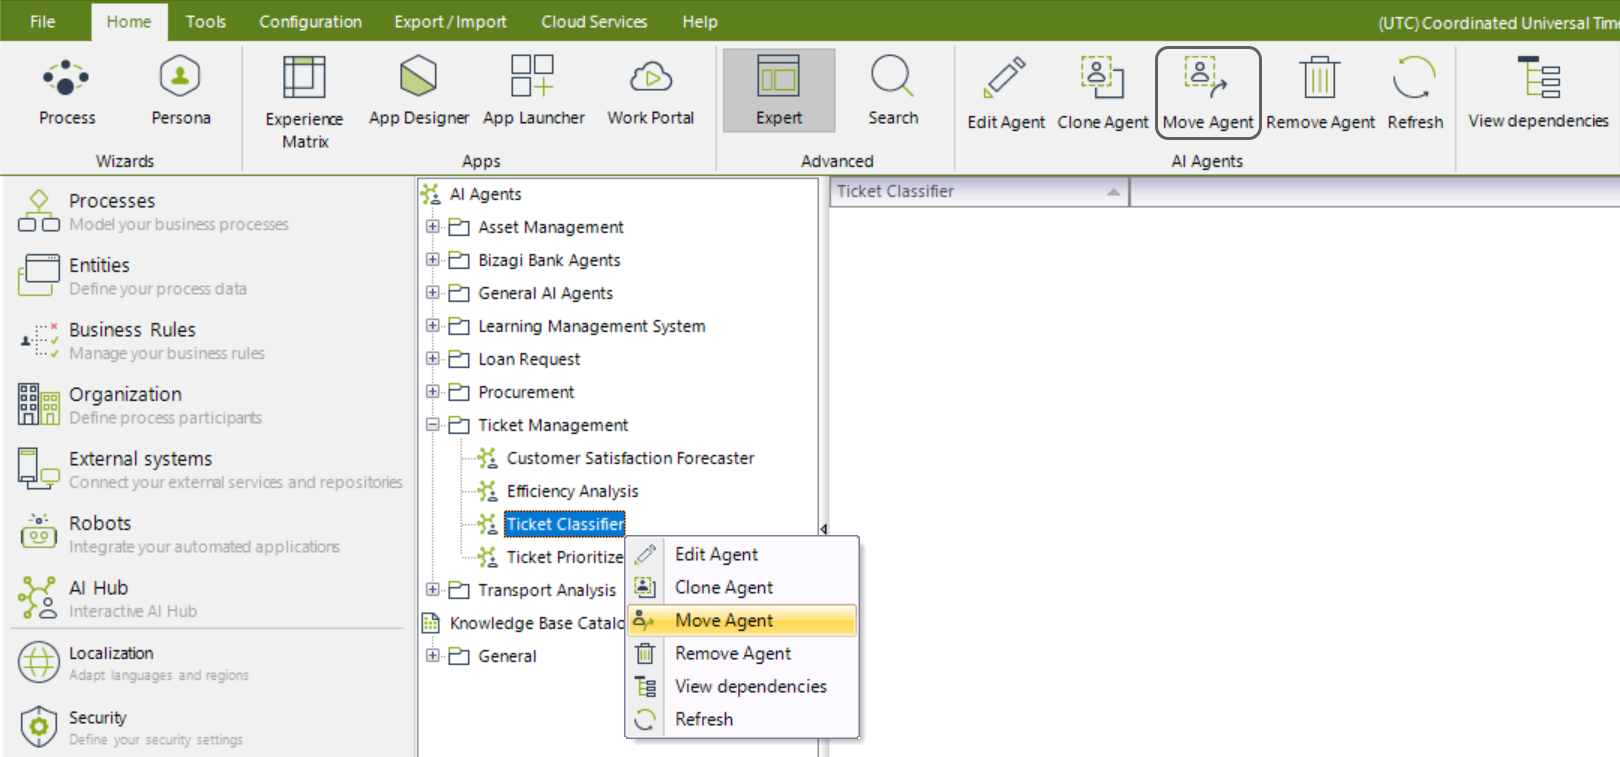
2.If the AI Agent has no dependencies, the Move Agent window opens.

Otherwise, a warning message appears, preventing the move.
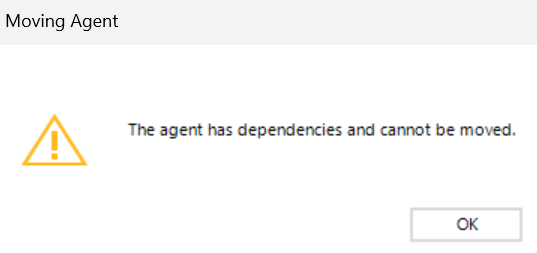
|
Dependencies include AI Agents referenced in Activity Actions within AI tasks, Actions and Validations within forms or Pipelines. |
3.In the Move Agent window, click the drop-down menu next to Target Category to view available Categories in your project. You must select a destination Category to proceed.
|
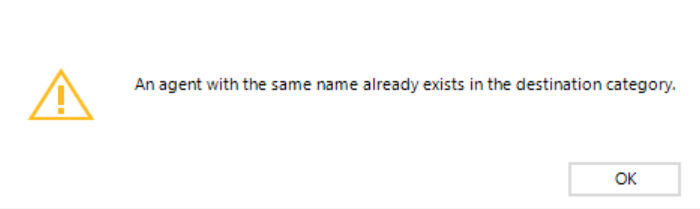
If an AI Agent with the same name exists in the destination Category, a warning message blocks the move.
|
4.After all conditions are met, click OK to proceed with the move. Once successful, the window closes, and the AI Agent is relocated.
Clone an AI Agent
You can create an identical copy of an existing AI Agent within the same Category by following these steps:
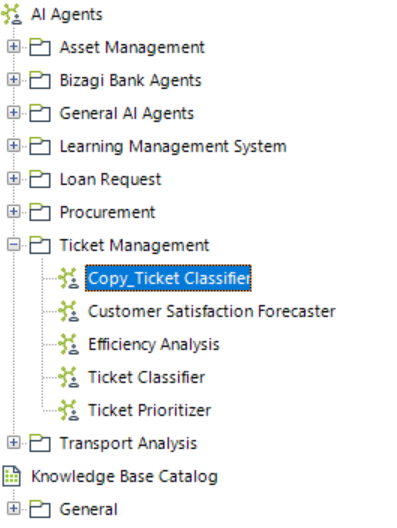
1.Right-click the node containing the AI Agent’s name and select Clone Agent. Alternatively, use the corresponding button in the top ribbon.

2.Upon selection, a duplicate AI Agent is created within the same Category, prefixed with Copy_.
Last Updated 5/4/2025 5:40:02 PM