Overview
Custom documentation logo is a feature in Bizagi Modeler to customize the logo in the documentation using two ways: Company Logo and custom logo (for enterprise users). The following sections will explain each one of them in detail.
Company Logo
This feature is a subscription-level configuration using the cloud model, where the owner of the subscription can upload the company logo centrally and unify the user experience. The next paragraphs first describe how to configure the company logo in Process Library and then how any user of the subscription can customize it in Modeler Desktop.
Process Library Configuration
|
For further information about Process Library, please refer to the following article |
The following steps describe the process of configuration and uploading of the company logo by the owner of the subscription, so that it is stored in associated databases and can be used by any user associated with it:
1. Select the Subscription settings option in user information.
![]()
2. Once inside the Subscription Settings, select the Additional Settings tab.
![]()
3. There you will find Company Logo and you have the different options:
a. Pencil: It allows you to activate the image file upload window with the company logo, as well as its change if required.
![]()
b. Trash can: It allows to delete the uploaded company logo.
|
The recommended image file types are: .jpg, .bpm, .png. The recommended size for the logo is 190x60 pixels. |
Modeler Desktop Configuration
To make use of the company logo set in Modeler Cloud by the subscription owner from Modeler Desktop, follow the steps below:
1. Go to the Tools tab > Company Logo.
![]()
2. You will then find the following options:
a. No logo
b. Company logo: this is the default logo set in Modeler Cloud.
c. Bizagi Modeler logo
d. Custom logo
![]()
|
Company Logo is the default setting for Enterprise users, you can select any of the other options in the desktop version only. The only user authorized to make global company logo changes that affect all users is the subscription owner. |
Custom Logo
In this option, you can change the Bizagi logo that appears in the documentation generated with Bizagi Modeler for another one locally, following the image file type and size recommendations.
There are two ways to access the custom logo options: either through the Tools tab (as explained in the Company Logo section) or through the File Tab. For the latter, follow the following steps:
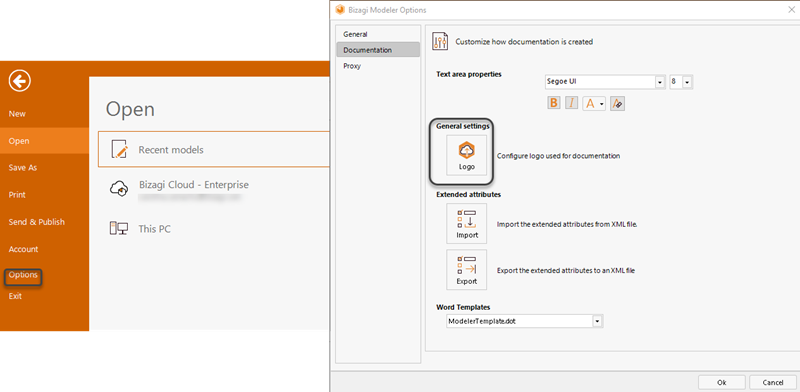
1. Go to the File Tab, select Options and choose the Documentation option.
2. Select Configure logo used for documentation.
3. Select the option you prefer:
•No logo
•Company Logo
•Keep the Bizagi Modeler logo
•Use a customized logo
|
Keep in mind Company Logo and Custom Logo options are only available for Enterprise subscription. |
For the customized logo for local use, select Custom Logo and open the folder image to browse and select your user-defined logo.
![]()
4, Click the Close button to finish your configuration.
Last Updated 7/8/2022 3:38:21 PM