Overview
Environment Profiles is a feature that allows the assignment and management of roles in an environment for the Management Console in your Automation Service subscription.
These profiles, also known as roles, can be assigned to your users in the Customer Portal in several ways, which are detailed in the following sections. The roles you can assign to your users are the following:
Roles
Owner
This profile has full access to the Management Console options, as well as user administration of Automation Service in the Customer Portal.
Administrator
This profile has full access to the Management Console options.
Technical
This profile has access to modules related to external systems tools (modules: Connect, Scheduler, Track, RPA Bots y Data Visualization).
Basic
This profile has access to the Track module in the Management Console.
Assigning roles from the Customer Portal
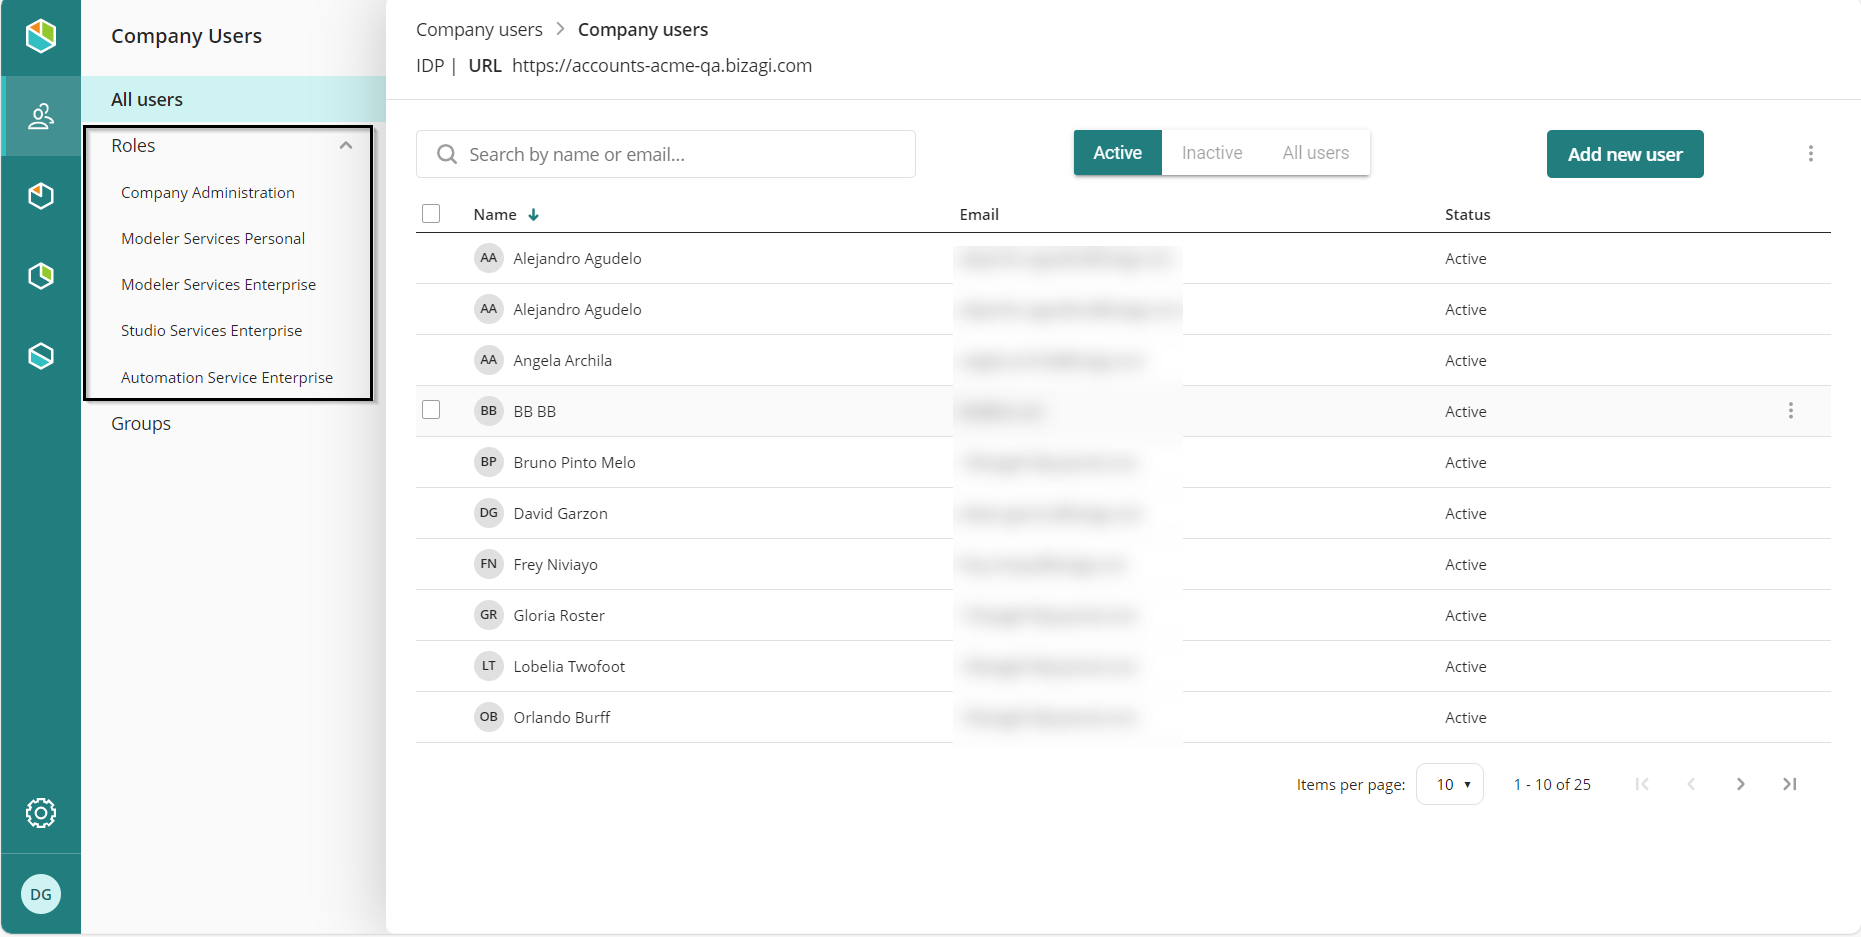
Company User Module
To assign a role in the Customer Portal follow these steps:
1.Log in to the Customer Portal and navigate to the Company User module.
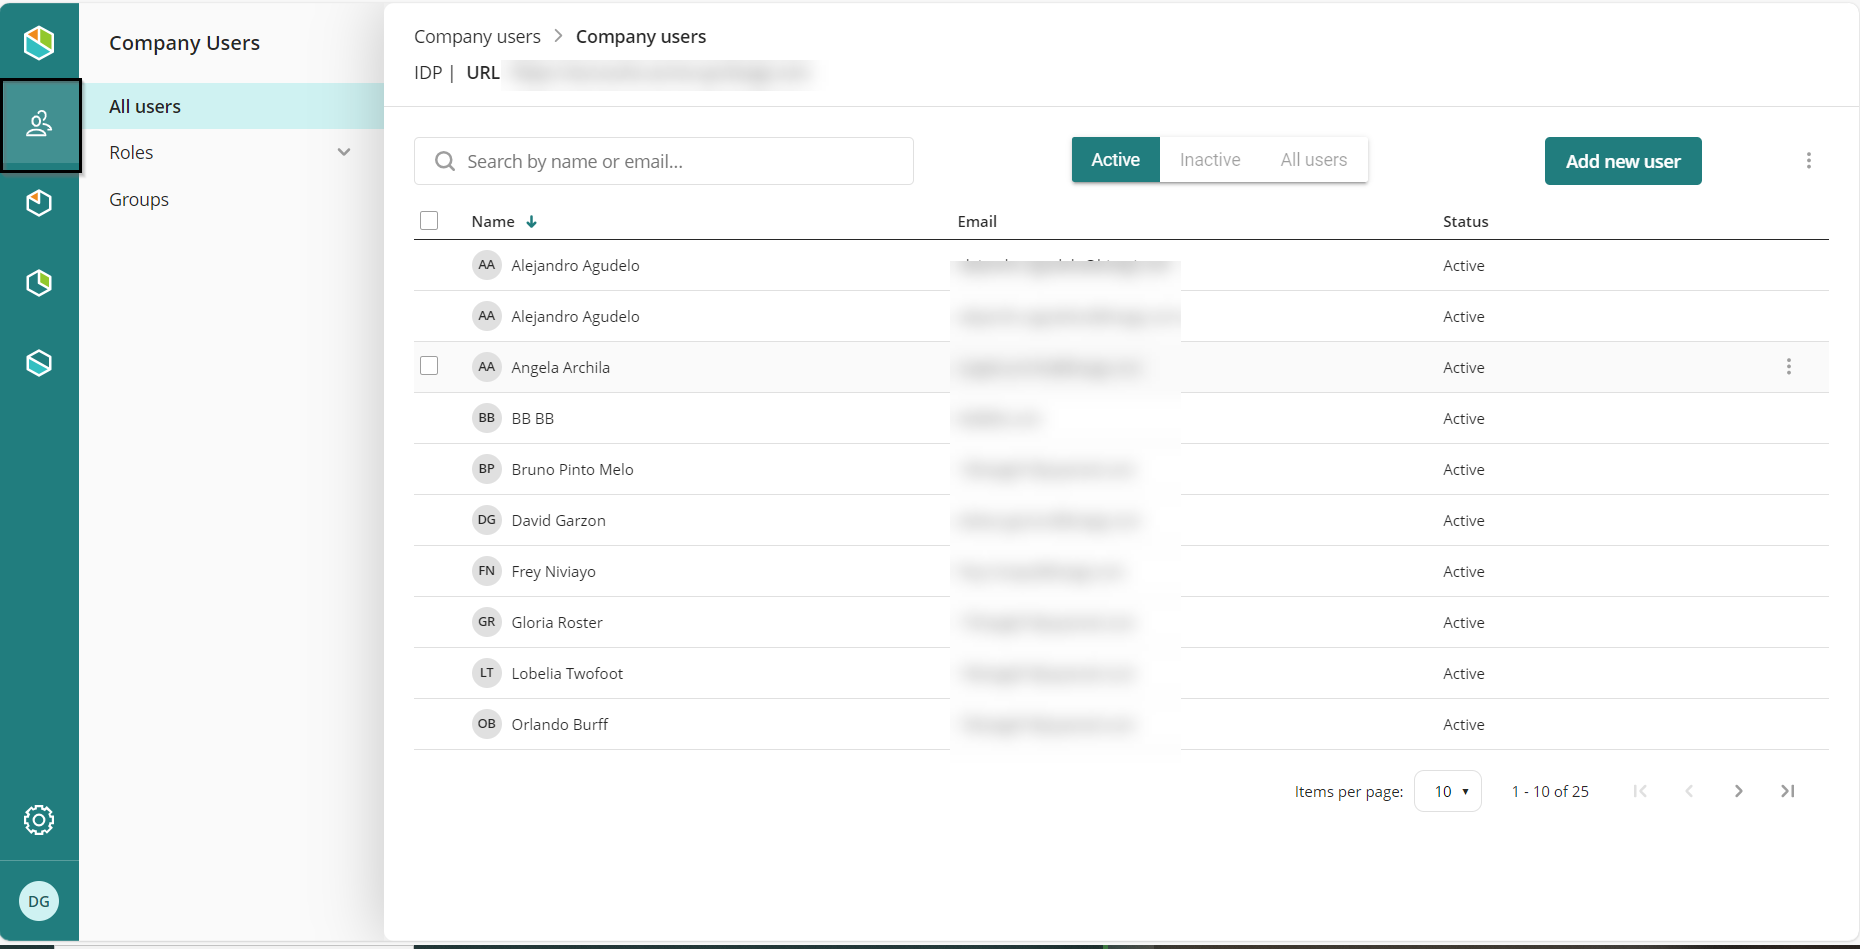
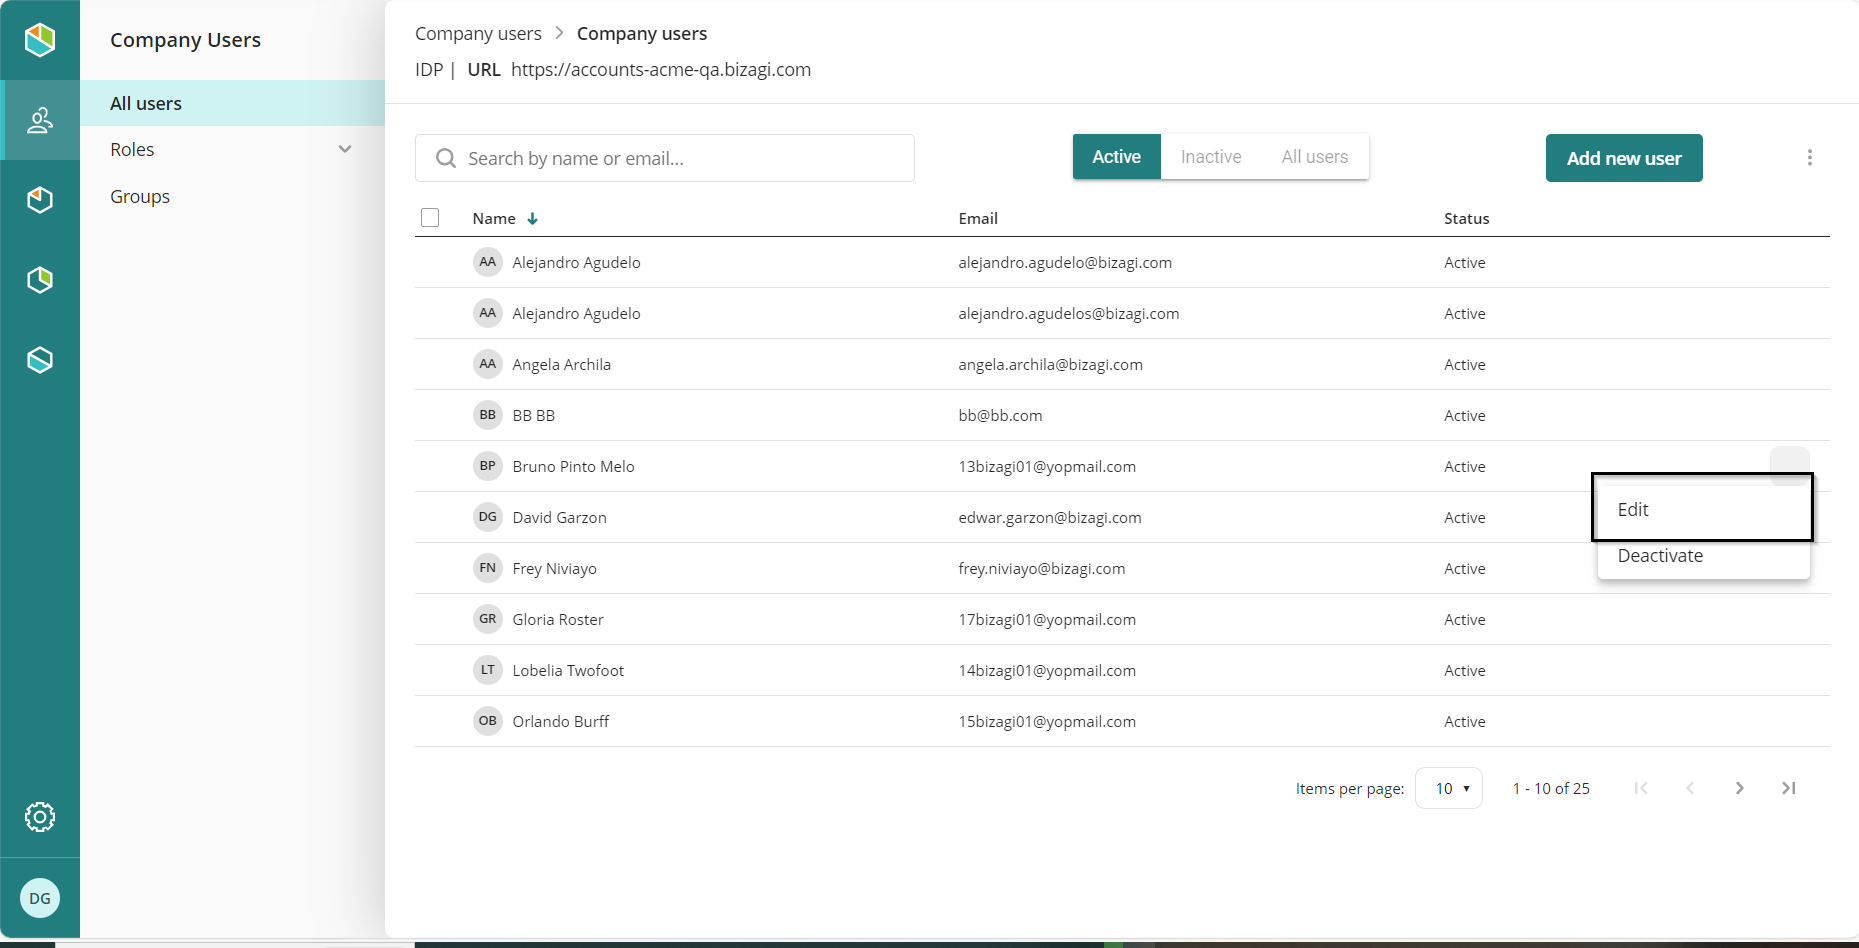
2.Go to the All Users section. Then, select the user to whom you want to assign a role. Click the three point on the right of the row and select the Edit option.
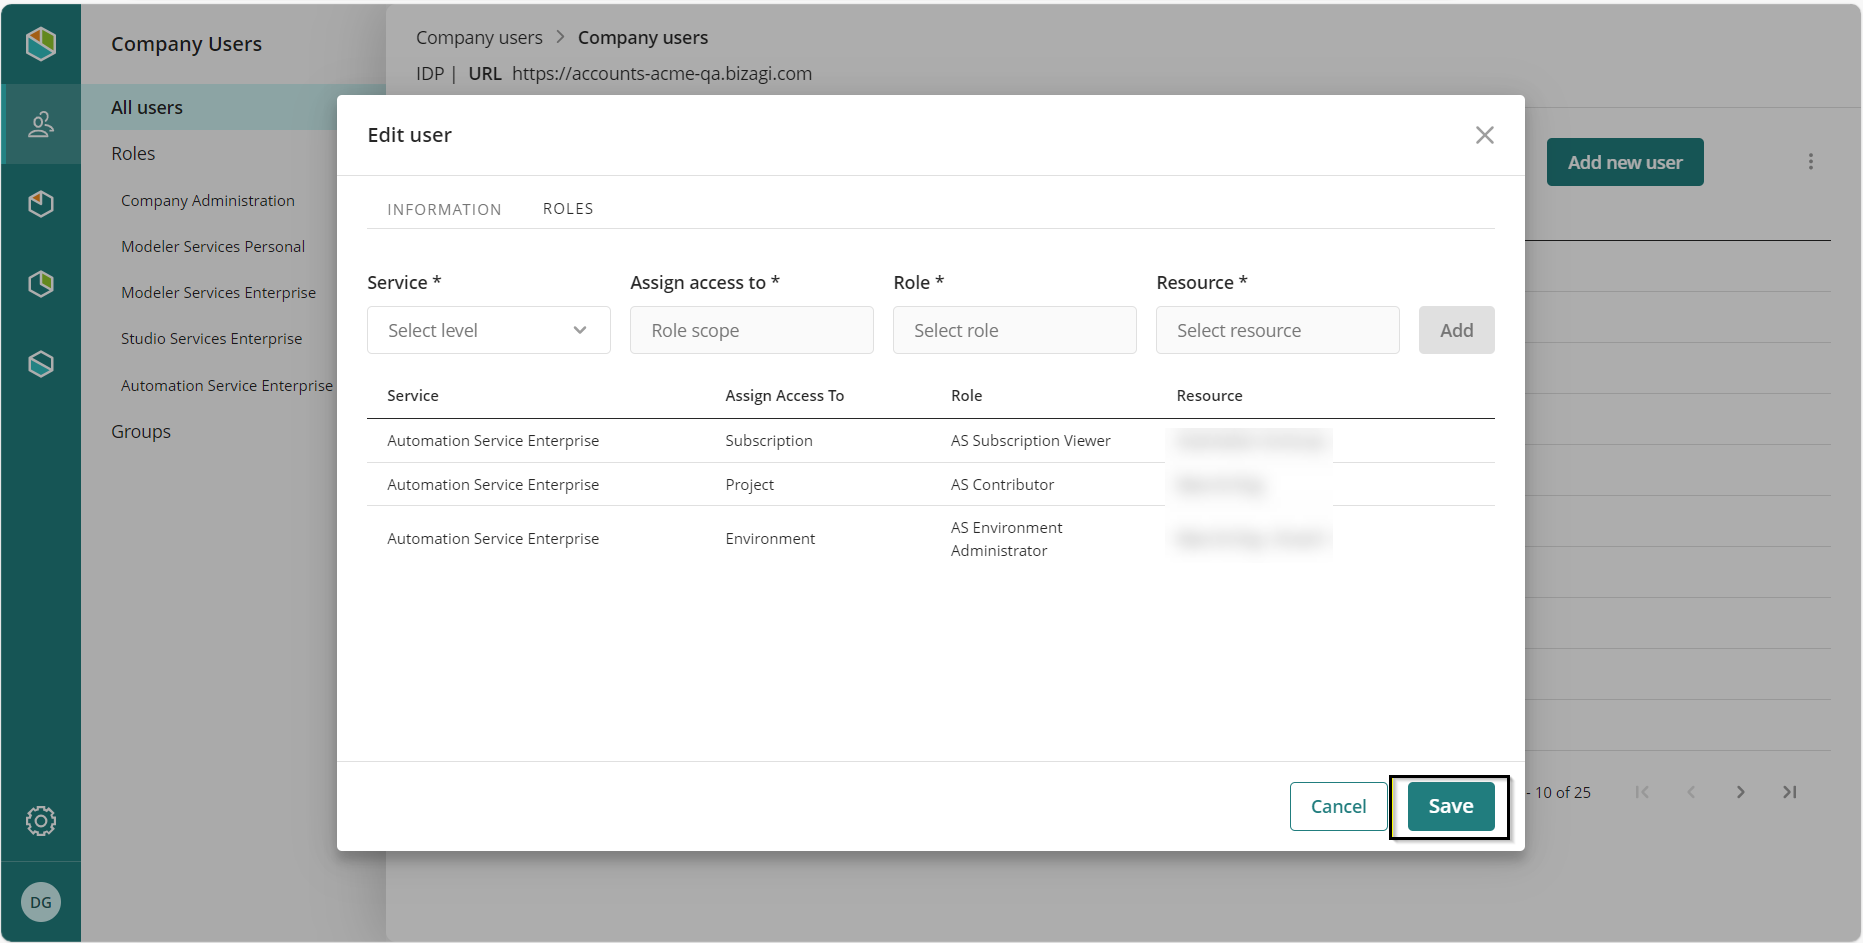
3.In the window that pops up, go to the Roles tab. In the Assign Access To field, select Environment, which defines the scope of the role for this functionality. Select the desired role and resource (this refers to the project). Once finished, click Add and then Save to confirm your changes.
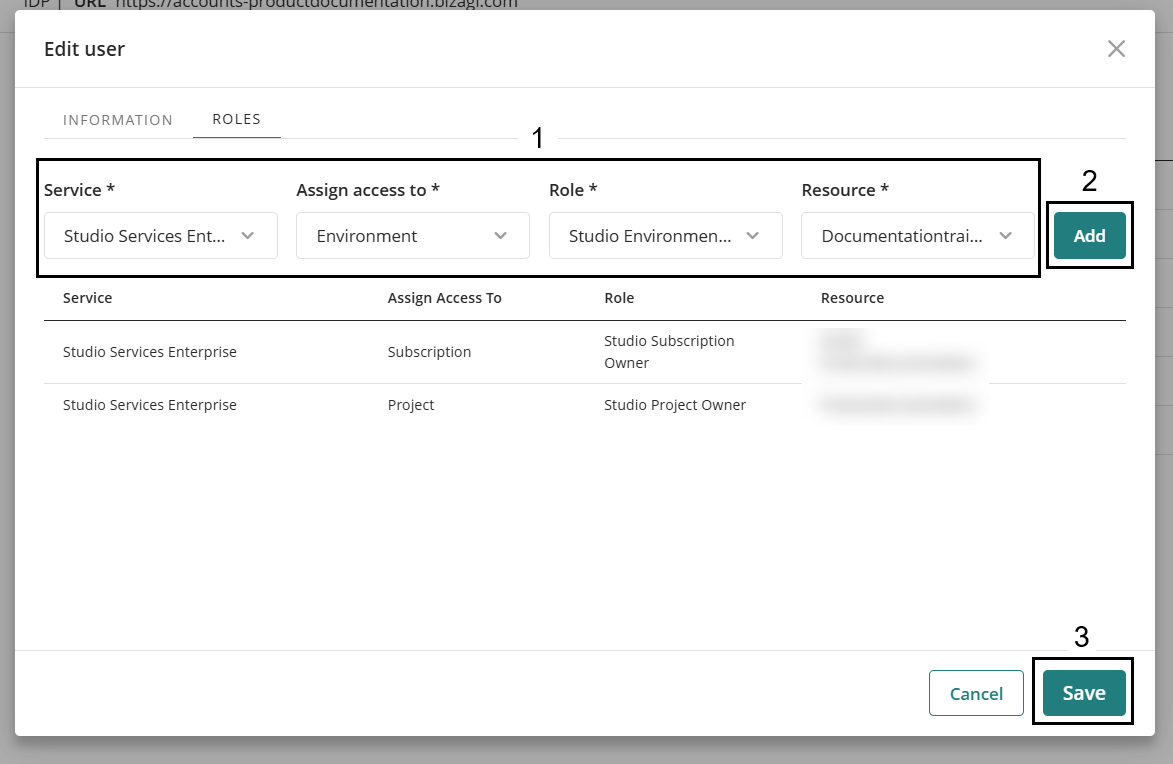
4.Then, confirm and click the Save button.
Roles Selection within Company Users
To select the roles between users within Company users follow these steps:
1.Log in to the Customer Portal and navigate to the Company User module.
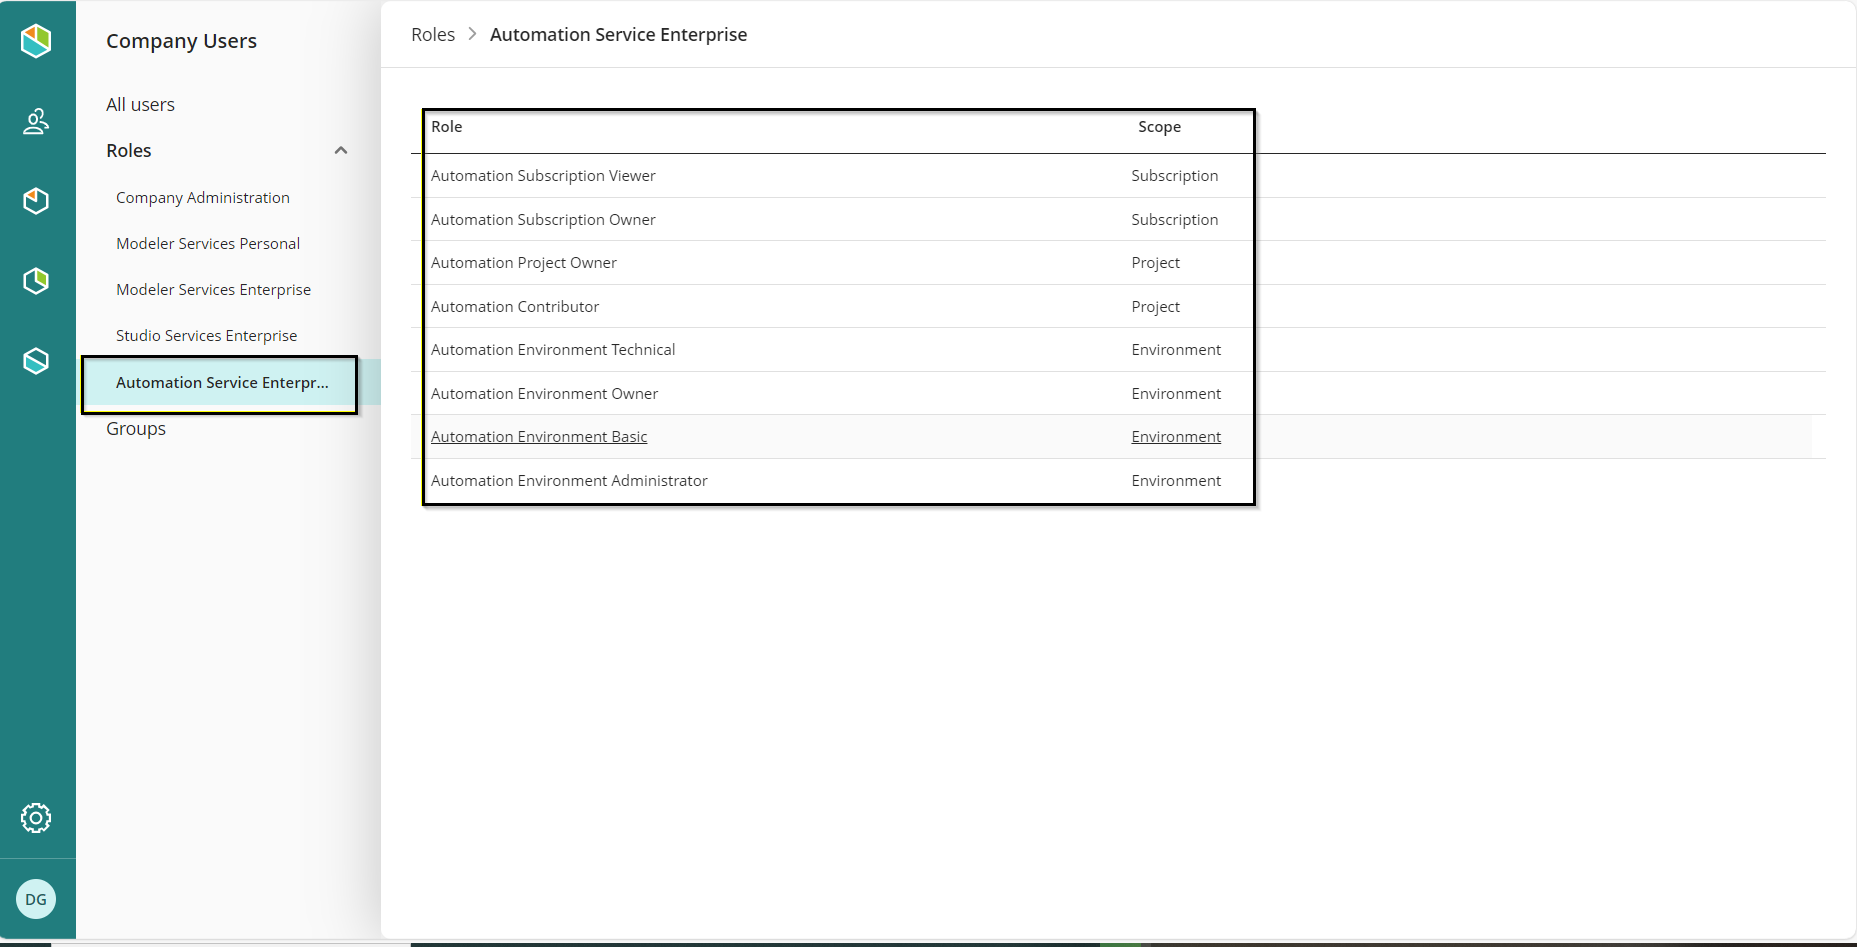
2.Click the Roles section. This will open a drop-down menu.
3.From this menu, select the product to which the role will be assigned.
4.Click the Add user button
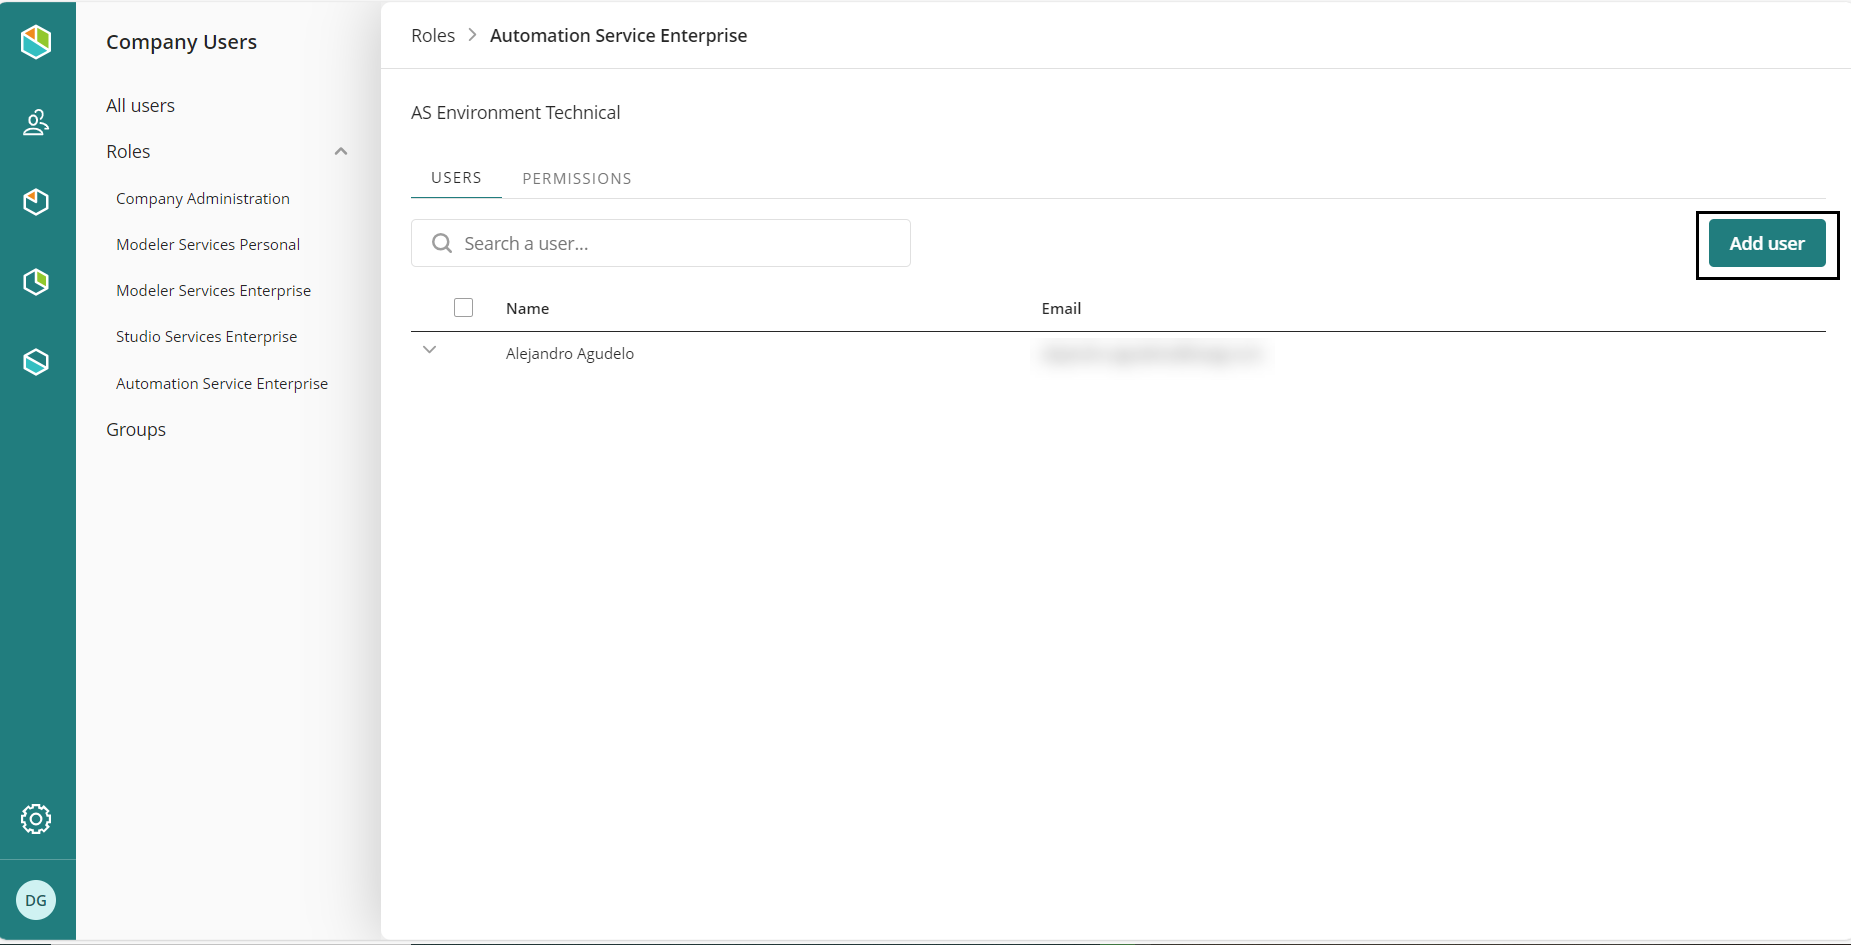
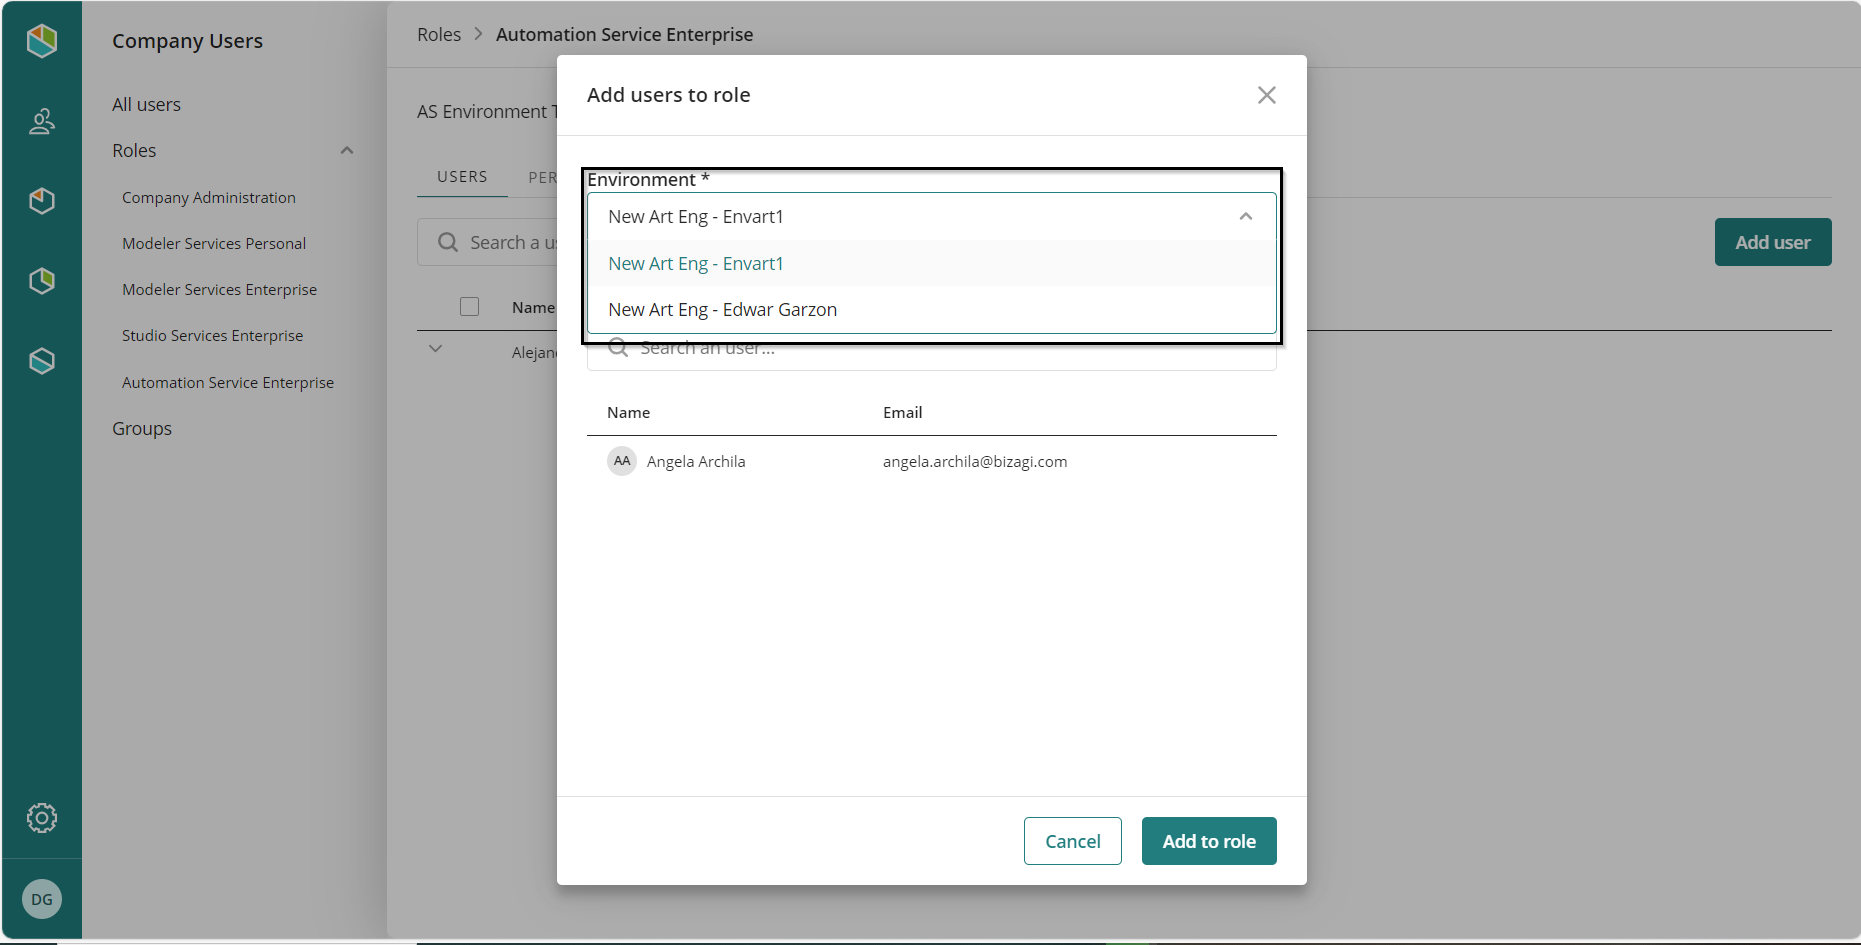
A window in which the current users assigned to that role appear. The window also contains the Add and Remove users options.
5.Then select the environment associated to the role.
6.When all is set, click the Add to role button to confirm and save your configuration.
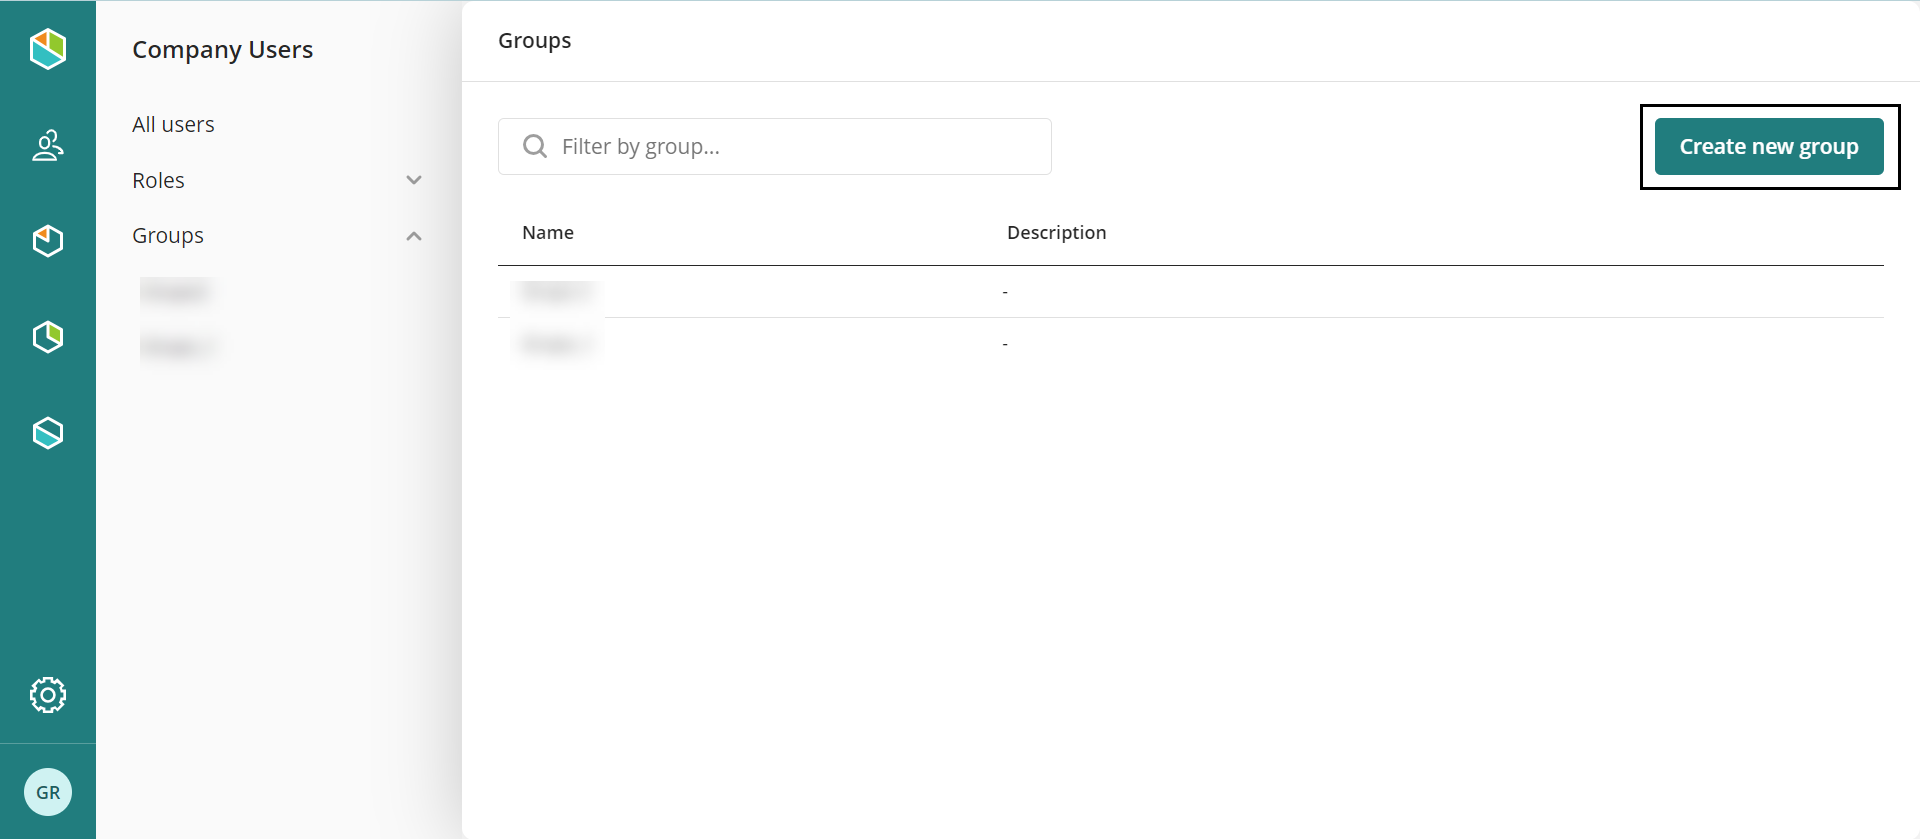
Groups
To associate a user to a group, follow these steps:
1.Log in to the Customer Portal and navigate to the Company User module.
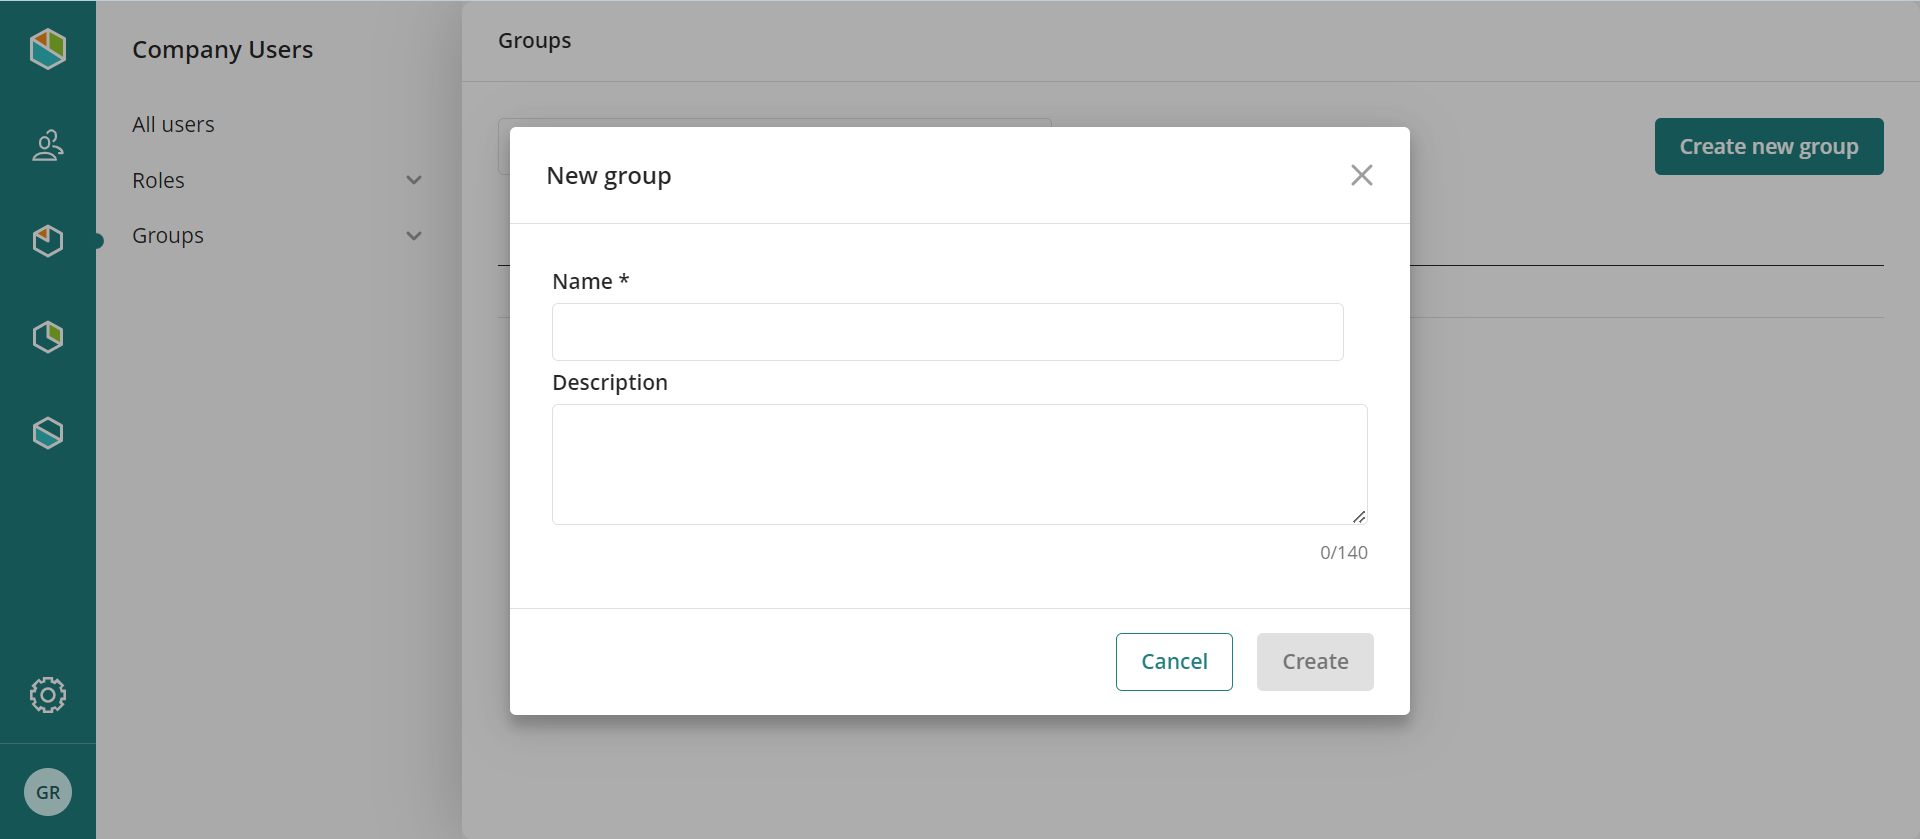
2.Then go to the Group section and click the Create new group button.
Assign a name and description to the new group.
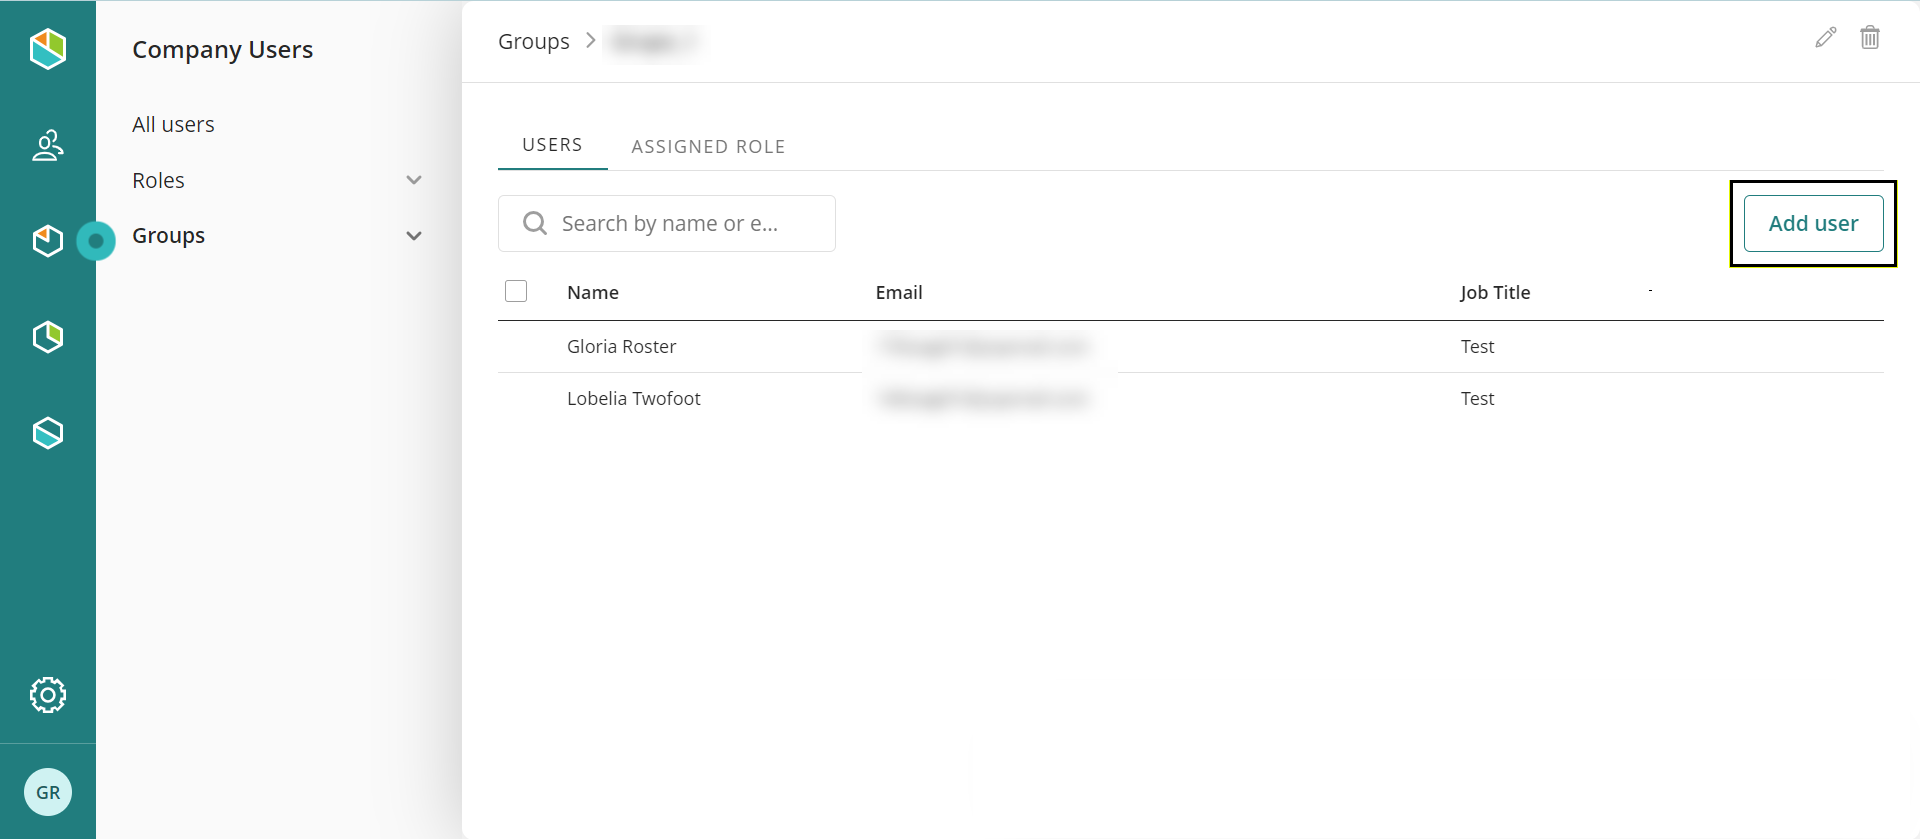
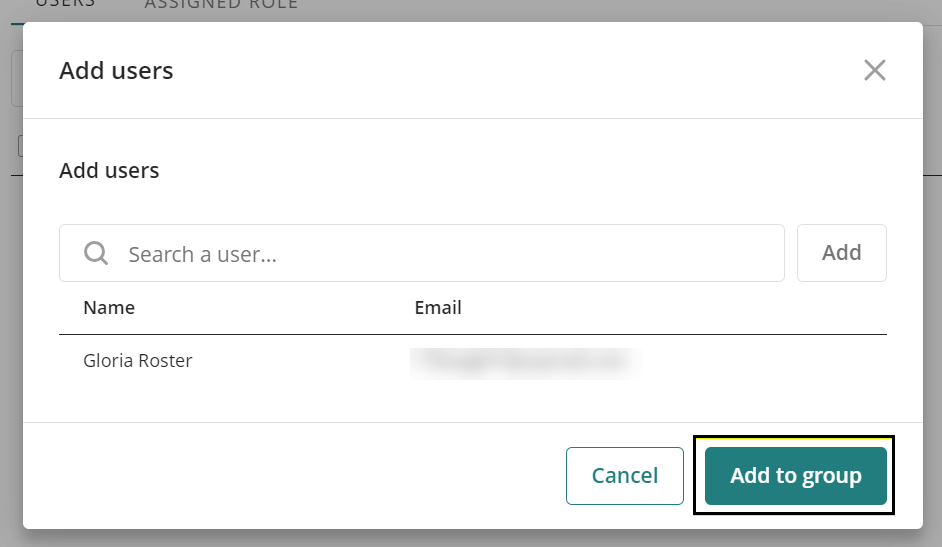
3.When the group of interest is created, click the Add User button.
4.Type the email or name of the desired User in the given text box and click the Add button.
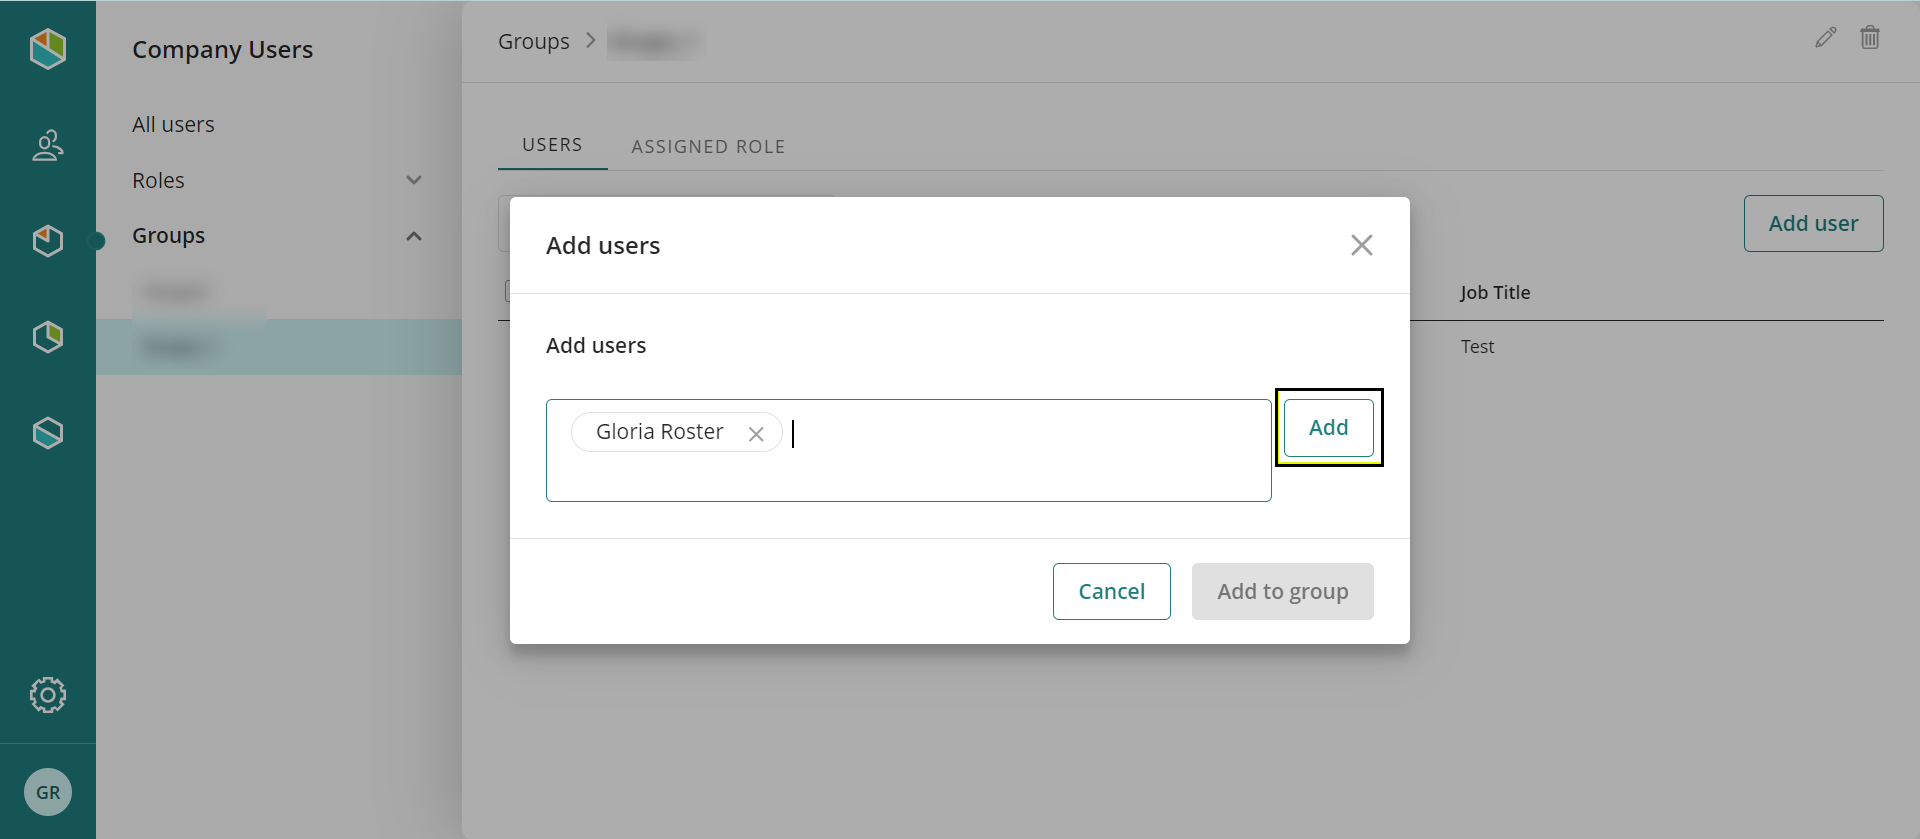
5.Then, click the Add to Group Button.
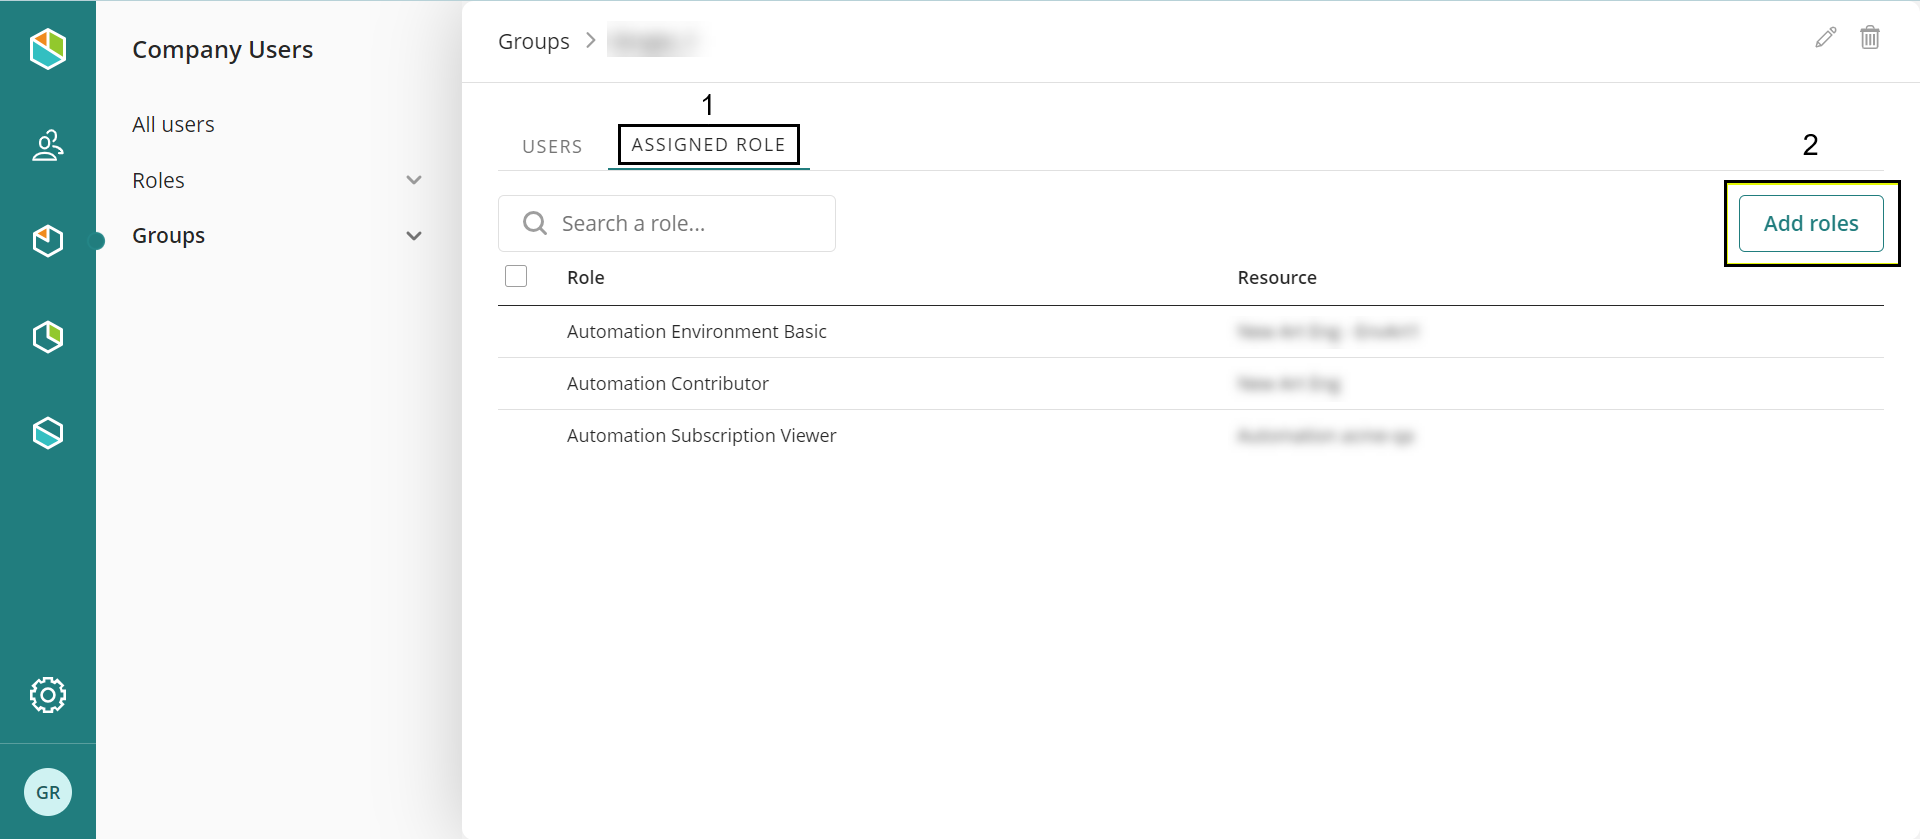
A confirmation message appears in the bottom left part of the screen.
6.Then, go to the Assigned Role tab and click the Add Roles button.
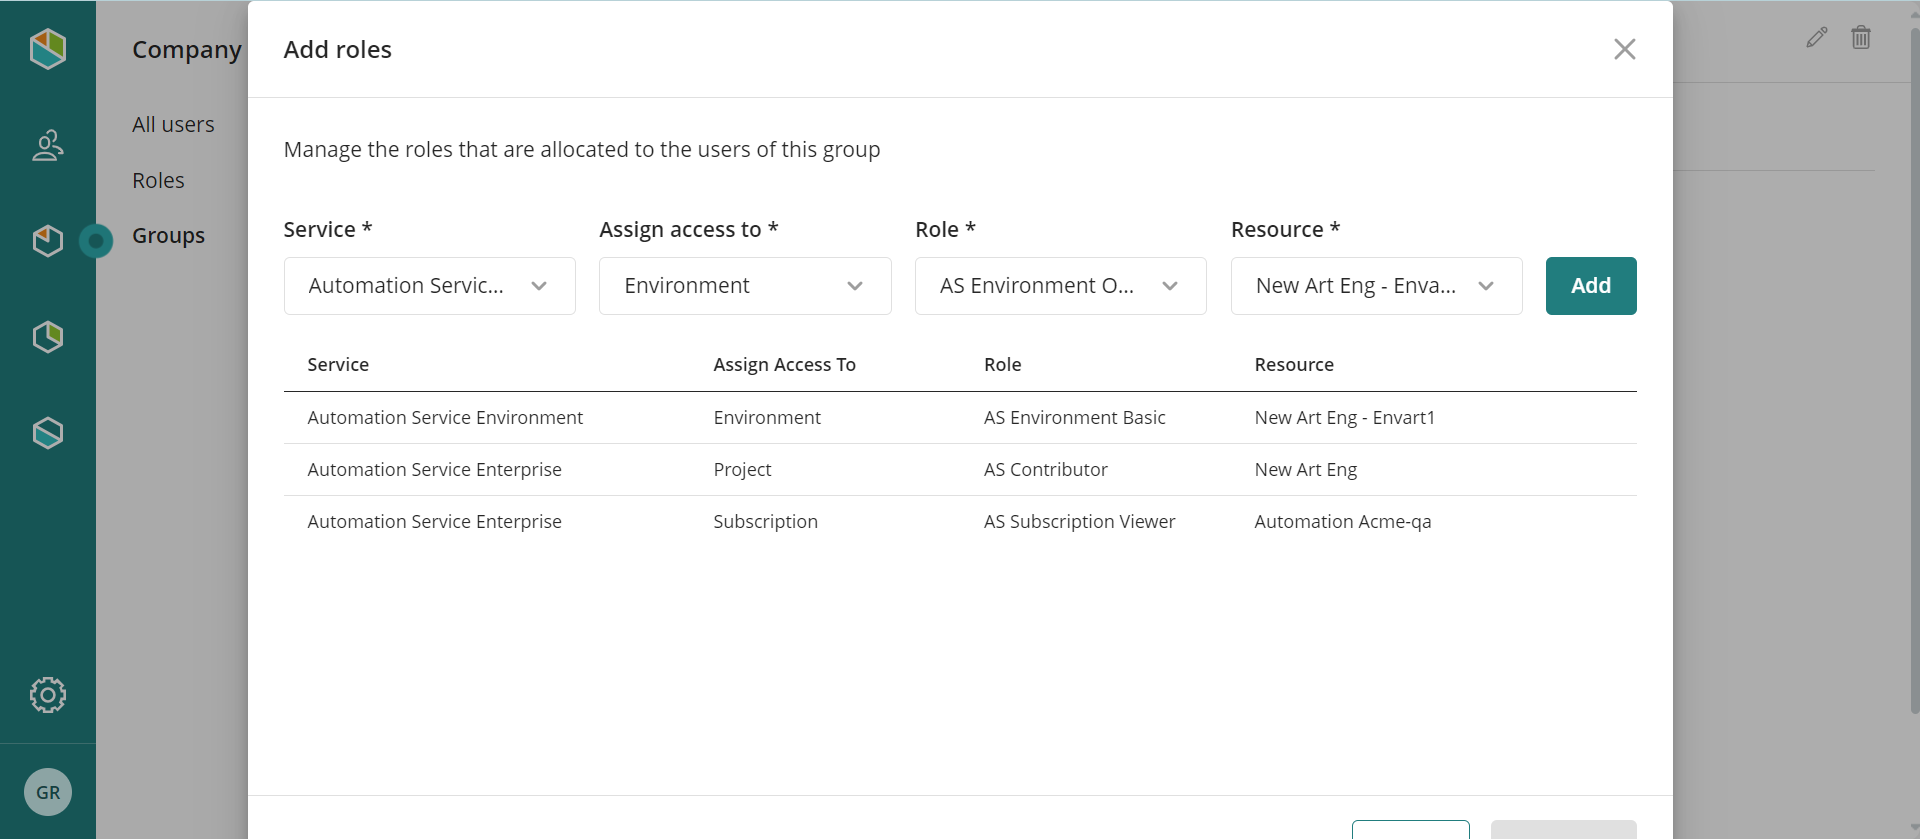
7.In the window that pops up, go to the Roles tab. In the Assign Access To field, select Environment, which defines the scope of the role for this functionality. Select the desired role and resource (this refers to the project). Once finished, click Add and then Save to confirm your changes.
Automation Sections
To manage projects and users in the subscription, follow these steps:
1.Log in to the Customer Portal and navigate to the Automation Service section.
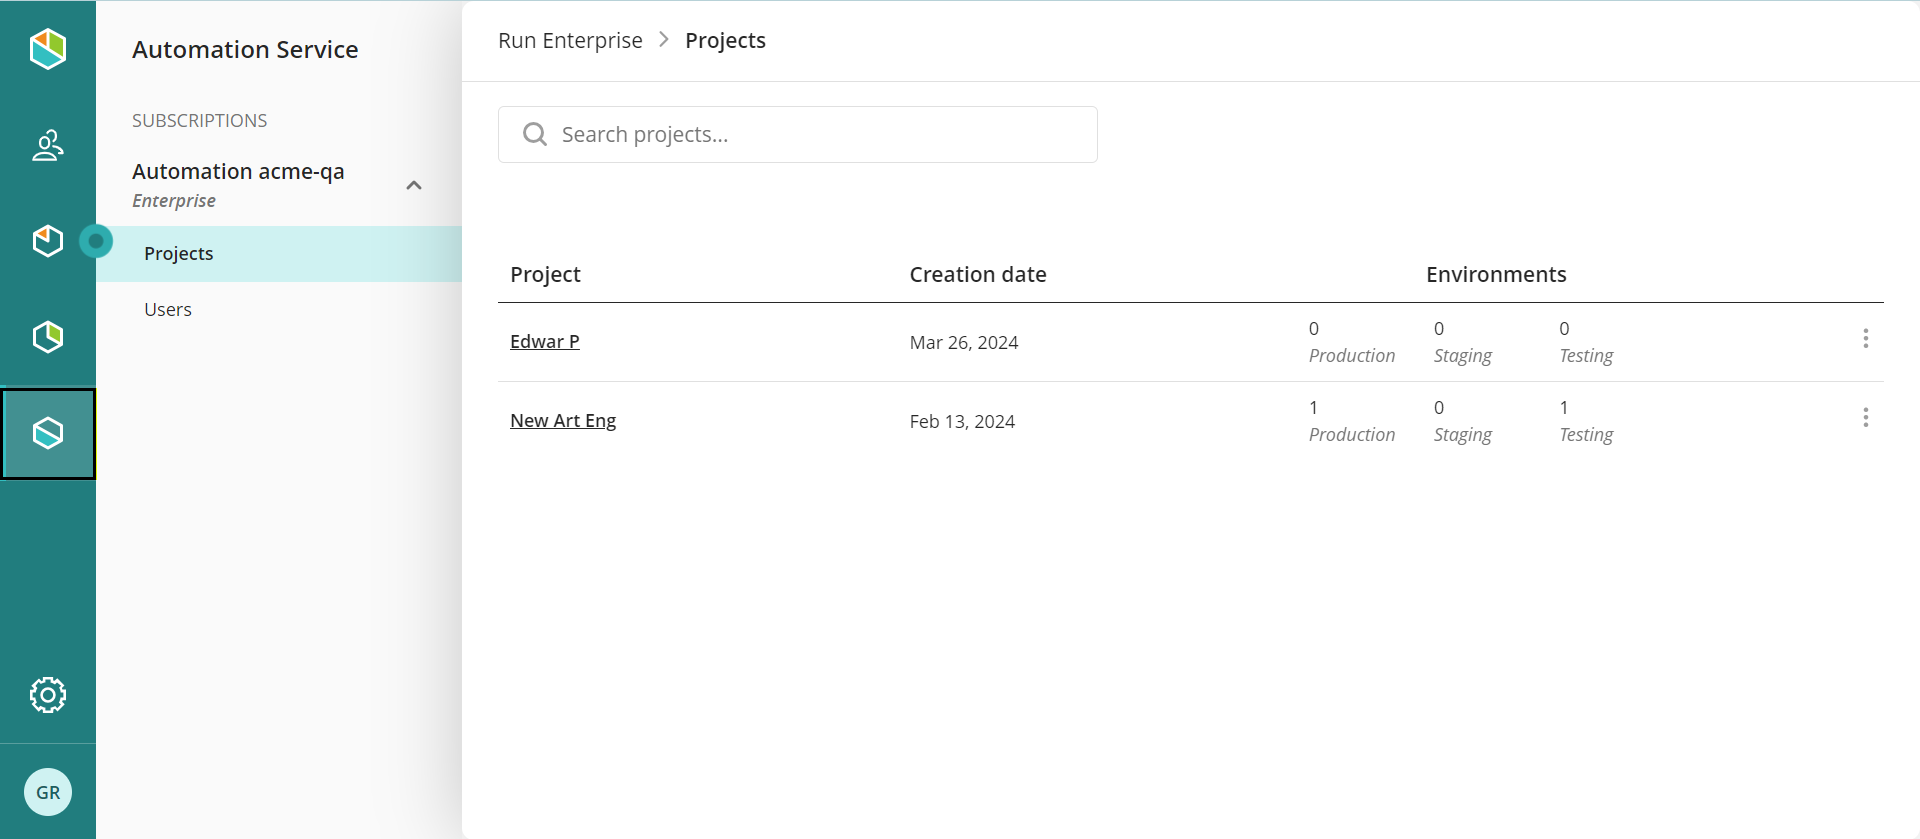
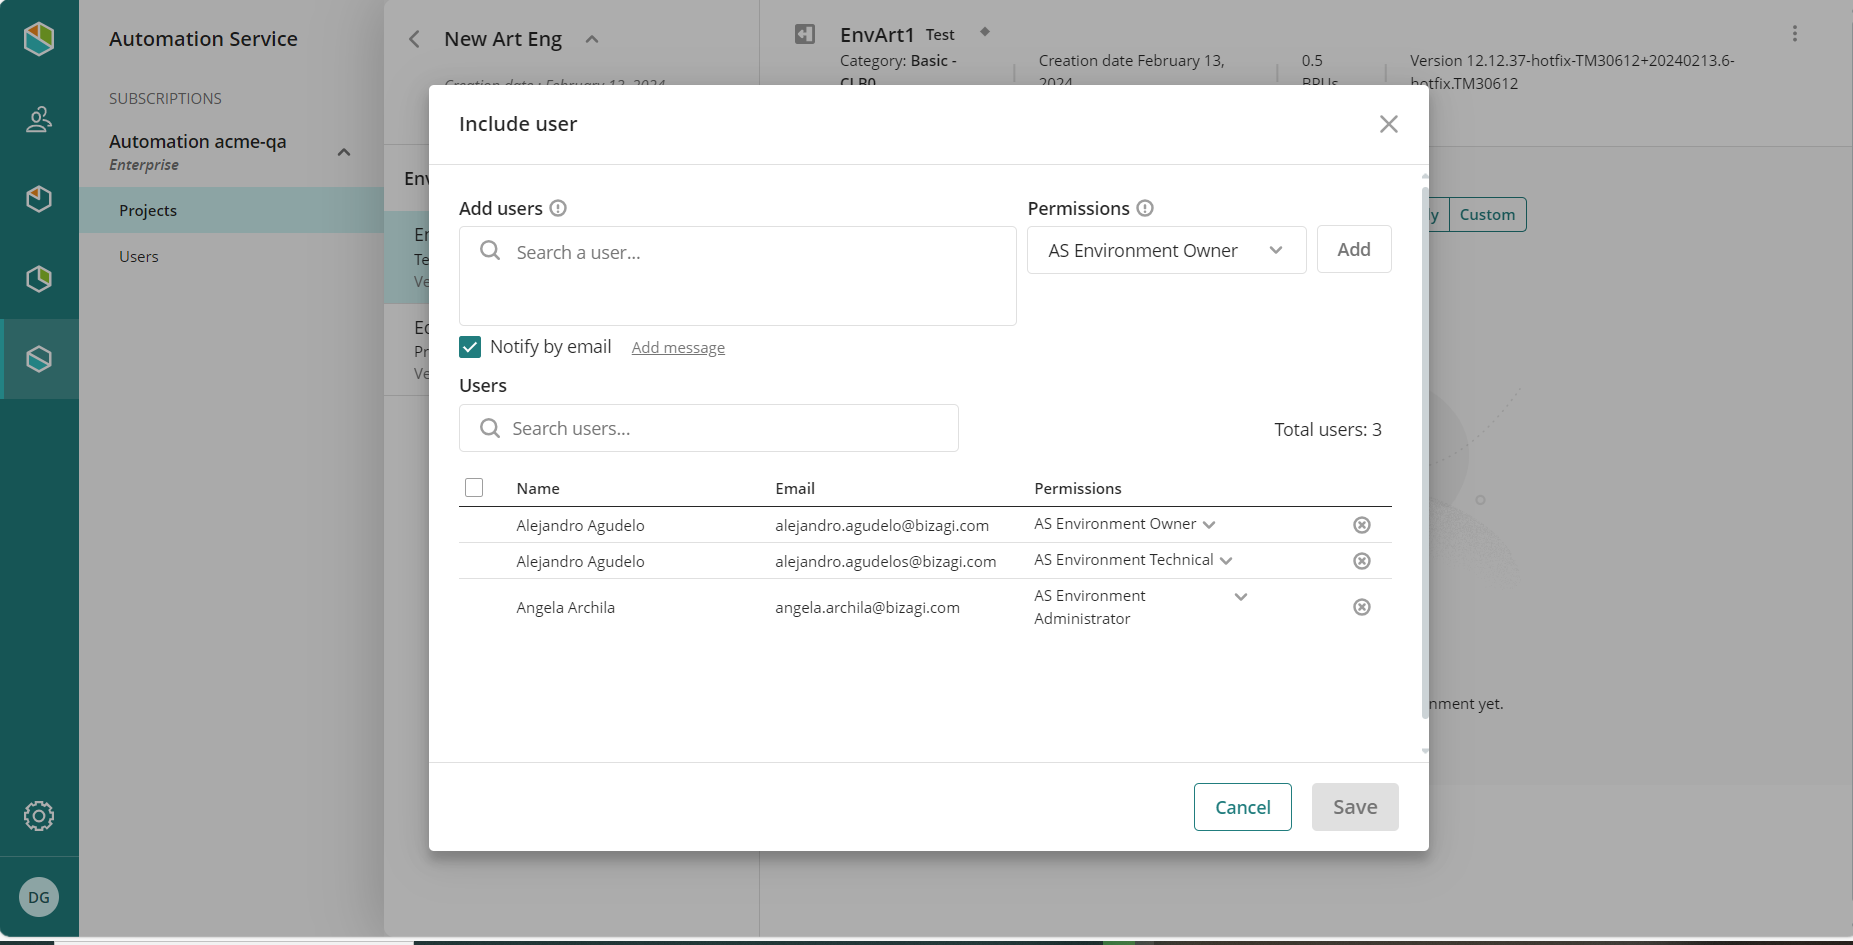
2.Go to the Projects section and select the environment. In the top right corner, select the three points, and select the Share Environments option.
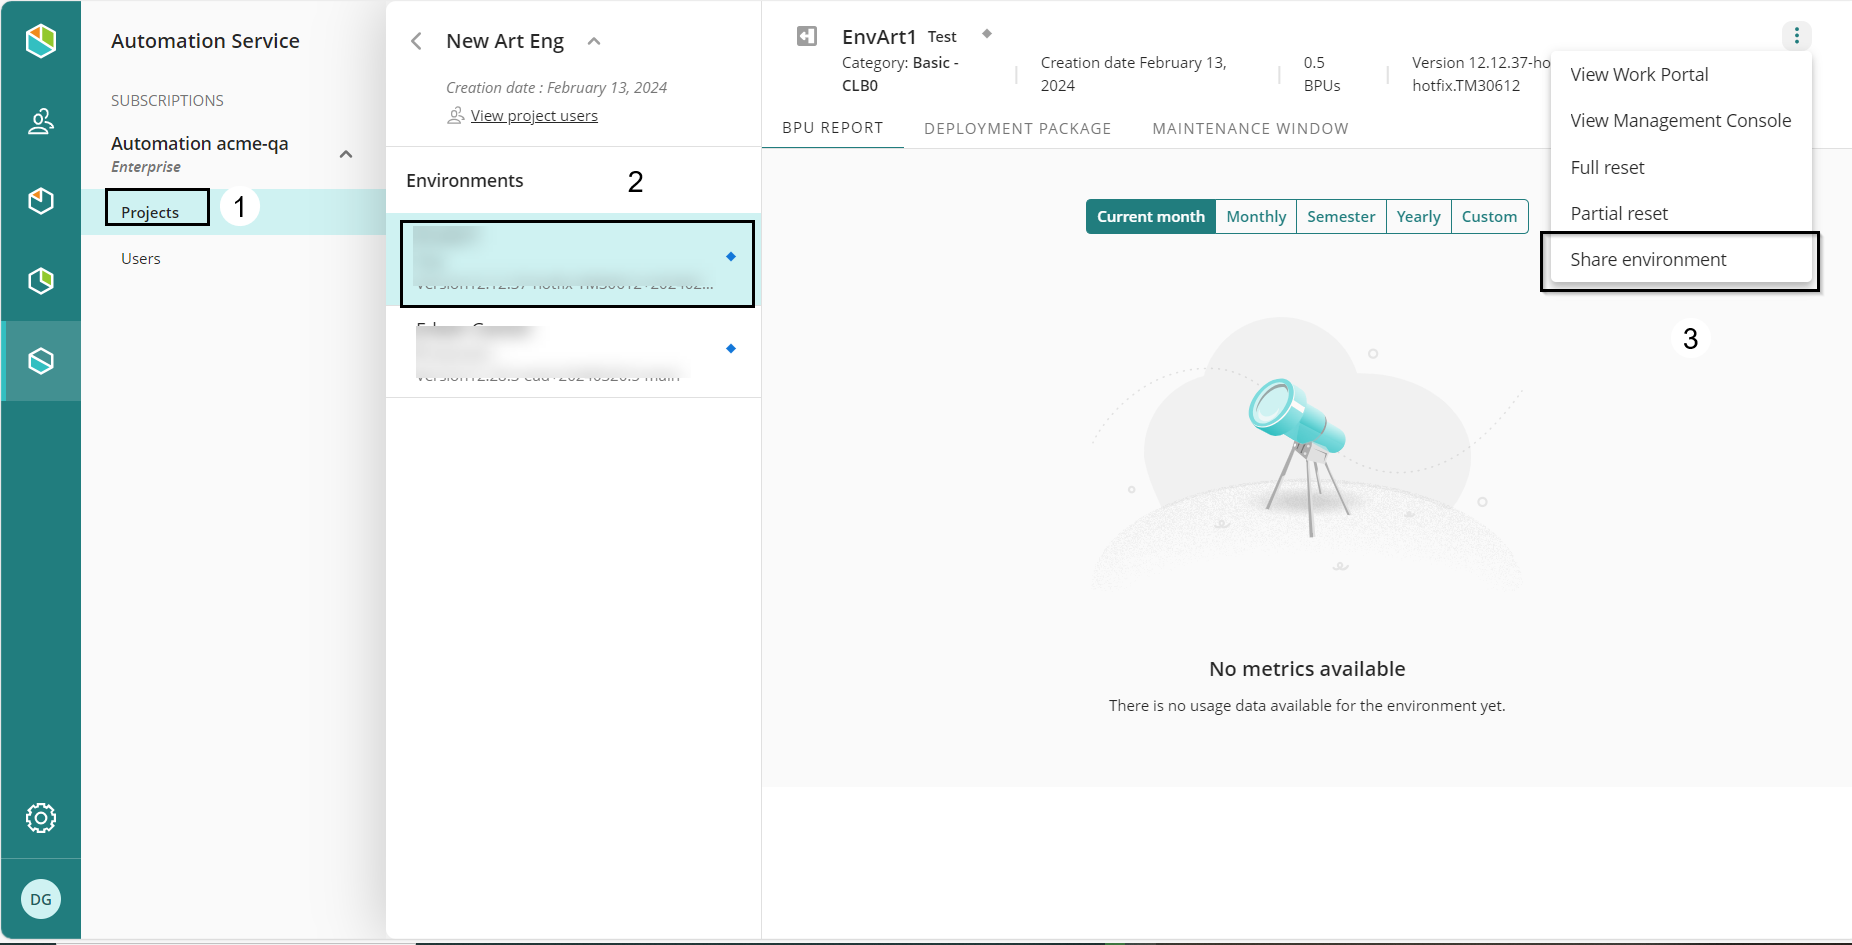
3.A window opens, showing the list of users and roles assigned to the environment. In this view you can add or remove users and assign permissions.
Last Updated 1/15/2025 10:09:27 AM