Overview
You need to define the Triggers and Actions in your authoring environment (Bizagi Studio) to configure the conditions an email must meet to start a process. This section explains how to configure a trigger and its action.
Configuration steps
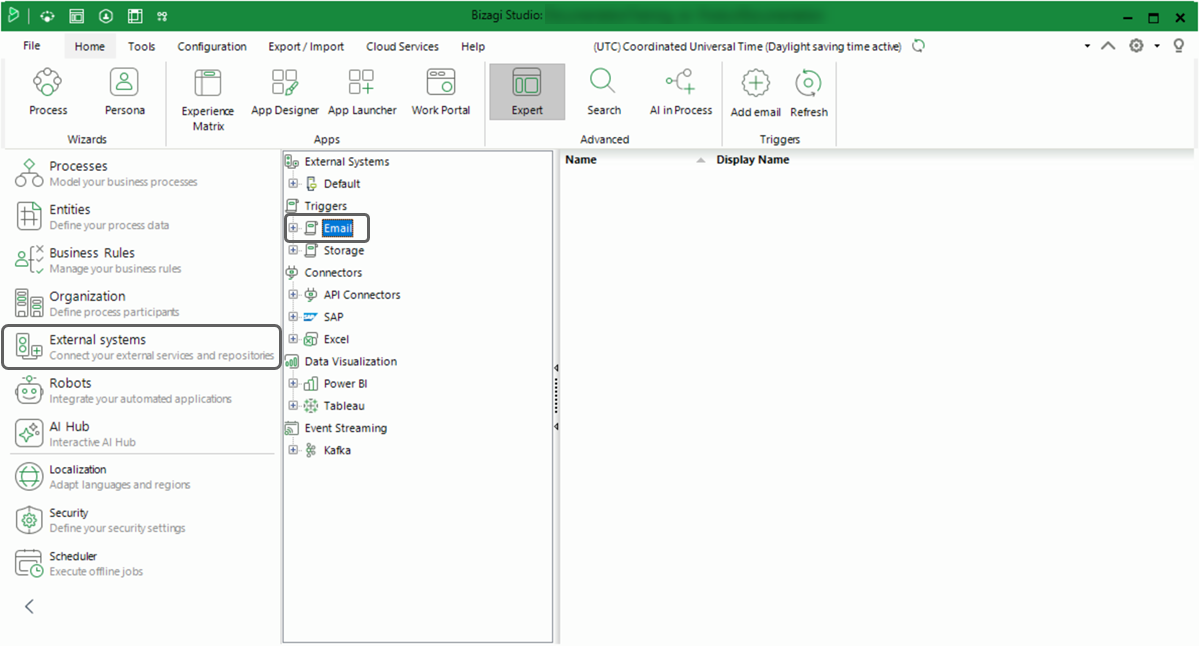
Open Bizagi Studio with a user who has the Developer role in the Studio Cloud subscription. Open the External systems module from the Expert view, locate the Triggers option, right‑click the Email trigger type node, and select Add Trigger.
Click the Create Trigger button. Bizagi displays the configuration wizard.
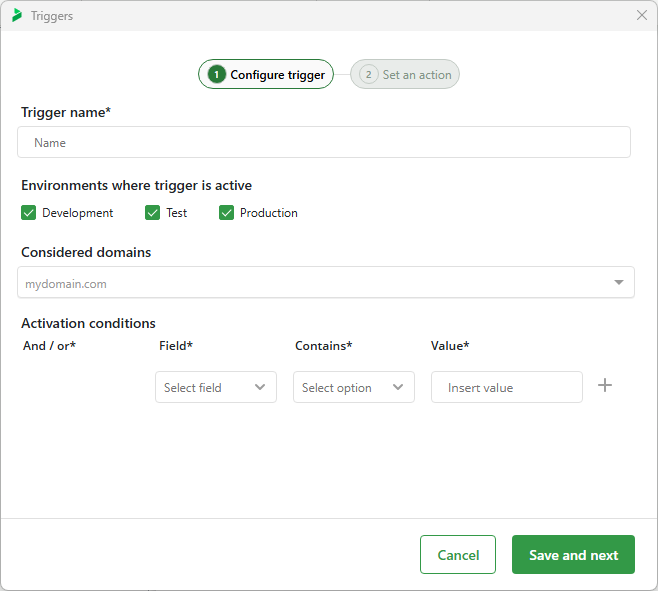
Configure the following parameters:
•Trigger name: Display name of the trigger in Bizagi Studio.
•Environments where trigger is active: Define in which environments the trigger will be active. For Test or Production environments, you must deploy the trigger. For more information, refer to Trigger deployment.
•Considered domains: Specify the sender domains that will be considered by the trigger. If this field is empty, the trigger considers all domains. If you register one or more domains (for example, mycompany.com), only emails from those domains will be considered.
To modify domains in Test or Production environments, make the change in Development and then deploy it.
•Activation conditions: These are the conditions that, if met, activate the action associated with the trigger. You can create multiple conditions by clicking the + symbol, and you can use the AND/OR operator to define whether they are combined or exclusive.
|
|---|
You must select at least one condition. |
You can extract information from the following email elements:
•From: corresponds to the email address used to send the message, it is stored as a string with a unique address.
•Subject: Stored as a string with the content.
•Body: Stored as a string. It is recommended to define its size within a large range or use Extended Text.
•CC: Stored as a single String with multiple addresses separated by semicolons (;). If no CC recipients exist, the value is an empty string.
•Sent date: Stored in ISO 8601 UTC format: yyyy-MM-ddTHH:mm:ss.fffZ. If the email does not include a sent date, Bizagi uses the current UTC system time. DateTime attributes can automatically convert the value to the user's local time zone when displayed.
|
|---|
BCC (Blind Carbon Copy) is not available in Email Triggers. |
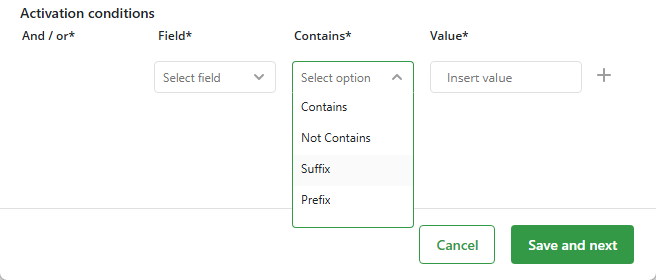
Depending on the selected element, you can use these operators:
•Contains: Evaluates whether the element (for example, the Body) contains the specified value. This is a broad search, so any match triggers the action.
•Not Contains (Subject only): Evaluates whether the Subject does not contain the specified value.
•Suffix: Checks whether the element starts with the specified value.
•Prefix: Checks whether the element ends with the specified value.
Once you configure the trigger options, click Save and next.
In the next step, select the process that the trigger will start. Only one trigger can be activated per email, meaning only one process can be started at a time. See Considerations about trigger execution for more information.
If you need to send information from the email to the process when the case is triggered, click Map data.
|
|---|
The process MUST have a Start Form that includes the attributes you plan to map. If the process does not have a Start Form, an error will occur when the trigger attempts to start the case. For more information, refer to Troubleshooting. |
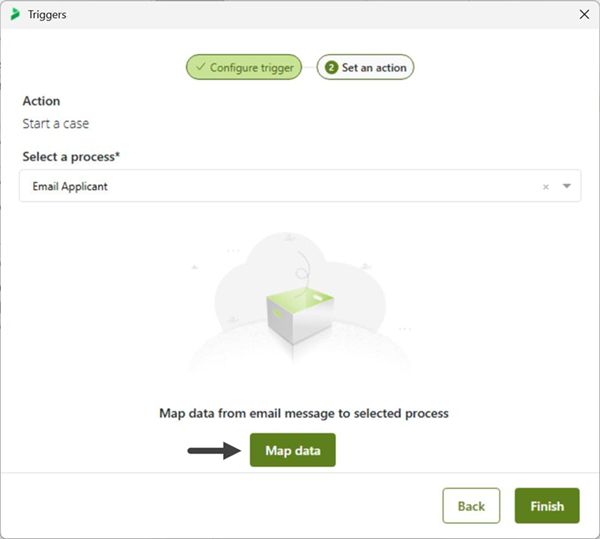
Map any of the email elements (From, To, CC, Subject, Body, or Sent date) to attributes in your process.
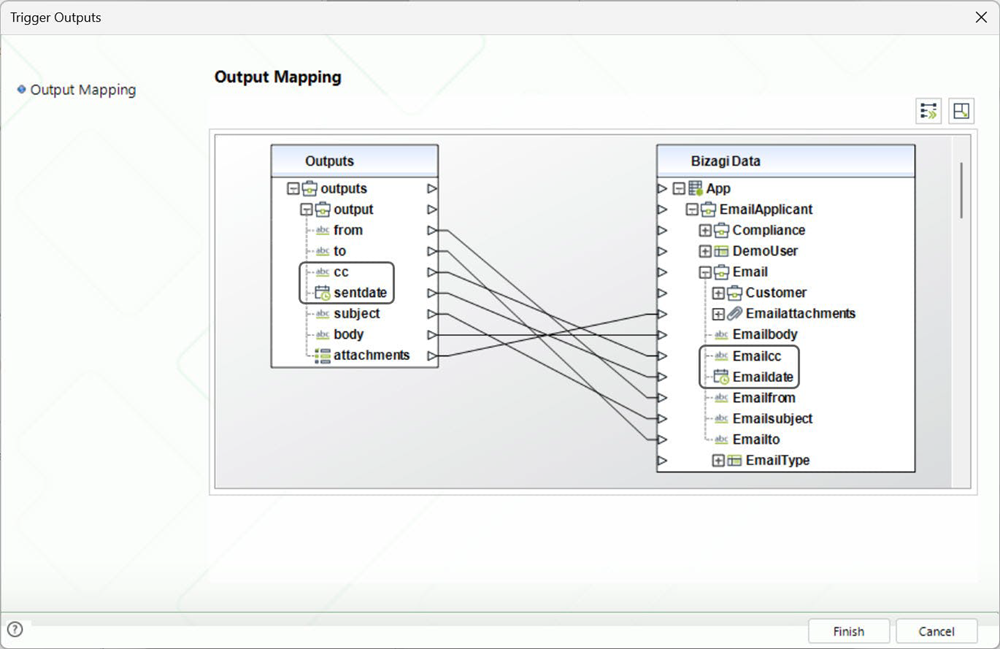
If you want to send attachments to the process, you must map the attachments node to a file-type attribute (do not map fileName or data).

After completing the mappings, click Finish to save the trigger configuration.
If you want to deploy this trigger to your Test or Production environments, continue to the next section.
Trigger deployment
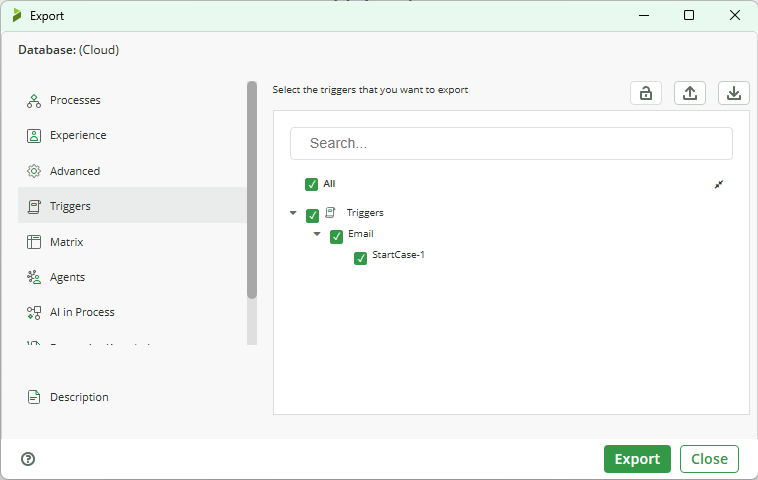
To deploy a trigger from Bizagi Studio to your Test or Production environments, open Studio’s Process Wizard as a Developer and go to step 7 – Execute. Select Export.
Select the Triggers section and check the box for the trigger you want to deploy.
|
|---|
The process associated with the trigger must already be deployed or included in the same .bex deployment package. |
Deploying using Microdeployment
You can also deploy a trigger using Microdeployment. To do so, open the Export/Import tab in Bizagi Studio and select Microdeployment.
In the first step of the wizard, select the Triggers checkbox and the Include global objects option. Click Next.

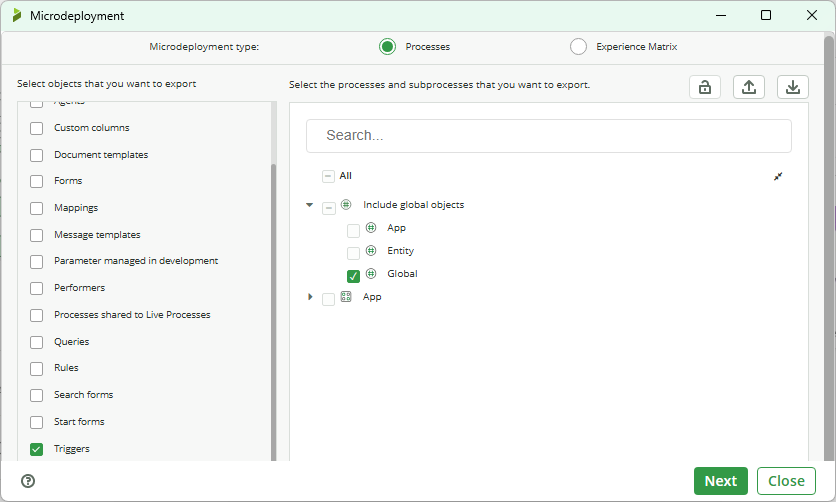
Select the trigger(s) you want to deploy using the right‑hand checkbox, and click Export to generate the deployment package.

Environment configuration
Bizagi uses internal cloud components that monitor the queues of trigger actions. Because trigger actions involve creating cases in your processes, you must define a secure integration between triggers and your Bizagi environment.
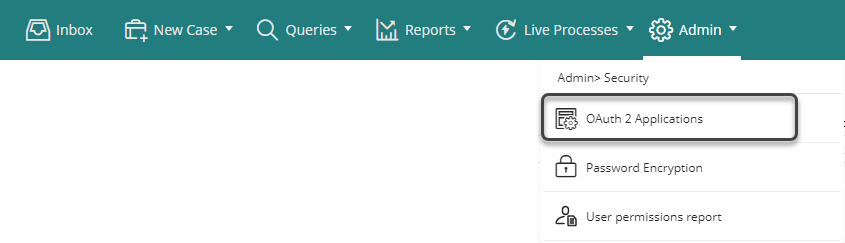
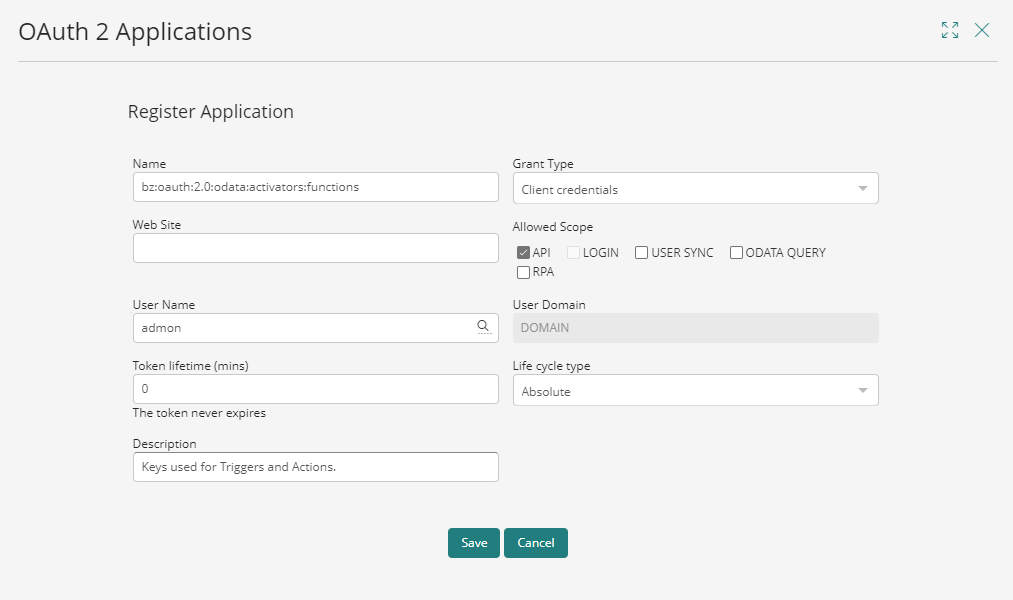
To do this, configure an OAuth application in the Work Portal.
Open the Work Portal with a user who has access to the Admin menu and the Security section, and then open OAuth 2 Applications.
Add a new application with the following characteristics:
•Name: Register the following name:
bz:oauth:2.0:odata:activators:functions
|
|---|
IMPORTANT: DO NOT USE ANOTHER NAME OR CHANGE IT. |
•Grant type: Client Credentials.
•Web site: You can either include the URL of the Work Portal or leave it blank.
•Allowed Scope: API.
•User Name: Select a Bizagi user with the minimum permissions required for the trigger operations. This user does not need to be an administrator. For better security, we recommend creating a dedicated service account (e.g., trigger-action-user). This user must have:
oStart access only to the specific processes that will be initiated by your triggers.
oPermission to authenticate with the OData API.
The user should not have administrative privileges or global access to all processes.
•Token lifetime: Define the validity period of the access token used by the trigger. For security, configure a short duration, typically 2 to 5 minutes. Each trigger operation requests and uses a new token, so short lifetimes support secure, single‑use authentication. Avoid using 0 (no expiration), as previously issued tokens would remain valid if credentials were compromised.
•Life cycle type: Absolute.
•Description: Optional description for the application.
After deploying the trigger and configuring the OAuth keys, the trigger is ready to operate in the environment.
Last Updated 7/15/2026 10:30:35 AM