Overview
Once an Expert user has created and shared a process in Bizagi Studio to be used as a Live Process, Citizen Developers can configure it without dealing with the complexity of the process definition itself. This configuration is done directly in the Work Portal, where inputs and outputs must be mapped according to those defined in Bizagi Studio's automation process.
What you need to do
To configure a Process that has been shared from Bizagi Studio in a Live Process, follow these steps:
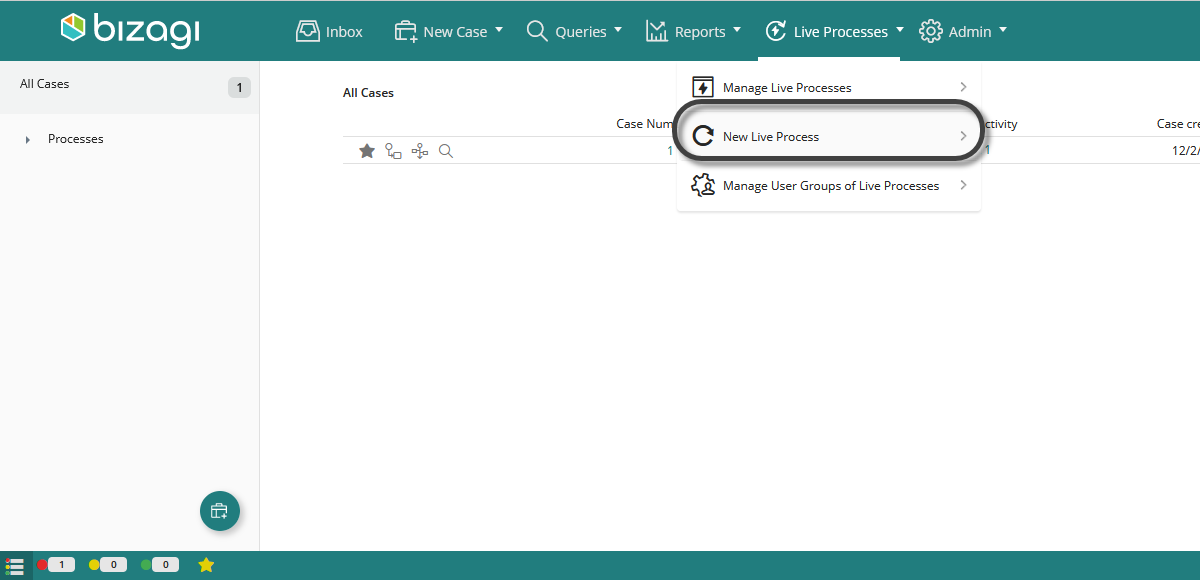
1.In the Work Portal, open the Live Processes option and then select New Live Process.
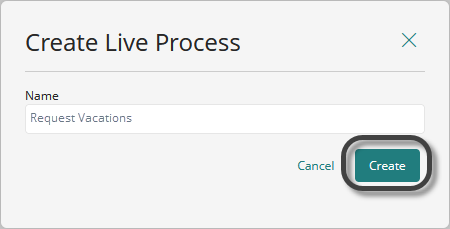
2.In pop-up window, give a name to your process and click Create.
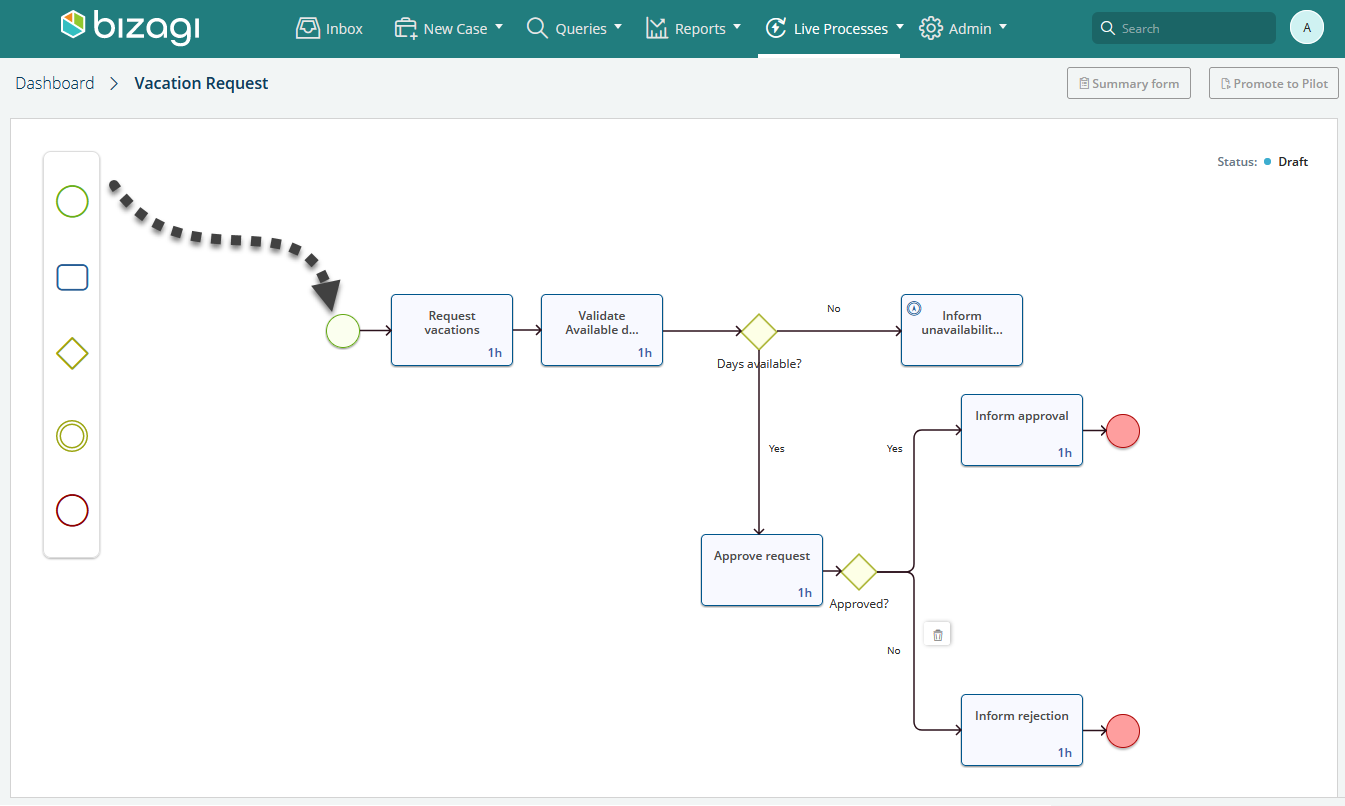
3.In the modeling area, drag and drop from the Palette the elements necessary to build your Live Process.
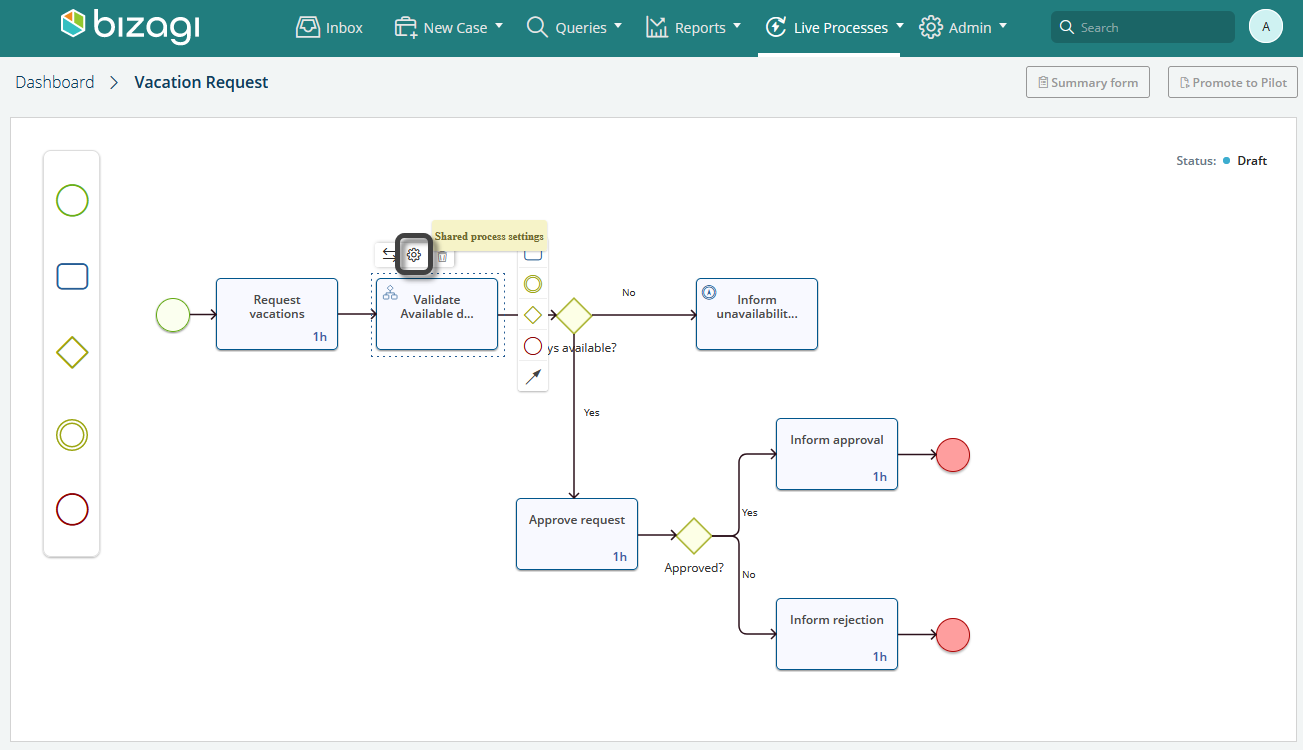
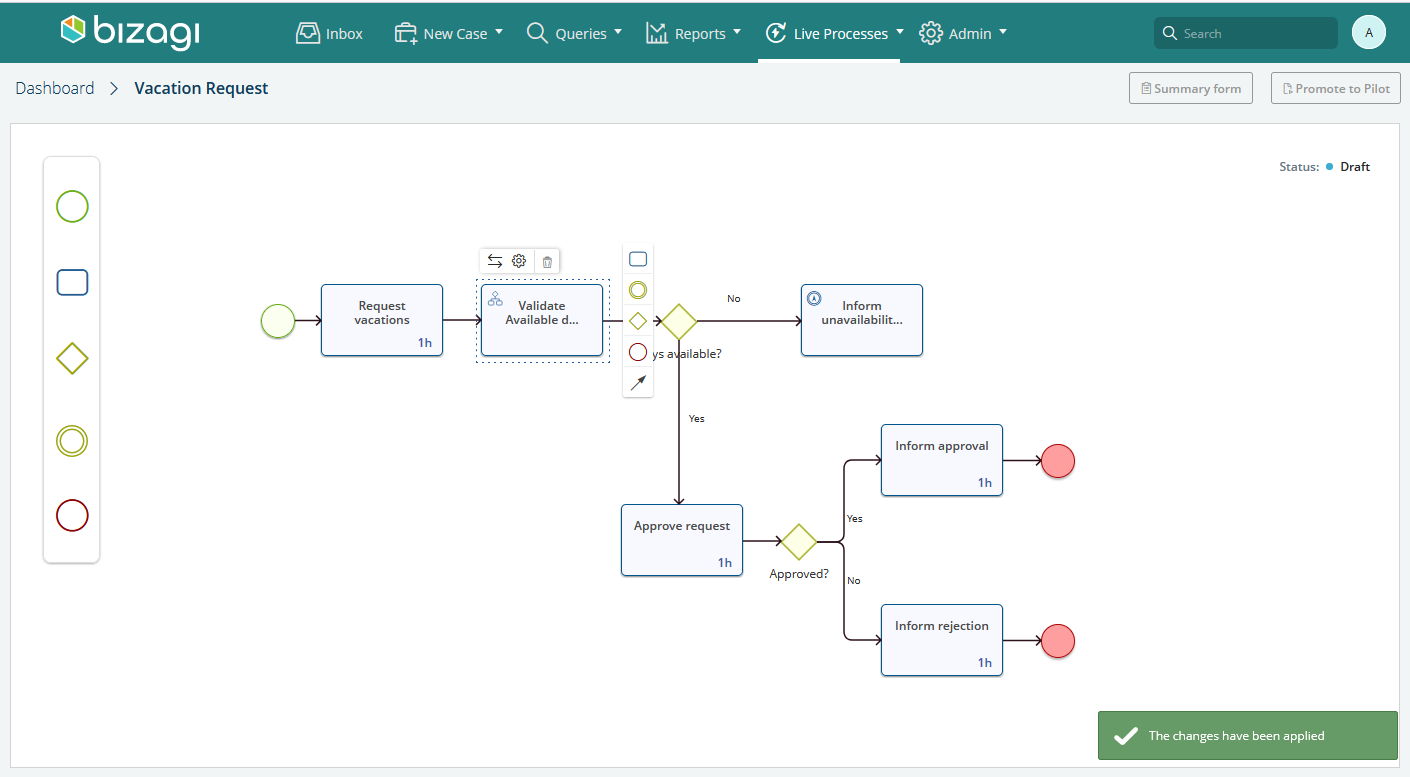
4. After creating the process, click the task where you need to configure the Live Process and select the Change type option. Then, switch the type to Shared process task.
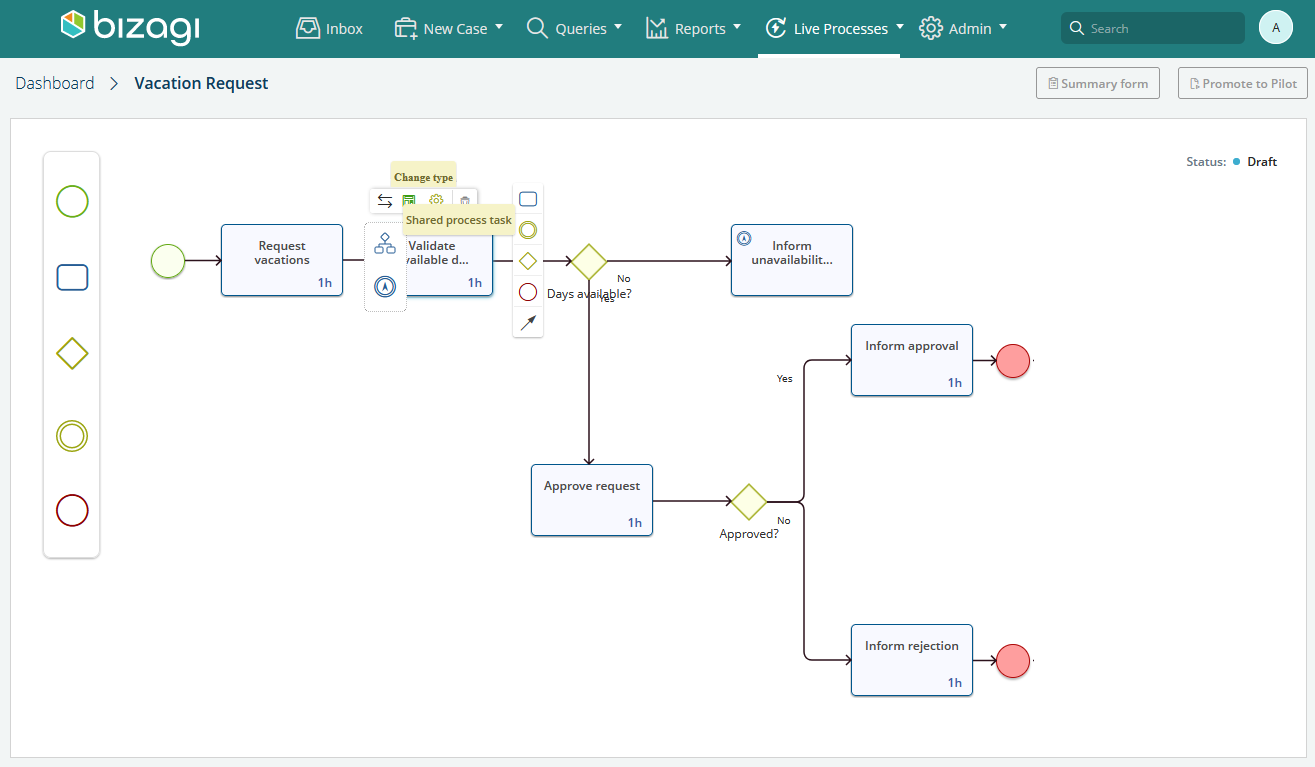
5.Click the task once more and now, choose the Shared process settings option.
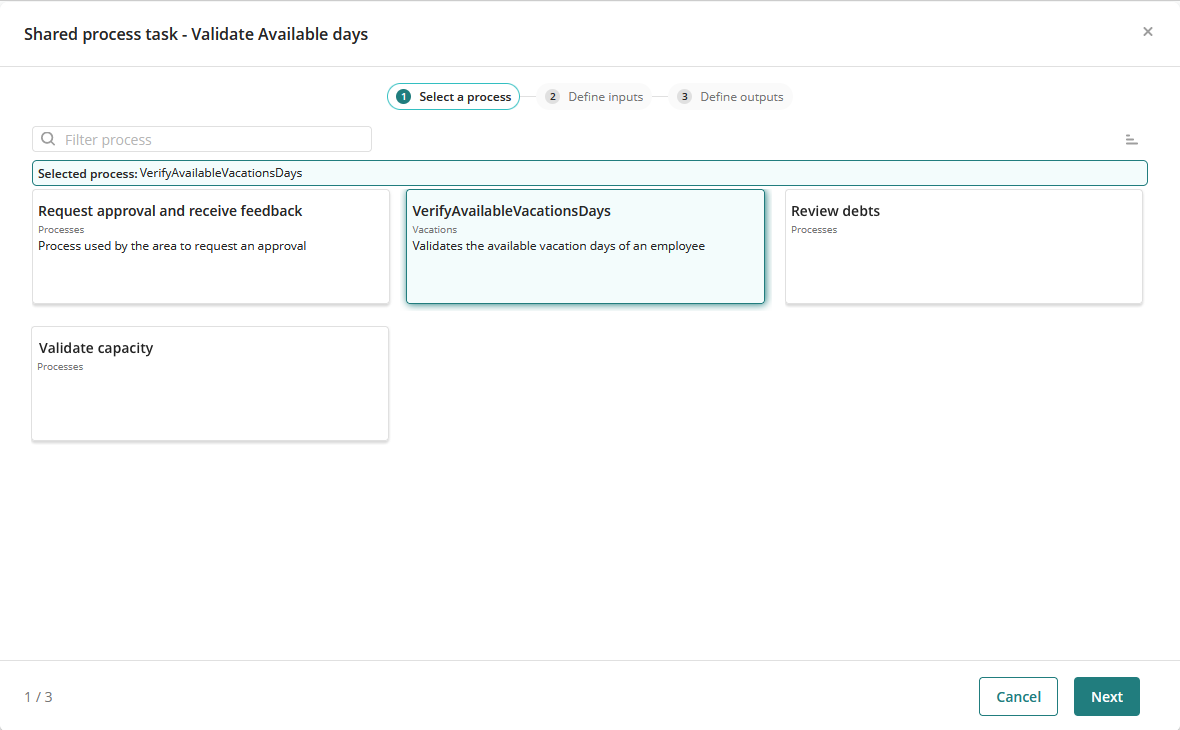
6.In the wizard's first step, select the process you want to configure and then click Next. The processes displayed are those that have been shared from Bizagi Studio.
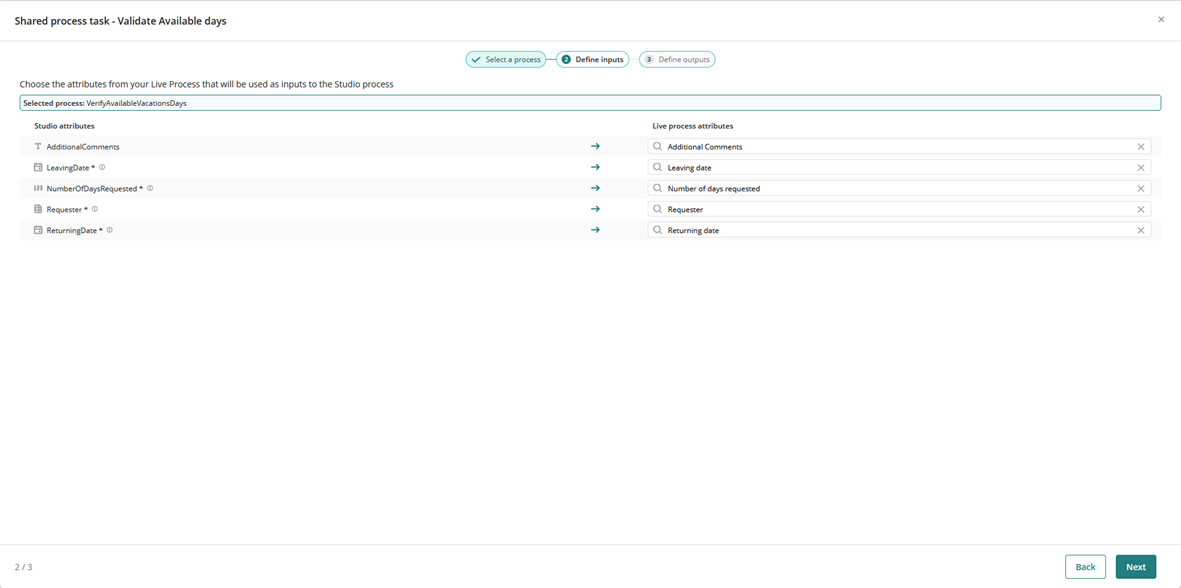
7.In the next step, define the inputs that the process need, matching the Studio inputs, with the attributes defined in the Live Process' data model.
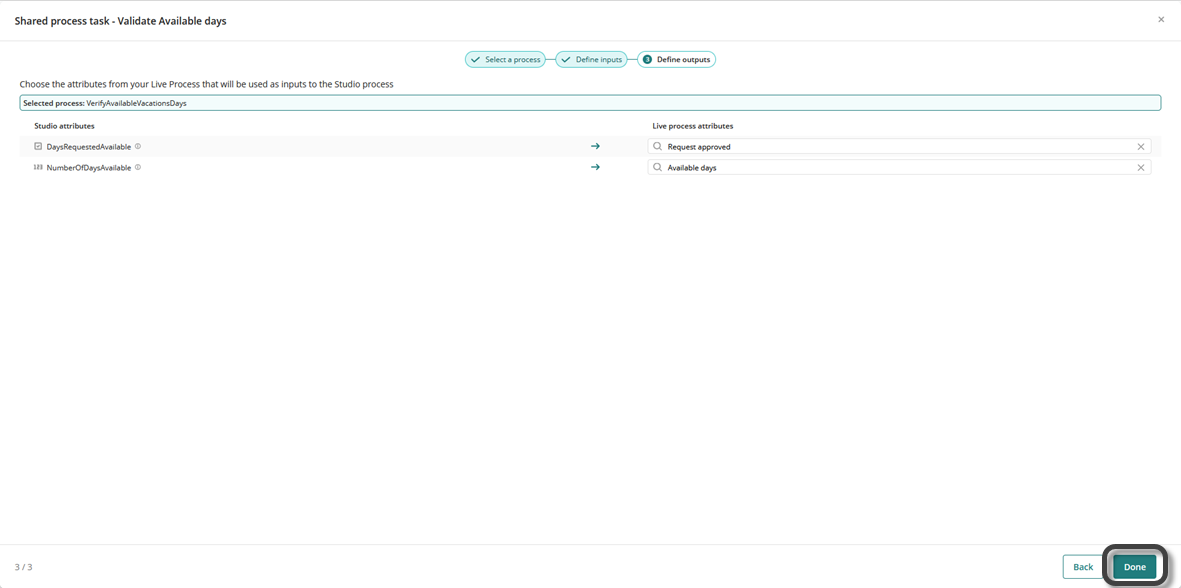
8.Finally, define the outputs of your process, matching the Studio outputs with the attributes defined in te Live Process' data model. When finished, click Done.
When the process is configured, a confirmation message appears in the bottom-right corner of the Work Portal.
Finally, promote your process, so that it can be used in the Work Portal. Now you can use your Live Process as described at Working with Live Processes.
|
Once a process has been promoted, if you go back to the Share Process configuration wizard, it will only be visible in read-only mode. |
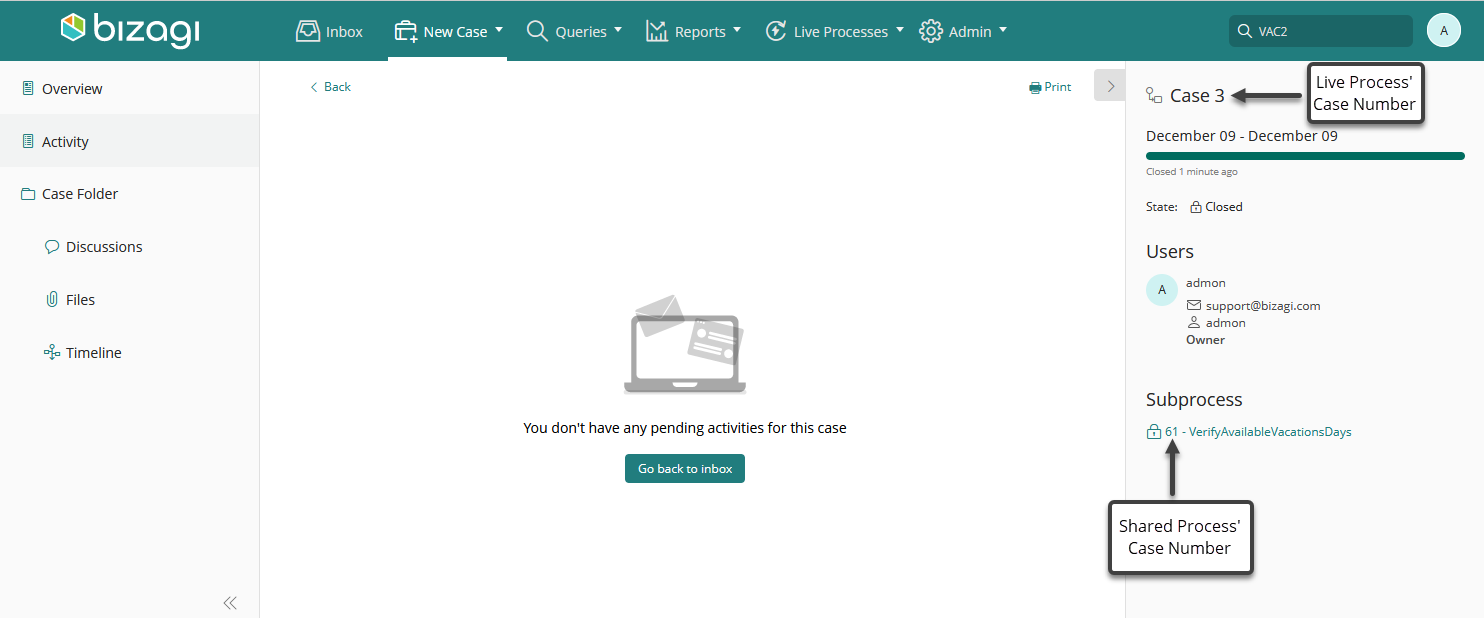
Notice that when the shared process is executed, it will have the same Case Number as its parent process, which is the Live Process.
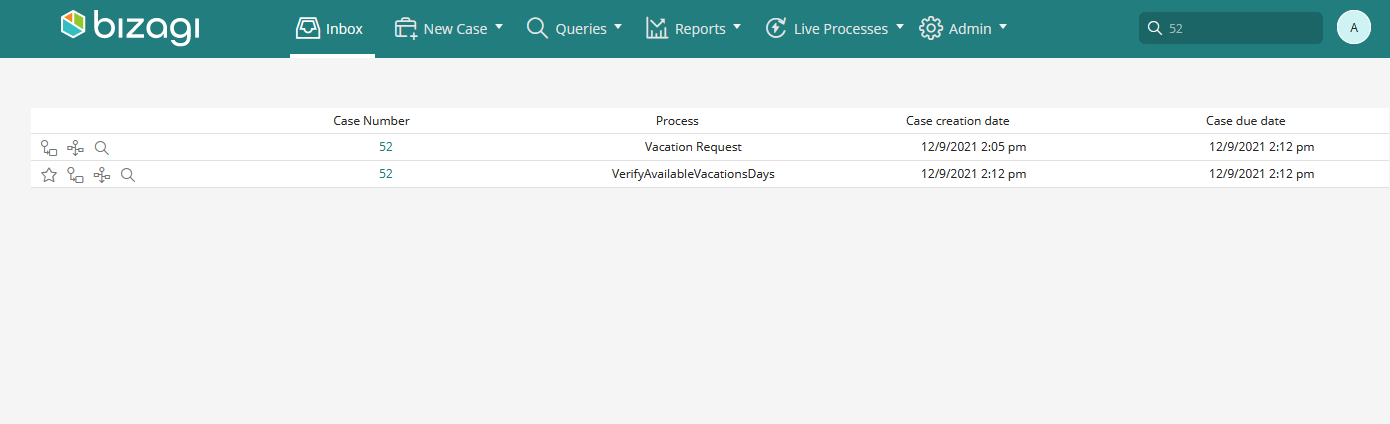
In this case, the Live Process can be conceived as the Shared Process' Parent process. If you want to have a different Case Number for the Live Process and the Shared Process, complete these steps:
1.Go to the Expert view in Bizagi Studio and select your Shared Process.
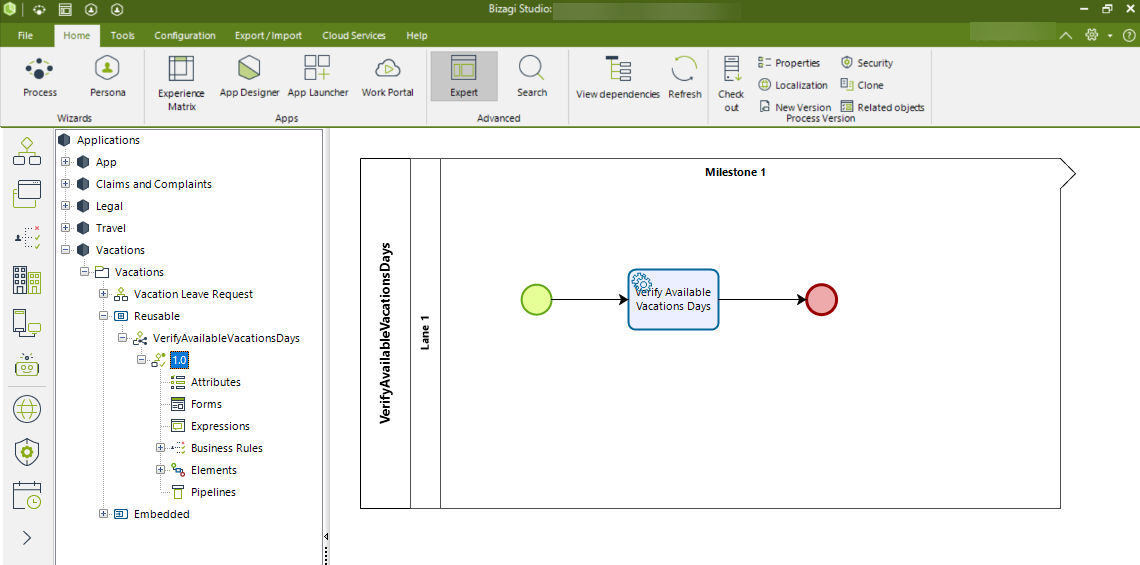
2.Right click the process' version and select Properties.
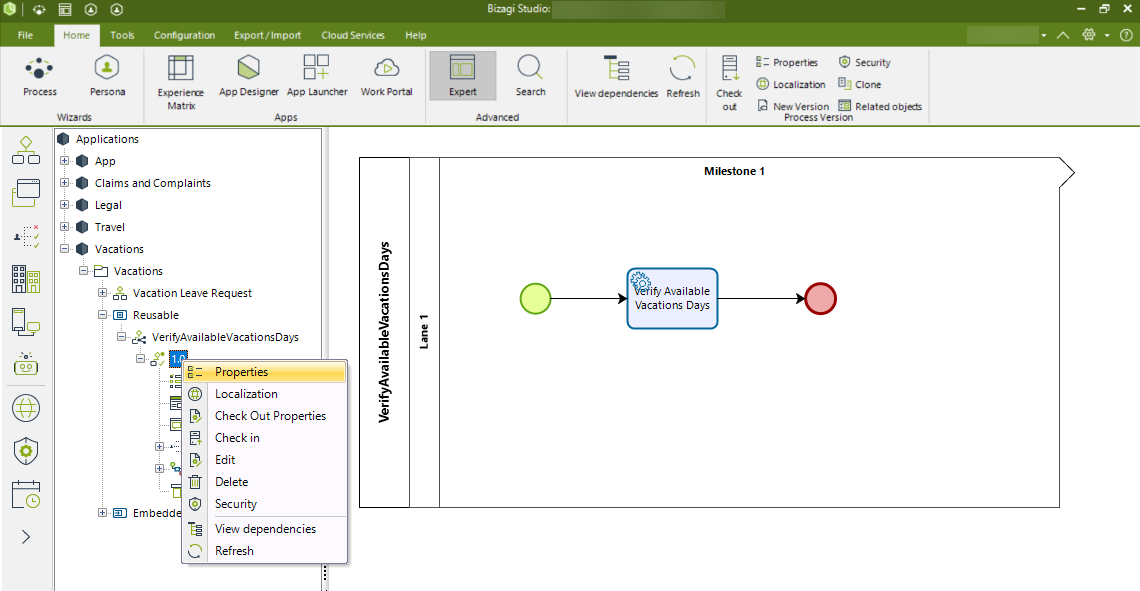
3.In the properties window, uncheck the Use parent case number checkbox.
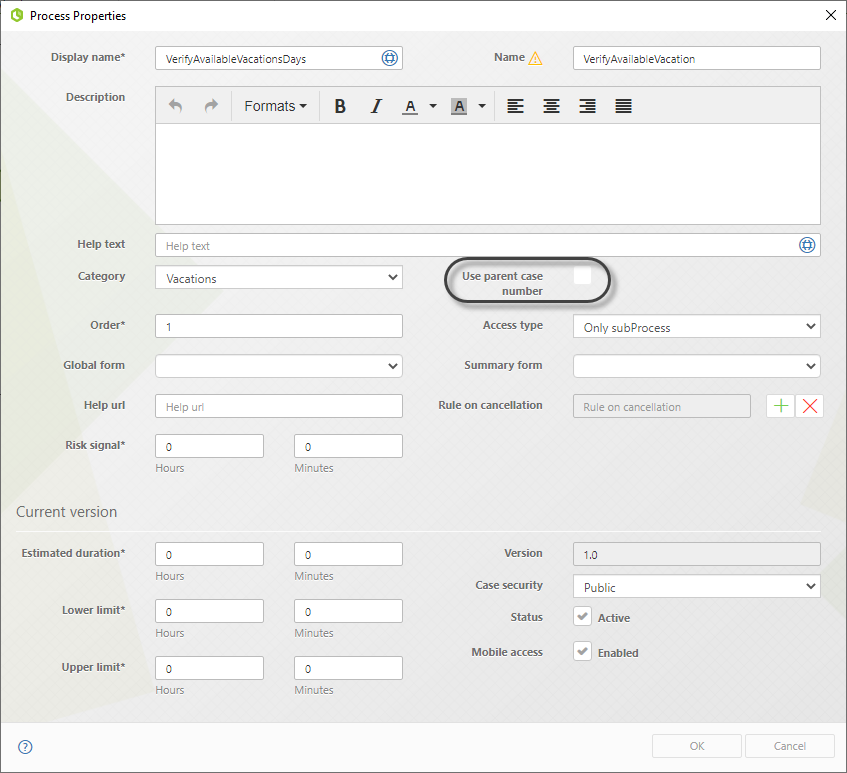
Now, when you create a Live Process, the Shared Process will have a different Case Number from that of the Live Process.
Last Updated 7/12/2024 2:22:39 PM