Overview
The Inbox menu is crafted to display all assigned activities and streamline access to pending tasks. It comprises various sections to aid in performing, managing, and overseeing your processes.
If the logged-in user has not been designated as a Persona, their default view is the Inbox. Access to the Me menu is exclusive to users defined as Personas. Once a user is associated with a Persona definition, the Me menu becomes their default view.
The main screen is segmented into three sections: Main menu, Case area and Pending activities.
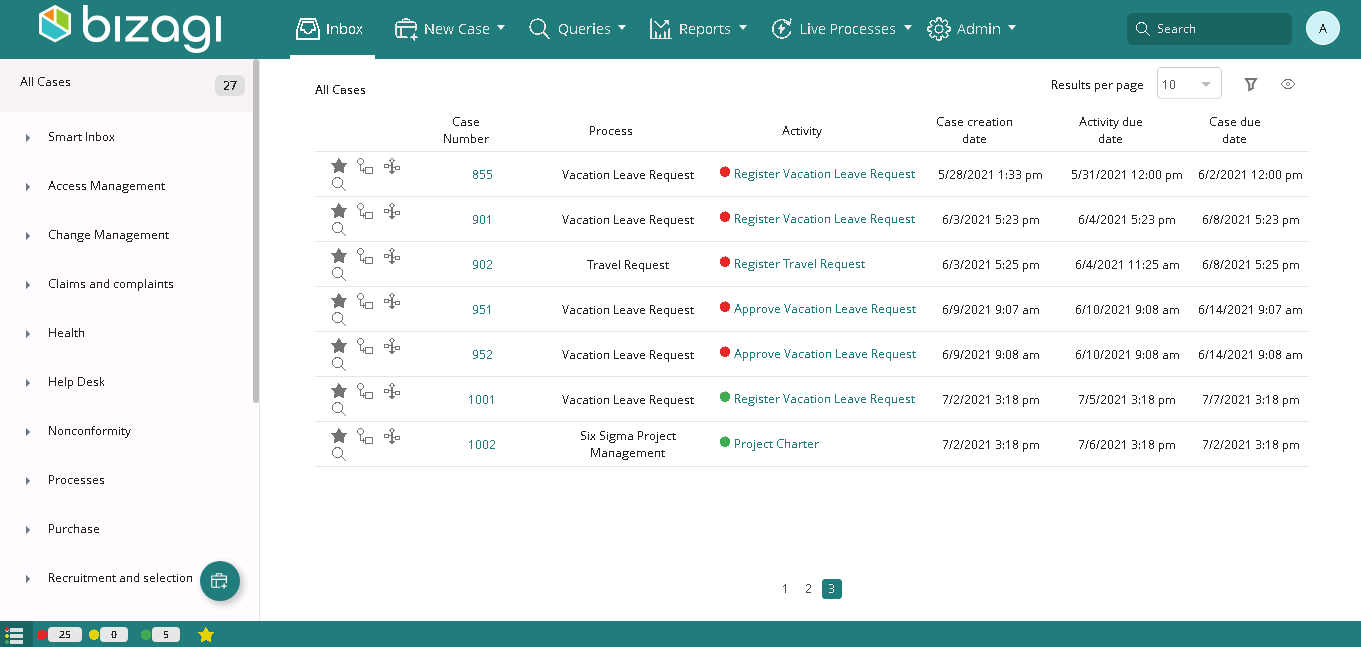
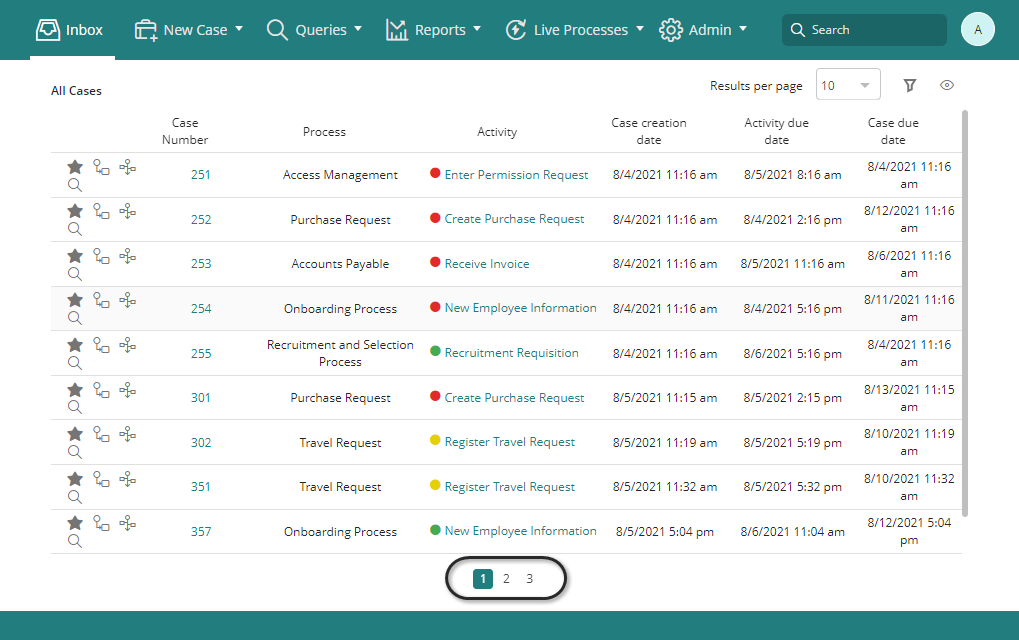
All assigned cases are visible in the Inbox, and by default, they present the following information.
This information is customizable based on your specific requirements. For more details, refer to customize and parametrize columns.
Creation Number |
Case identifier. |
Process/Plan |
Process to which the current Activity belongs. If the Activity is part of a Plan, the Plan name is used. |
Activity |
Pending activity assigned to the logged-in user. |
Case creation date |
Creation date of the case. |
Case due date |
Solution date of the case. |
Activity due date |
Expiration date of the current Activity based on the expected Activity duration. |
Task State |
The task states are indicated by three colors, determined by the elapsed time since the Activity was created in conjunction with the duration time defined for the task. • • • |
The Inbox offers two distinct views: Details and Grid. You can switch between them at any time by selecting the view icon located below the Logout option.
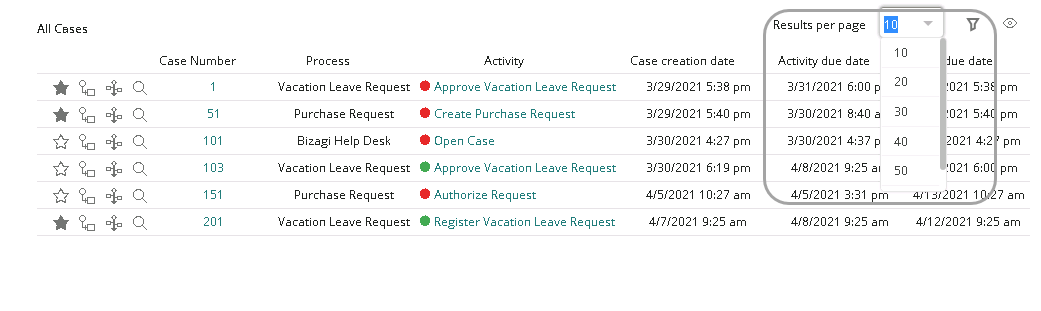
For both Details and Grid views, you have the flexibility to customize the number of rows per page in your Inbox. At the top right, click Results per page and choose from options such as 10, 20, 30, 40, 50, or 100. If the height of the browser cannot accommodate the selected number of results, the work area displays a scroll bar.
It's worth noting that if you apply a filter in the case area, the selected number of rows per page persists.
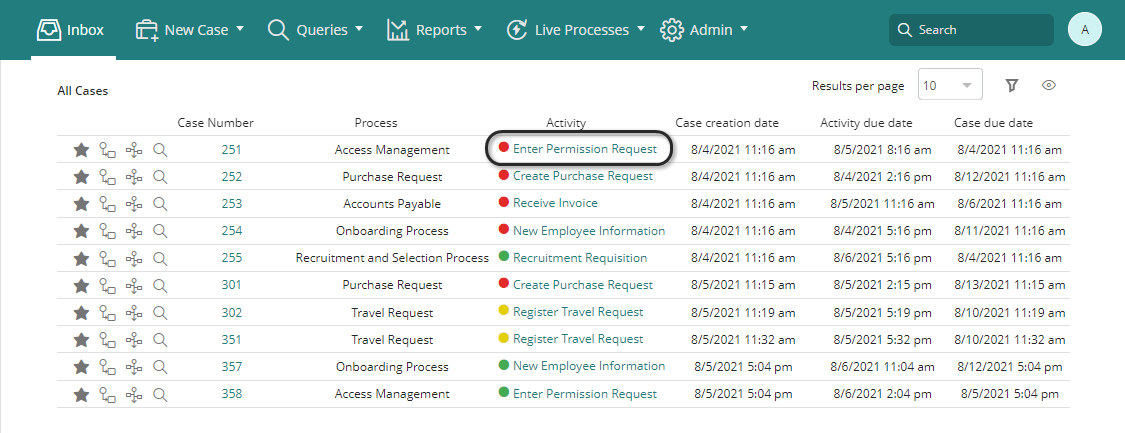
Grid view
In the Grid view, the Inbox presents the main information in a table format. Each row in the table represents a pending case. Clicking View Summary allows you to access additional information about a specific case without actually opening the case itself.
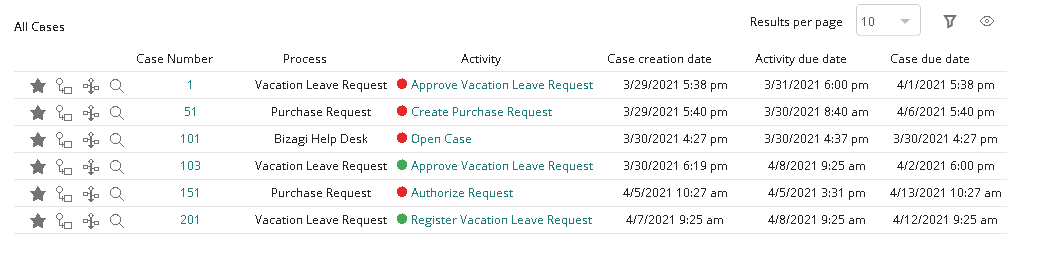
To access and work on an case, click either the State link or the Case Number link.
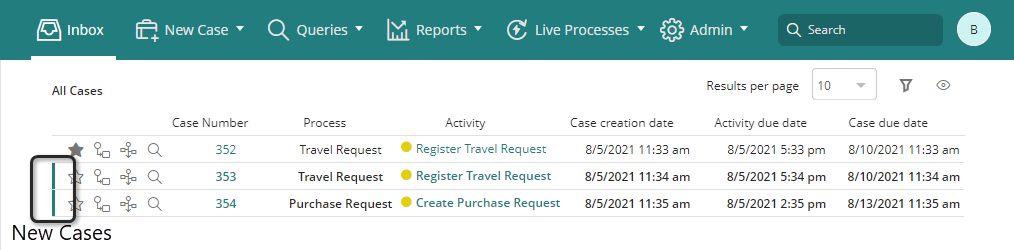
New pending tasks, where the user has not entered the task, are highlighted with a vertical line on the left-hand side of each row.
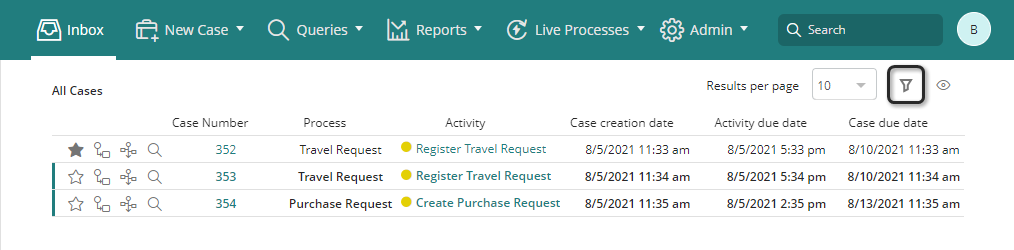
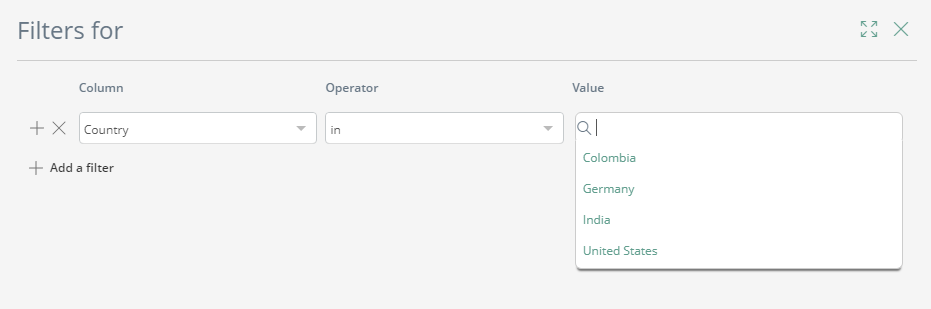
For each Inbox, whether it's a Smart or regular Inbox, users can apply additional filters known as Live Filters by clicking the filter icon located at the top-right corner of the Inbox.
|
By default, all the Smart Inboxes display the case number, the process, and the activity using the sorting defined in the Smart Inbox. |
The same icon is displayed on the tablet's grid view. Filters cannot be applied on mobile devices using the List view. These Live Filters persist at the browser level, meaning that users must create filters independently on the mobile device.
|
The columns Category, CurrentUserFullName, CurrentUserName, and UserLocation are not available for use in Live Filters, even if the are displayed in custom columns. |
Favorites
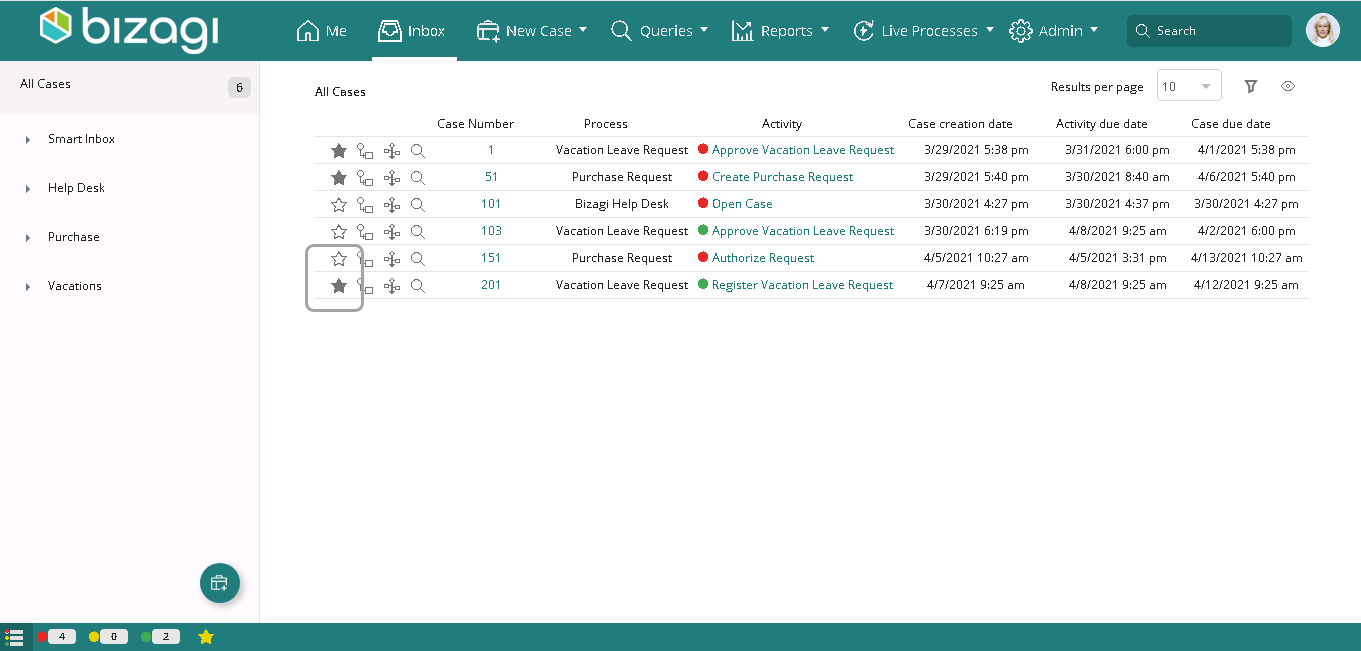
You can mark a case as a Favorite by clicking the star icon in the leftmost column of the relevant case. However, it's important to note that this option is not available for Live Process cases.
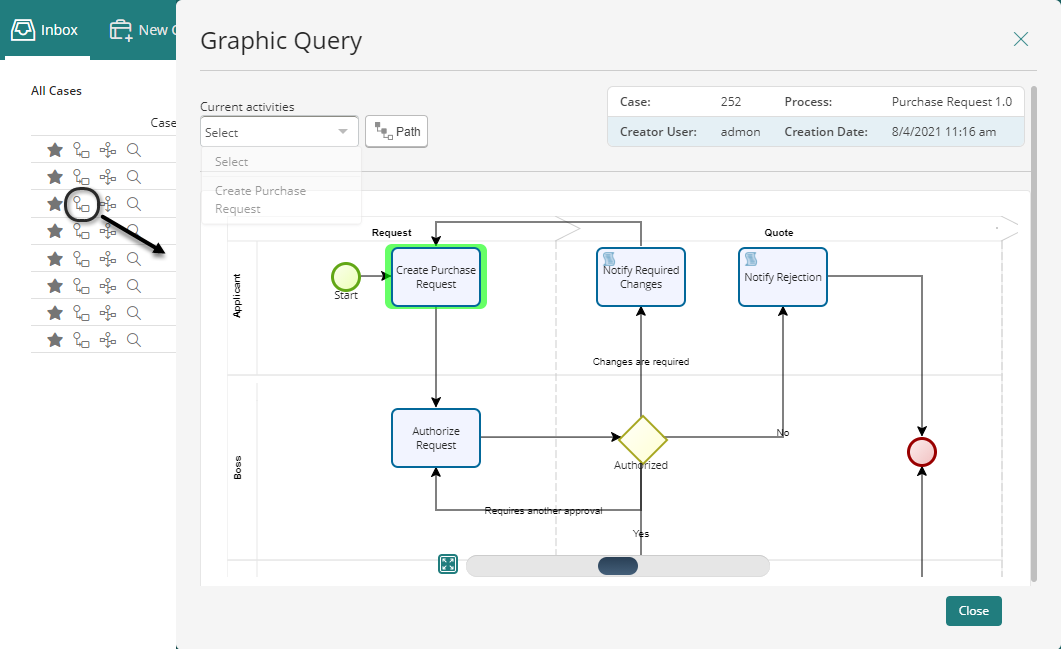
You can access the Graphic Query by clicking the graphic image alongside the star icon. In this screen, you can view the path followed by the case through the Process in a graphical way.
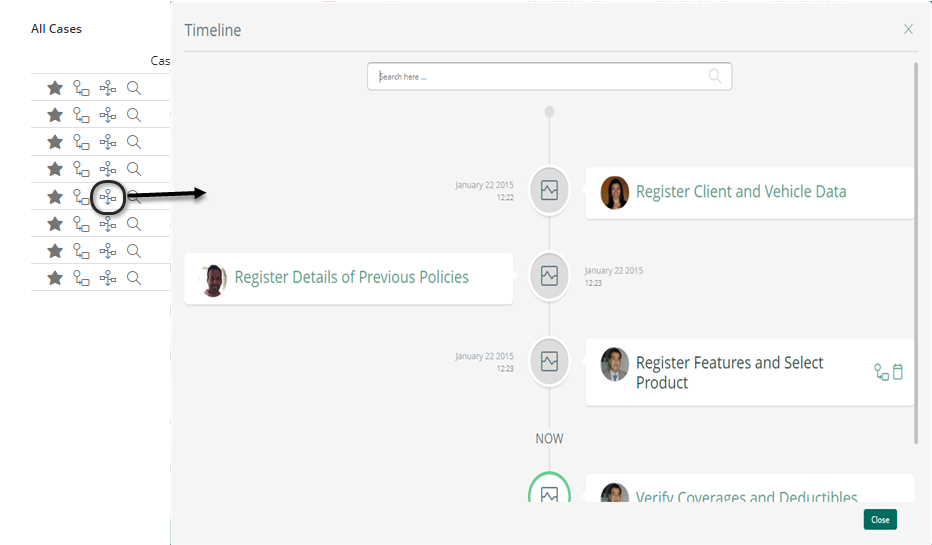
You can access a case's Timeline directly by clicking the timeline icon on the case's record. In this screen, you have visibility of the entire case, viewing in a graphical way the activities launched, the users involved, and the time spent in every activity of a case. It's important to note that the timeline displayed through this option does not cover the Process map and Activity map options.
This feature is not available for Live Process cases.
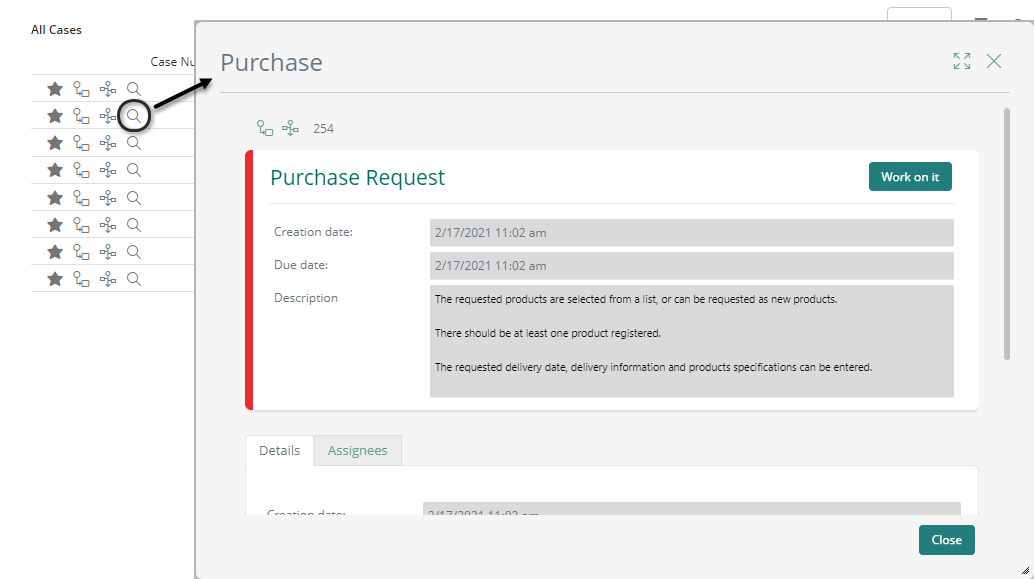
To view a summary of the case, click the magnifying glass icon. A new screen appears, displaying general information about the case, including pending activities, description, creation and due dates, and more. If the process has a Summary form defined, it is displayed on this screen.
|
If the description of the activity is too long, a button appears to view the description in another screen. |
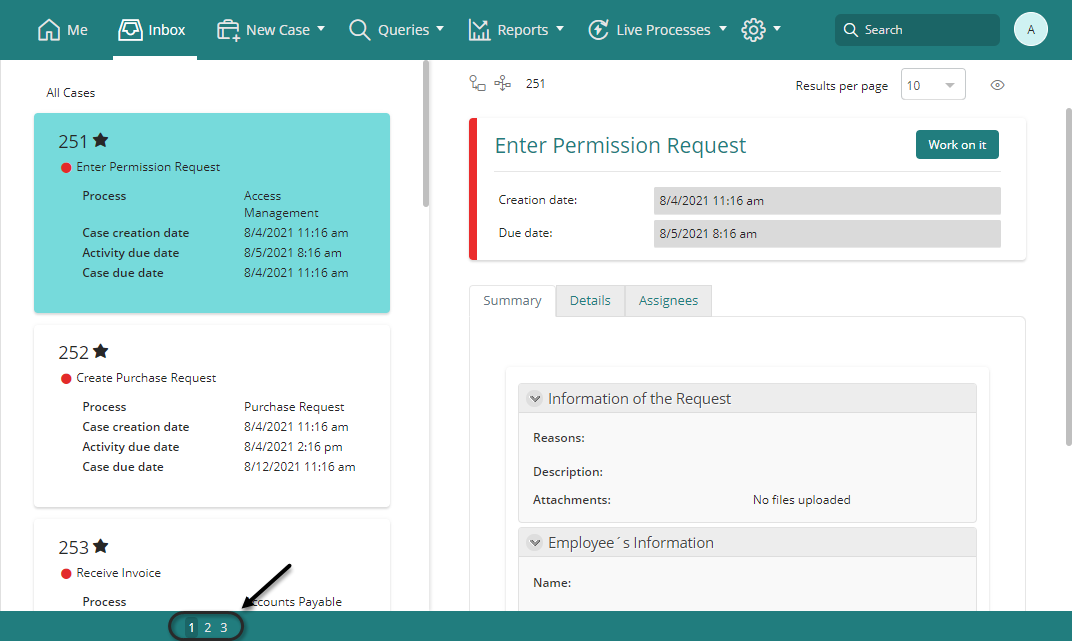
To view more Activities, navigate through the web pages by clicking the page numbers at the bottom of the grid.
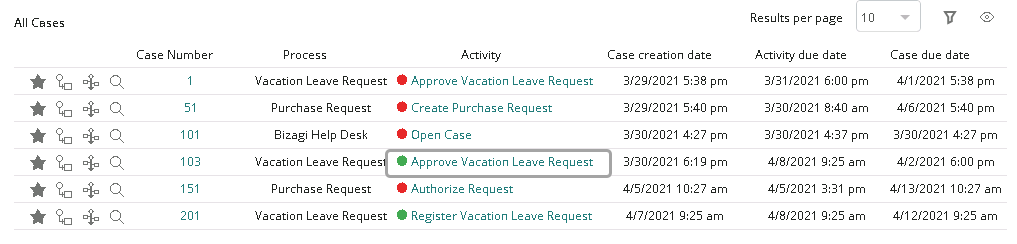
In the Grid view, each row of the table is a pending case. You can work on a pending Activity by clicking the access link in the Activity column of the case.
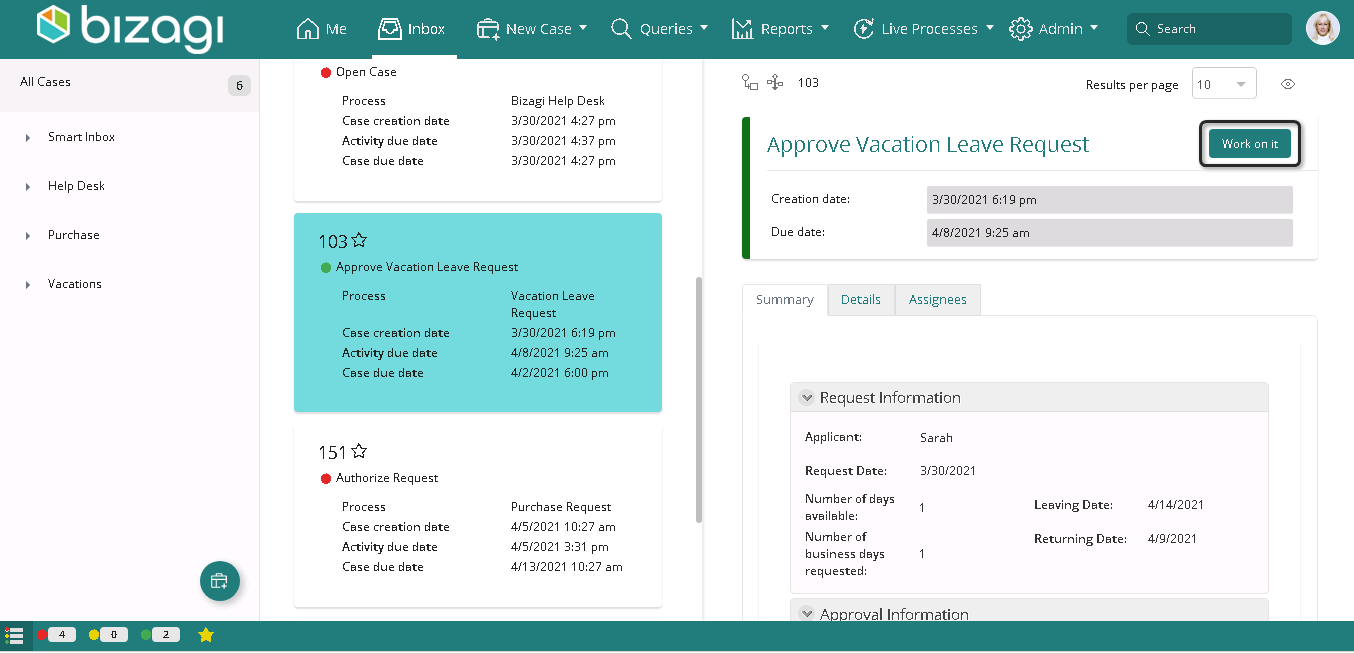
Details view
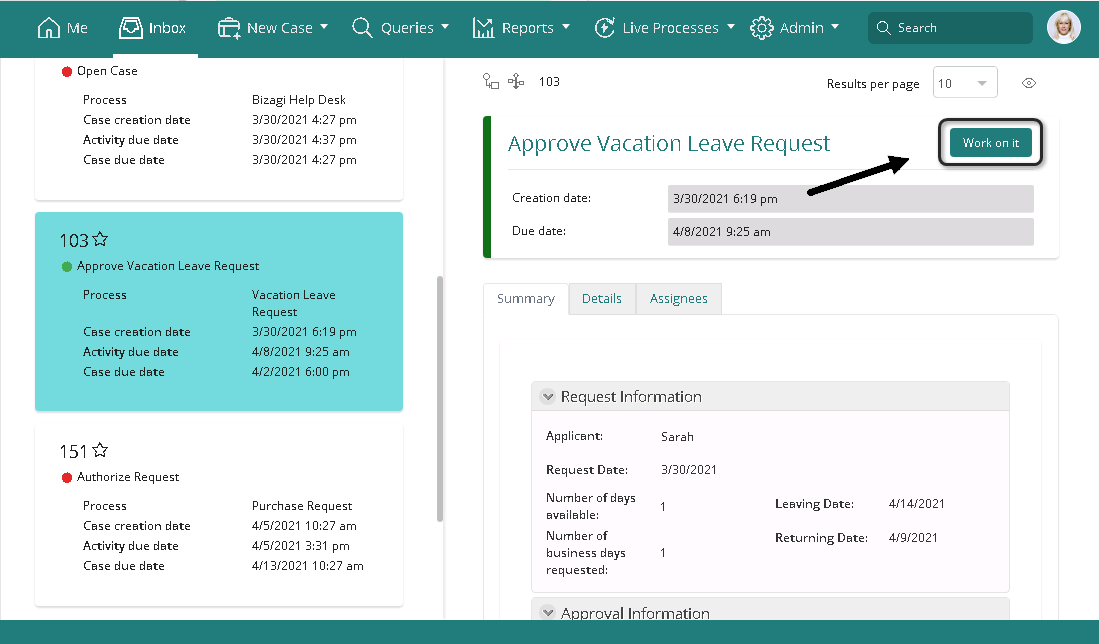
In the Details view, you can access detailed information about a specific case. Navigate through the pending cases on the left side of the screen by clicking a case to display the Summary information and the Assignees log of the selected case on the right side of the screen.

To access any of the Activities, select Work on it.
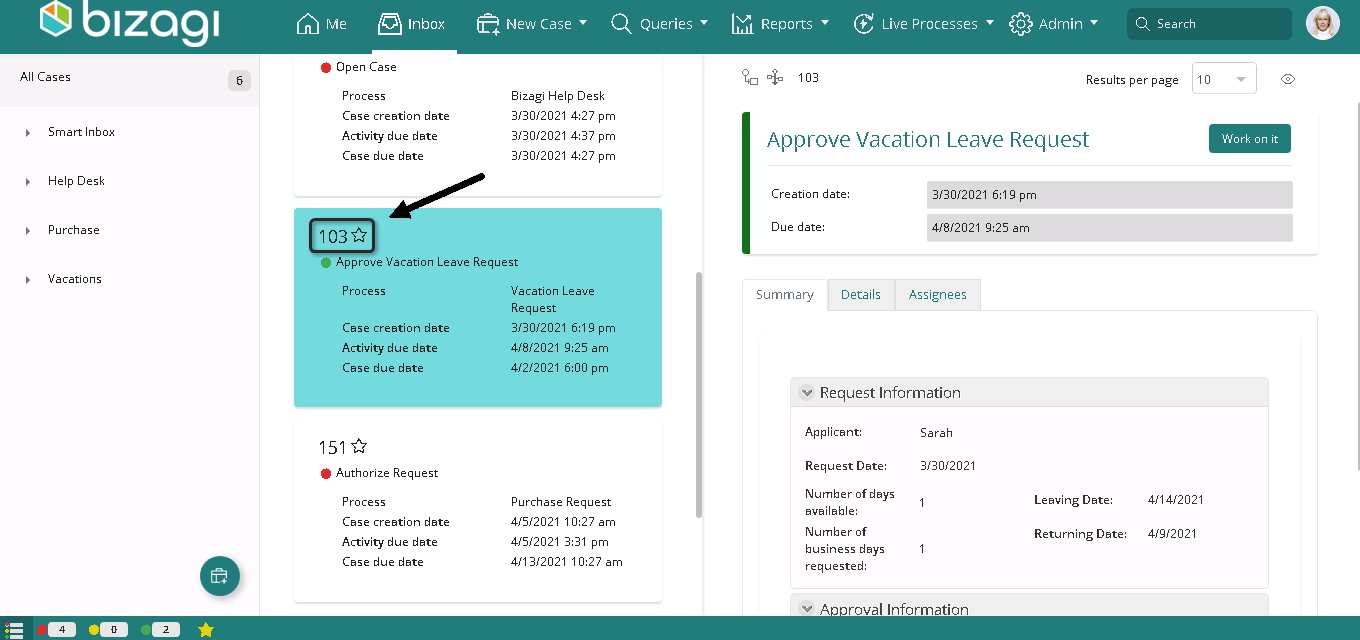
To mark a case as Favorite, click the star icon on the upper left of the Case navigation panel. This option is not available for Live Process cases.
To view the case Graphic Query, click the graphic image located in the upper left of the Summary information panel. This option is not available for Plans.
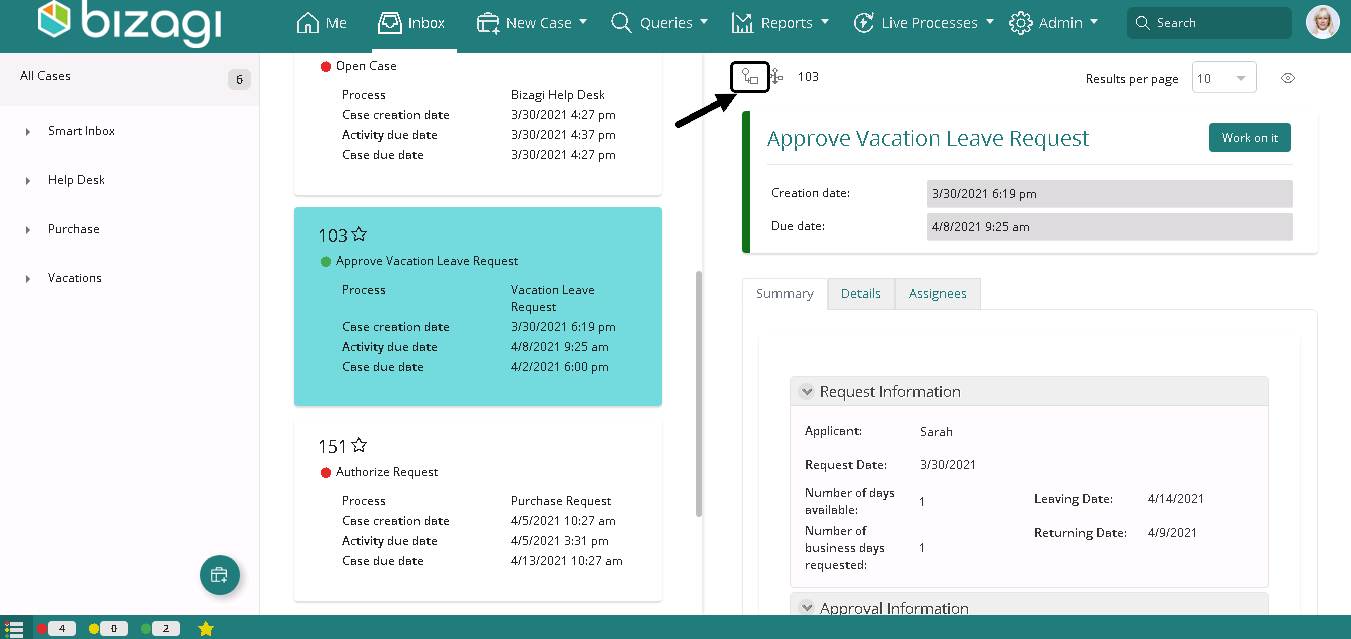
To view the case's Timeline, click the image located in the upper left of the Summary information panel. This option is not available for Live Process cases.

To view more Activities, navigate through the pages by clicking the page numbers at the bottom of the screen.
In the Details view, you can work on a pending Activity by clicking the Work on it button for the selected case.
Go back to Inbox
When a user completes working on a task and there are no further pending cases, Bizagi displays the following screen:
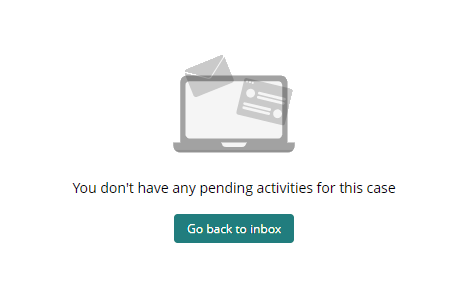
If the user clicks the Go back to inbox button, Bizagi redirects the user to the last section they were working on before finishing the task. For example, if the user was working on BAM reports, accessed the task from there, and then clicks Go back to inbox, Bizagi returns the user to the BAM report section. Another example is if the user was in a process inbox, accessed the task from there, and then clicks Go back to inbox, Bizagi returns the user to the process inbox.
Last Updated 12/28/2023 11:55:30 PM