Overview
AI Actions leverage the connectors already configured in your project, seamlessly integrating them into AI Agents. You can also configure whether to use external connectors and/or MCP Servers, depending on your integration and data processing requirements.
This functionality simplifies connector usage by eliminating the need for manual mapping or complex configurations. When defining the AI Action, simply include in the prompt what you want to achieve with the connector. Bizagi AI automatically determines when a connector should be invoked, manages the required input parameters, and processes the corresponding outputs.
By intelligently orchestrating connector execution, Bizagi AI enables AI Agents to reuse existing integrations efficiently. This approach ensures that the appropriate connectors are invoked at the correct time, optimizing resource utilization and maintaining data consistency across the process.
This capability improves the overall performance, scalability, and automation potential of AI Agents, allowing them to execute complex operations with minimal configuration effort.
Consult the MCP Servers article if you have any doubts about MCP Servers configuration.
Consult the SAP Connectors article if you have any doubts about SAP Connectors connection configuration.
AI Actions - External Connectors Configuration
We will configure a external connector in a already existing AI Agent as shown in the following steps:
Navigate to the AI Hub module in the Expert view from Bizagi Studio.
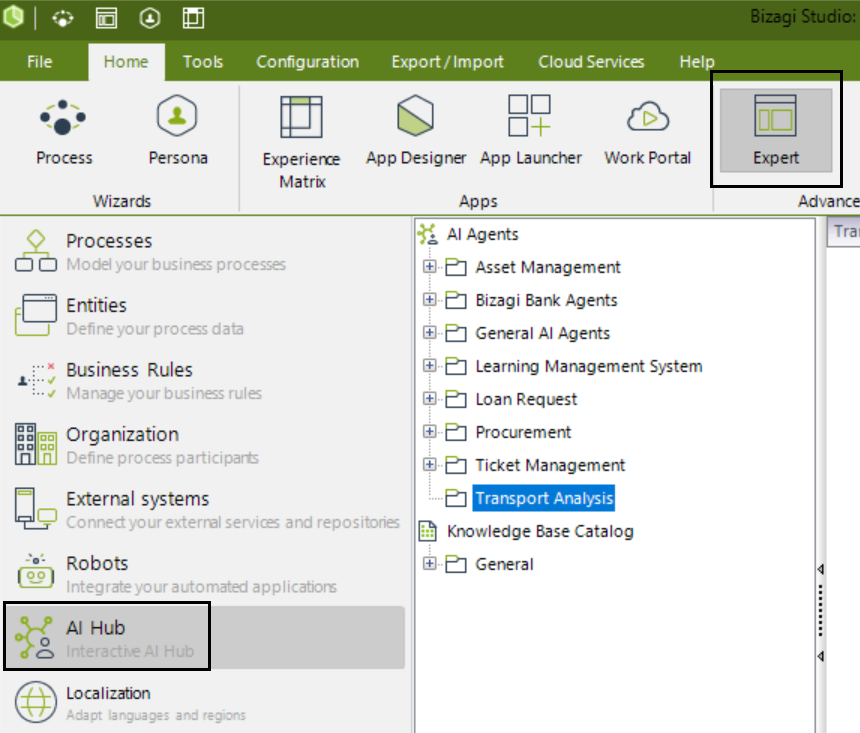
Open the folder and locate your predefined AI Agent. Then, right click it and select the Edit Agent option.

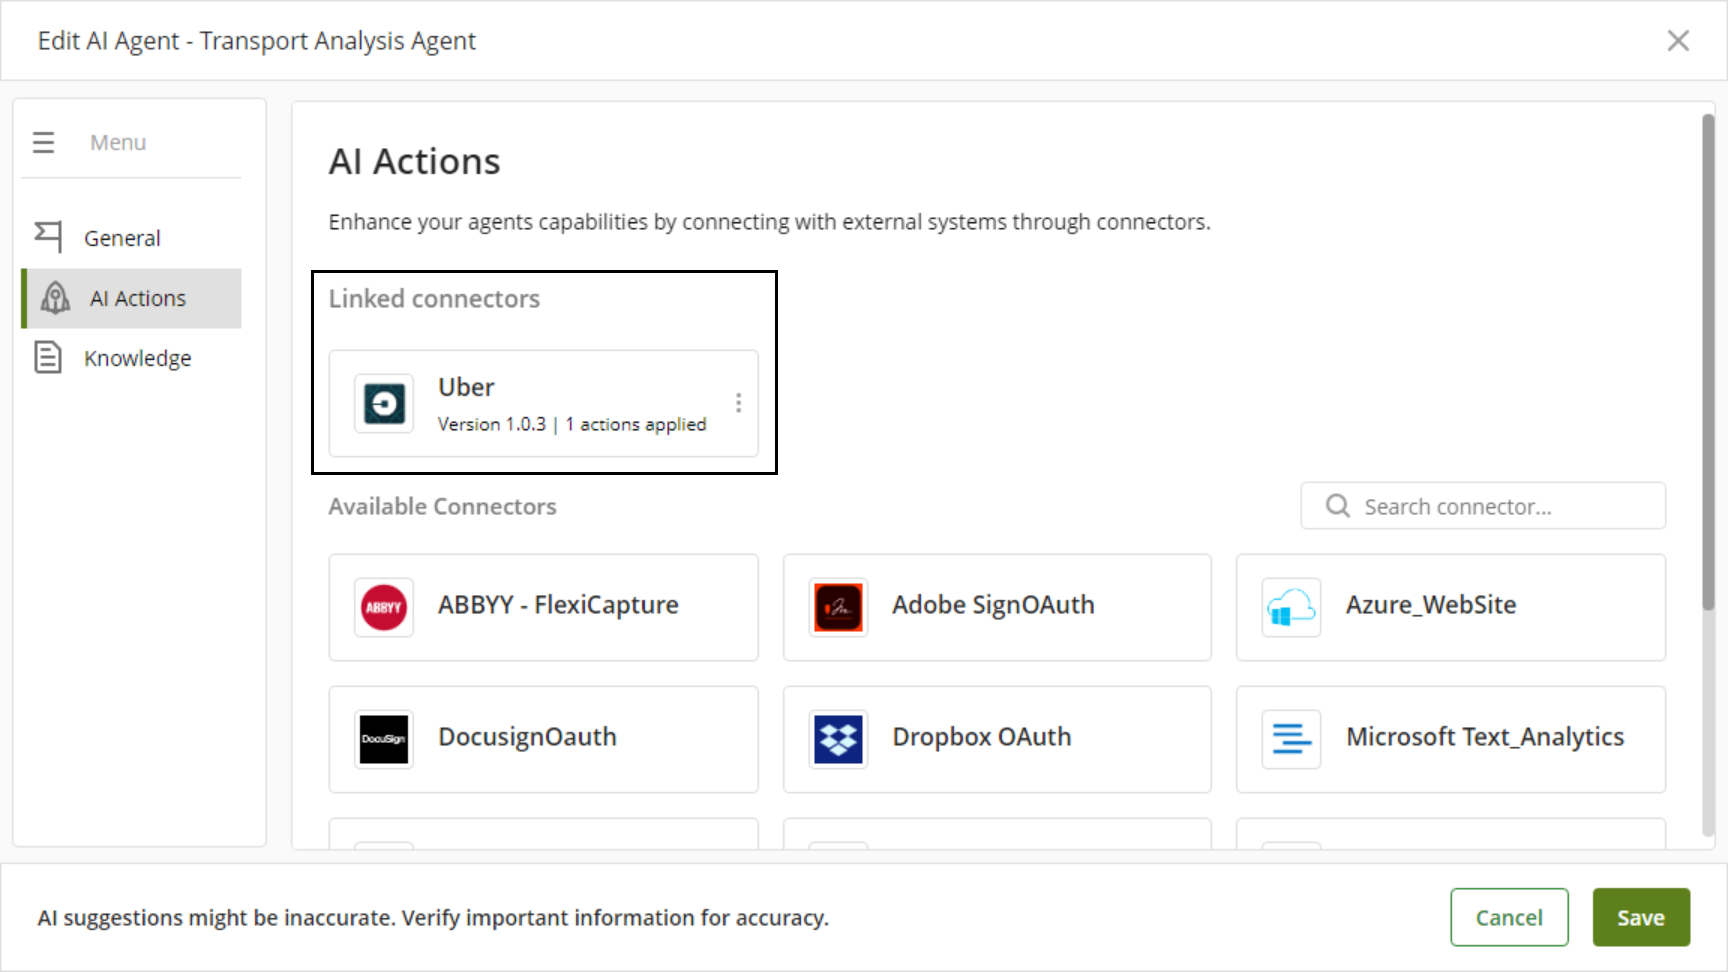
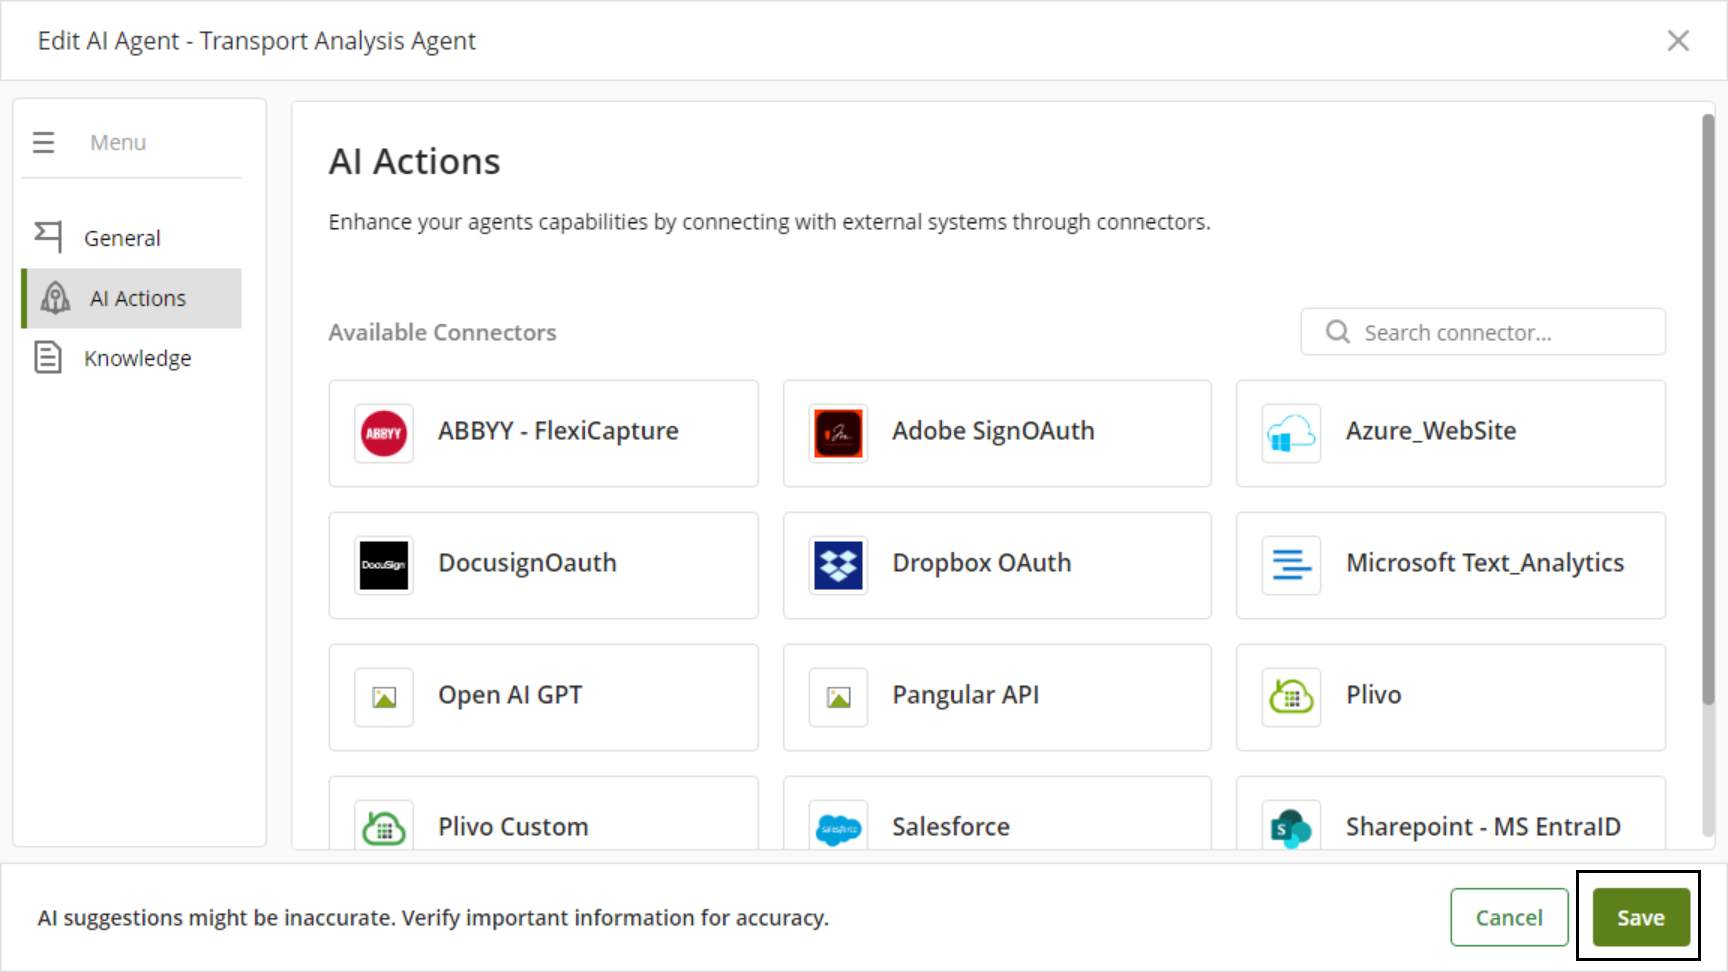
In the Edit AI Agent window, select the AI Actions section from the left menu. Here, you will be able to see the pre-existing connectors in your project.
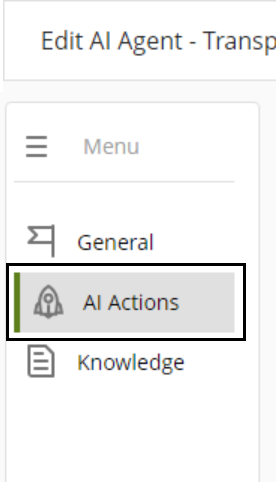
In the Available Connectors section, you can scroll through the listed Connectors. If you want to look up for some specific connectors, you could use the search bar to facilitate the search.
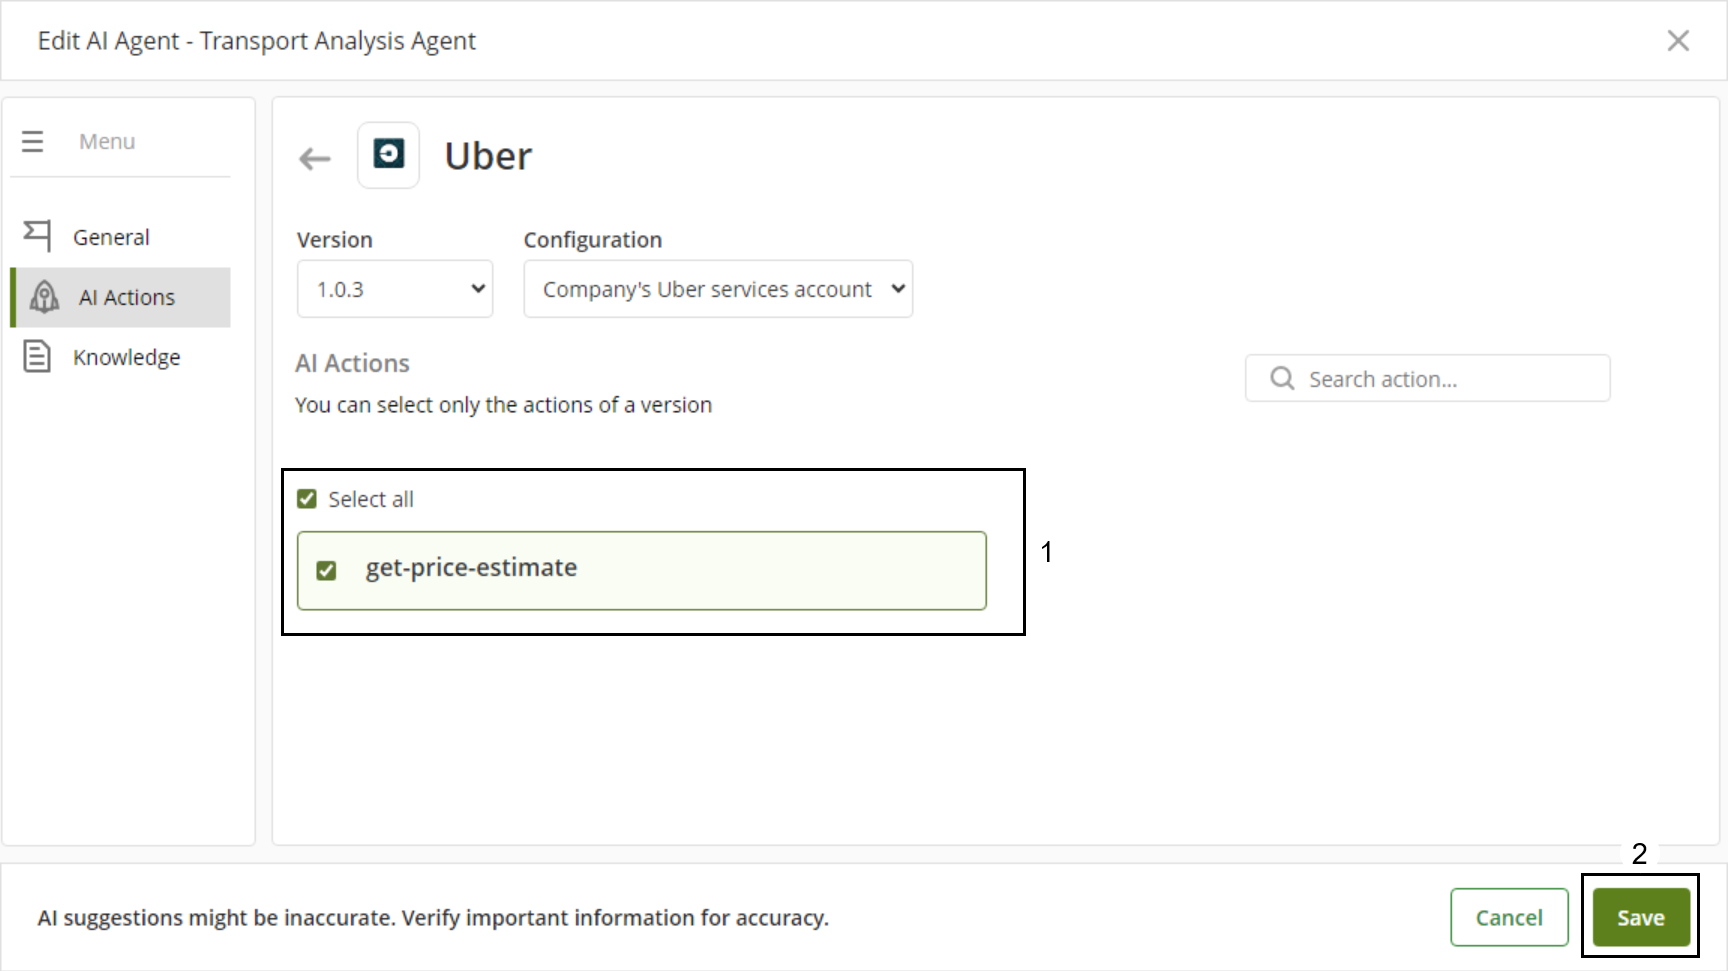
When selecting one of the connectors you want to configure, the window displays the connectors information including the Version, the Configuration and under the AI Actions section the list of available actions for that version. Make sure you set a compatible version for executing the actions you need to implement which in most cases it is the latest version.
|
Excel connectors are not configurable or executable in the context of an AI Agent. Although they may appear in the list, their actions are not available for selection or use. |
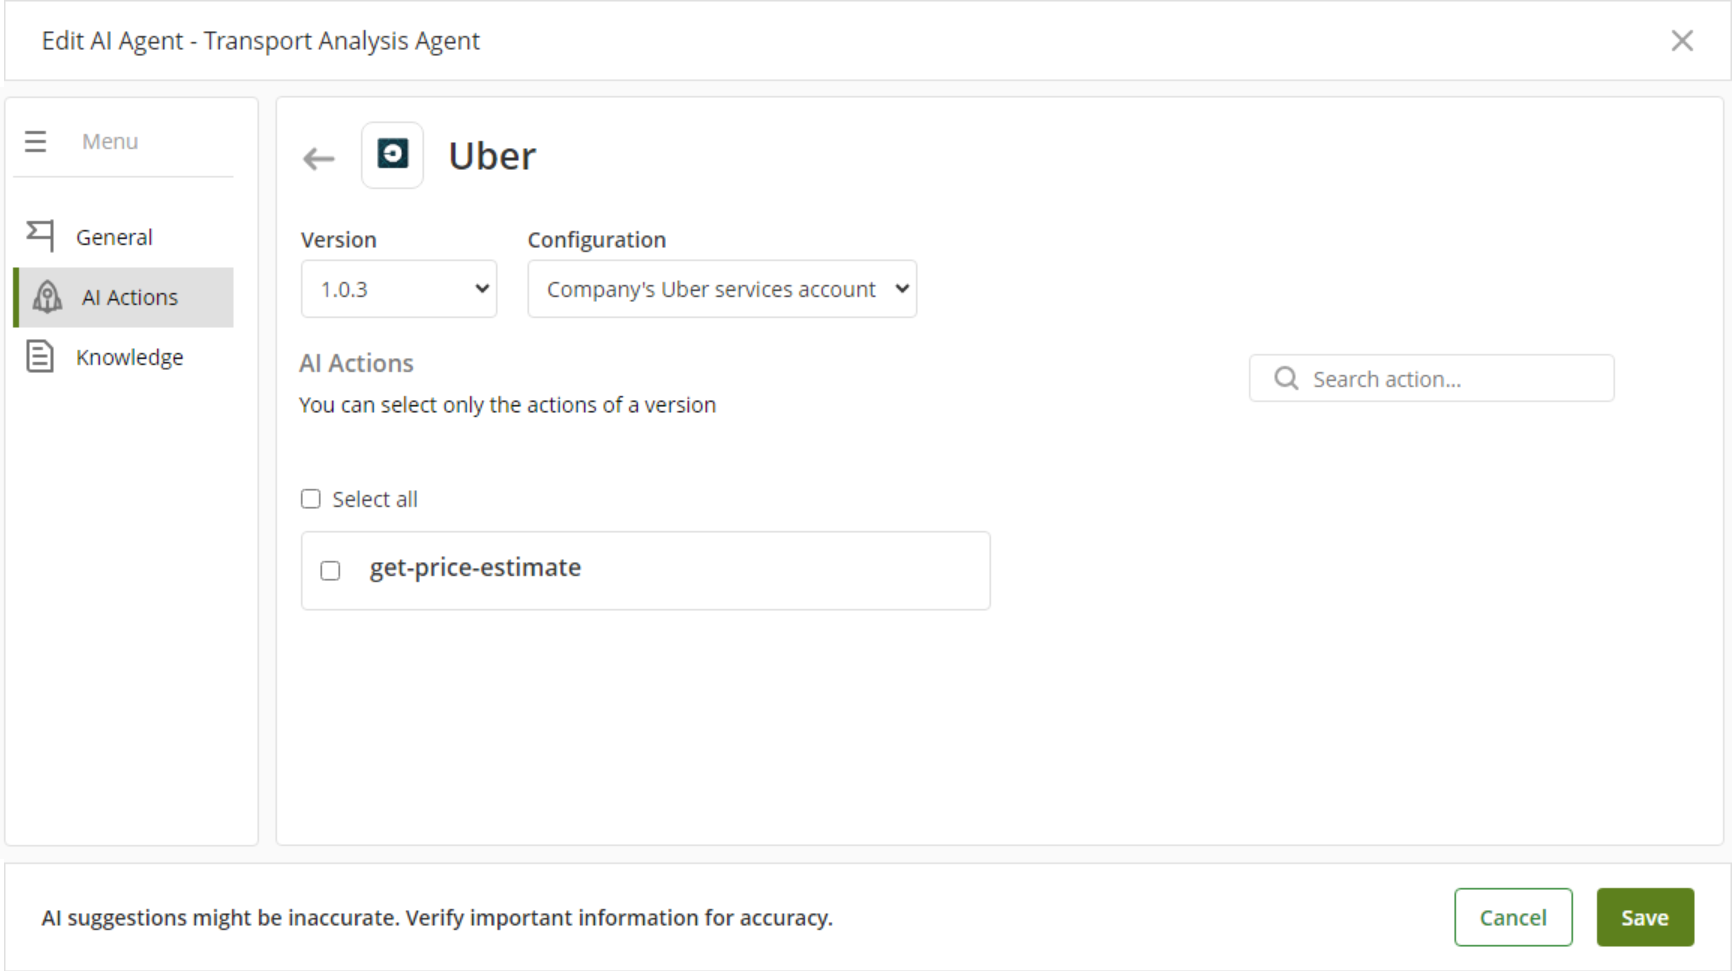
In the AI Actions section, select the action or set of actions that the AI Agent will execute with the connector. When selecting all the available actions, you can enable the Select all checkbox. If you need to find a specific action, you can use the search bar for a easier and quicker search.
To finish the process of linking a connector, click the Save button located in the right bottom of the window. This will save the changes and close the Edit AI Agent window.
Verify your just linked connector, by reopening the AI Actions section in the Edit AI Agent window. This view will update in the Linked Connectors used by the AI Agent. For each connector, you will find the version number and the quantity of applied actions.
To link another connector, reopen the Edit AI Agent window and repeat the process mentioned before.
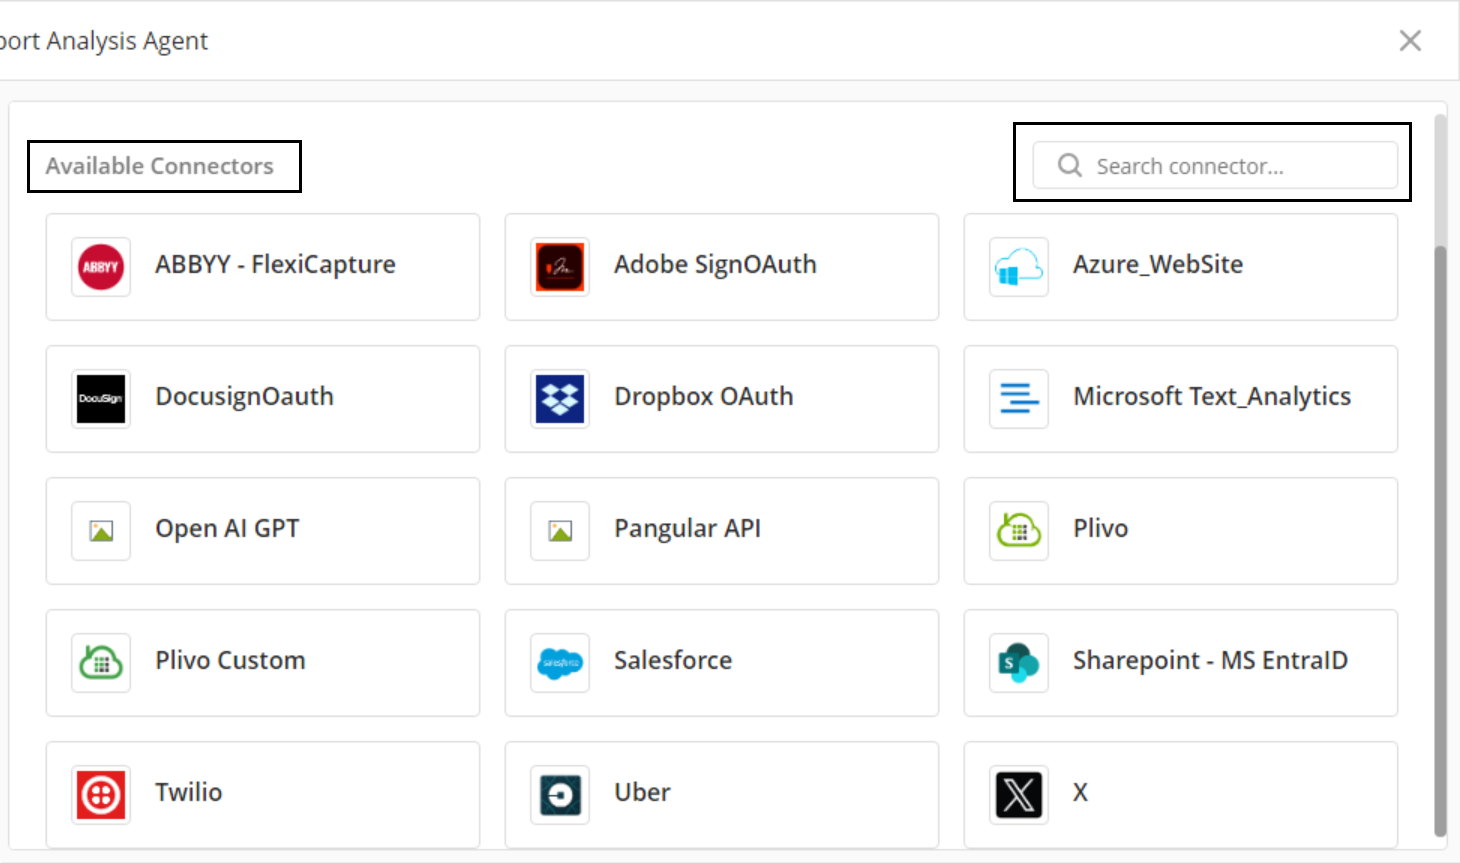
Unlink an AI Action
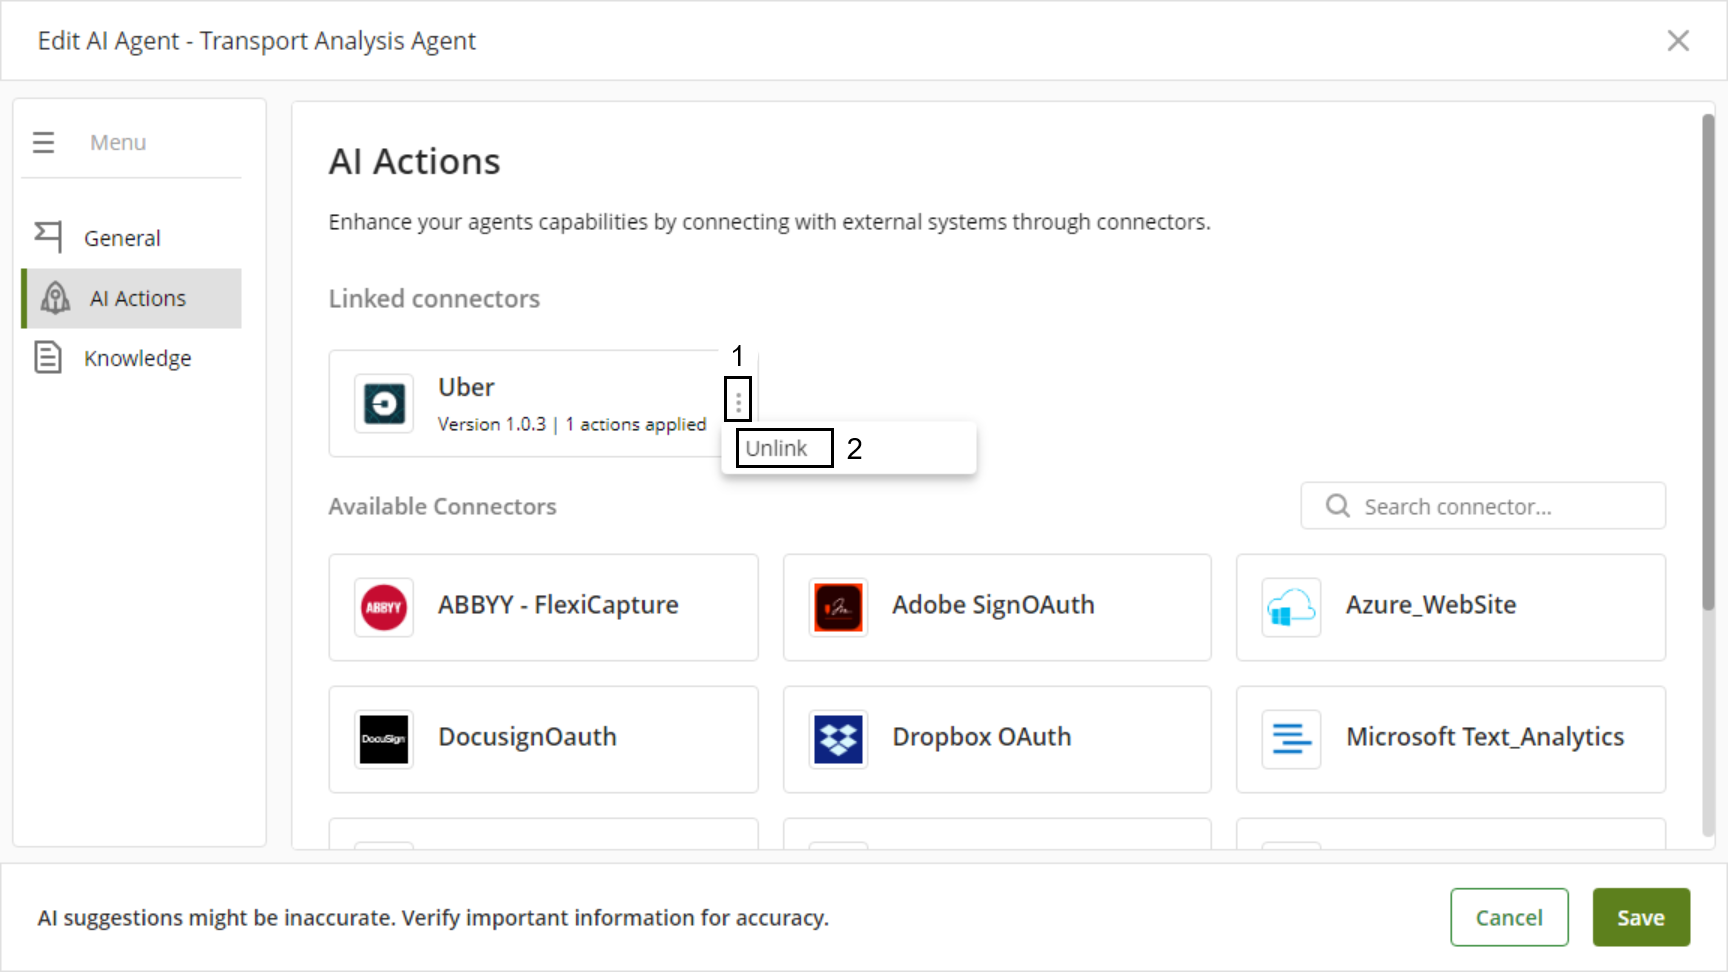
Open the Edit AI Agent window and navigate to the AI Actions section where you will find the linked connectors.
Select the three-dot menu of the connector you wish to unlink and then, select the Unlink option.
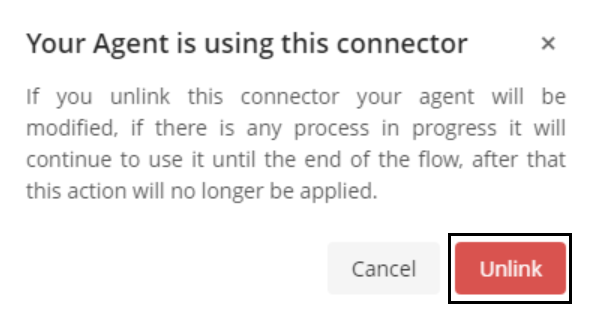
A warning window pops up, it mentions that the Agent will continue to use that connector until it finishes the flow. To confirm your decision, click the Unlink button.
Make sure to save your changes by clicking the Save button.
Implement AI Actions
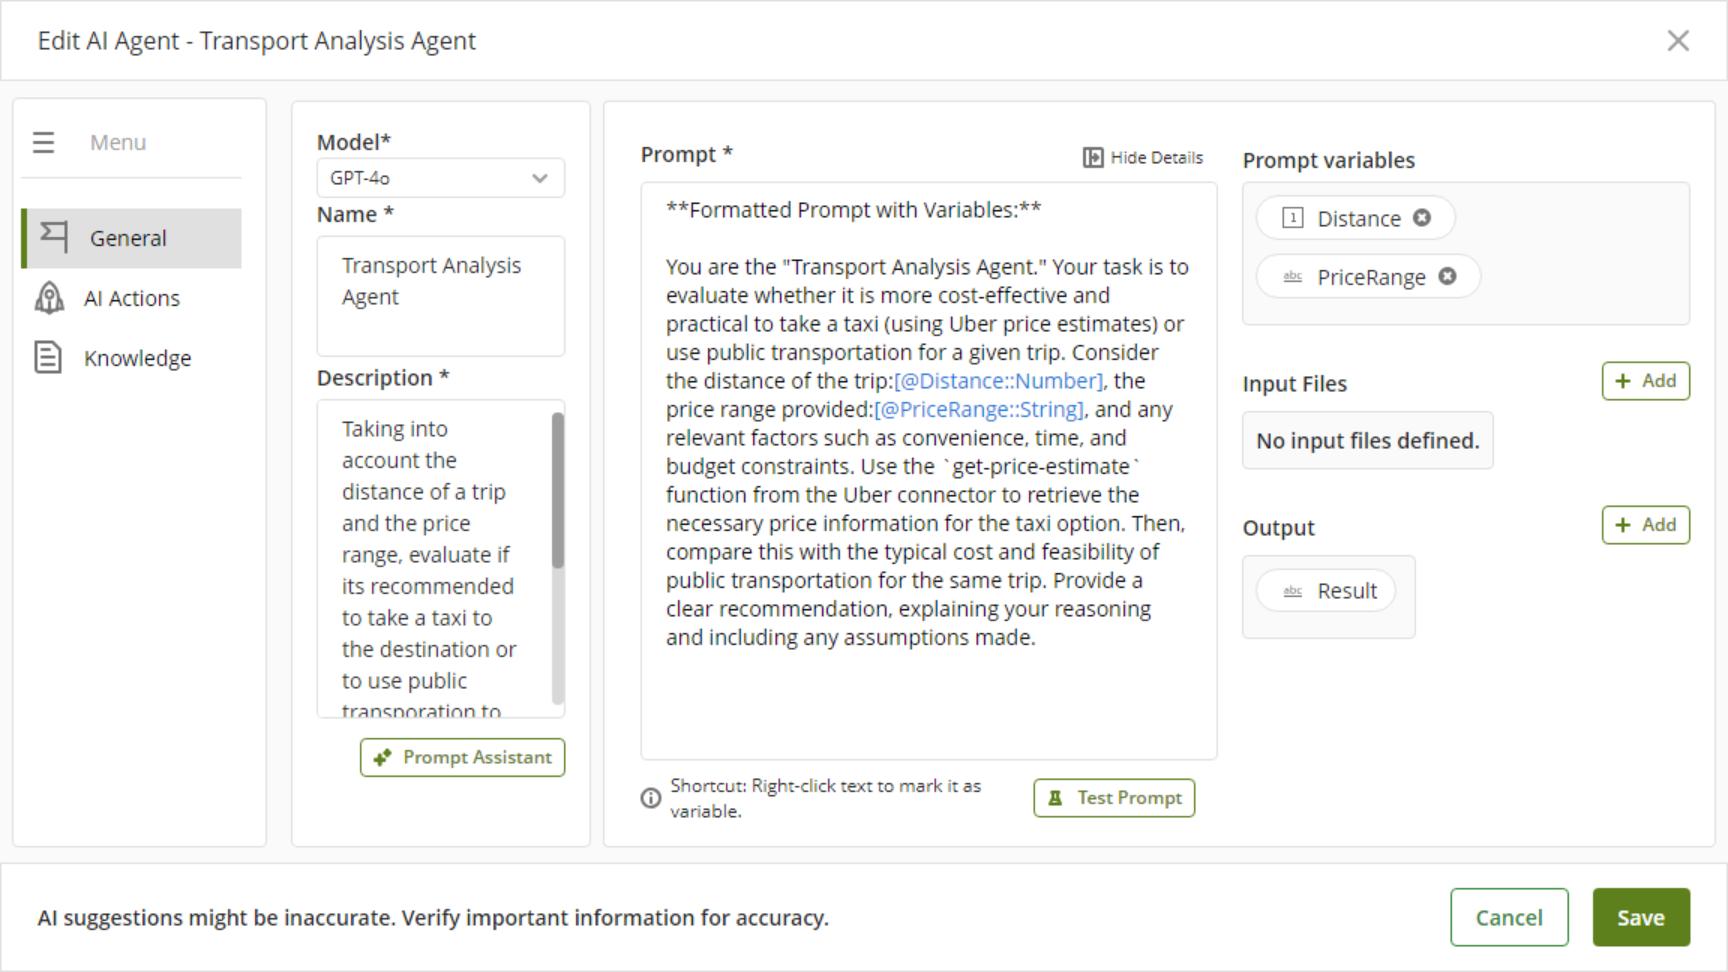
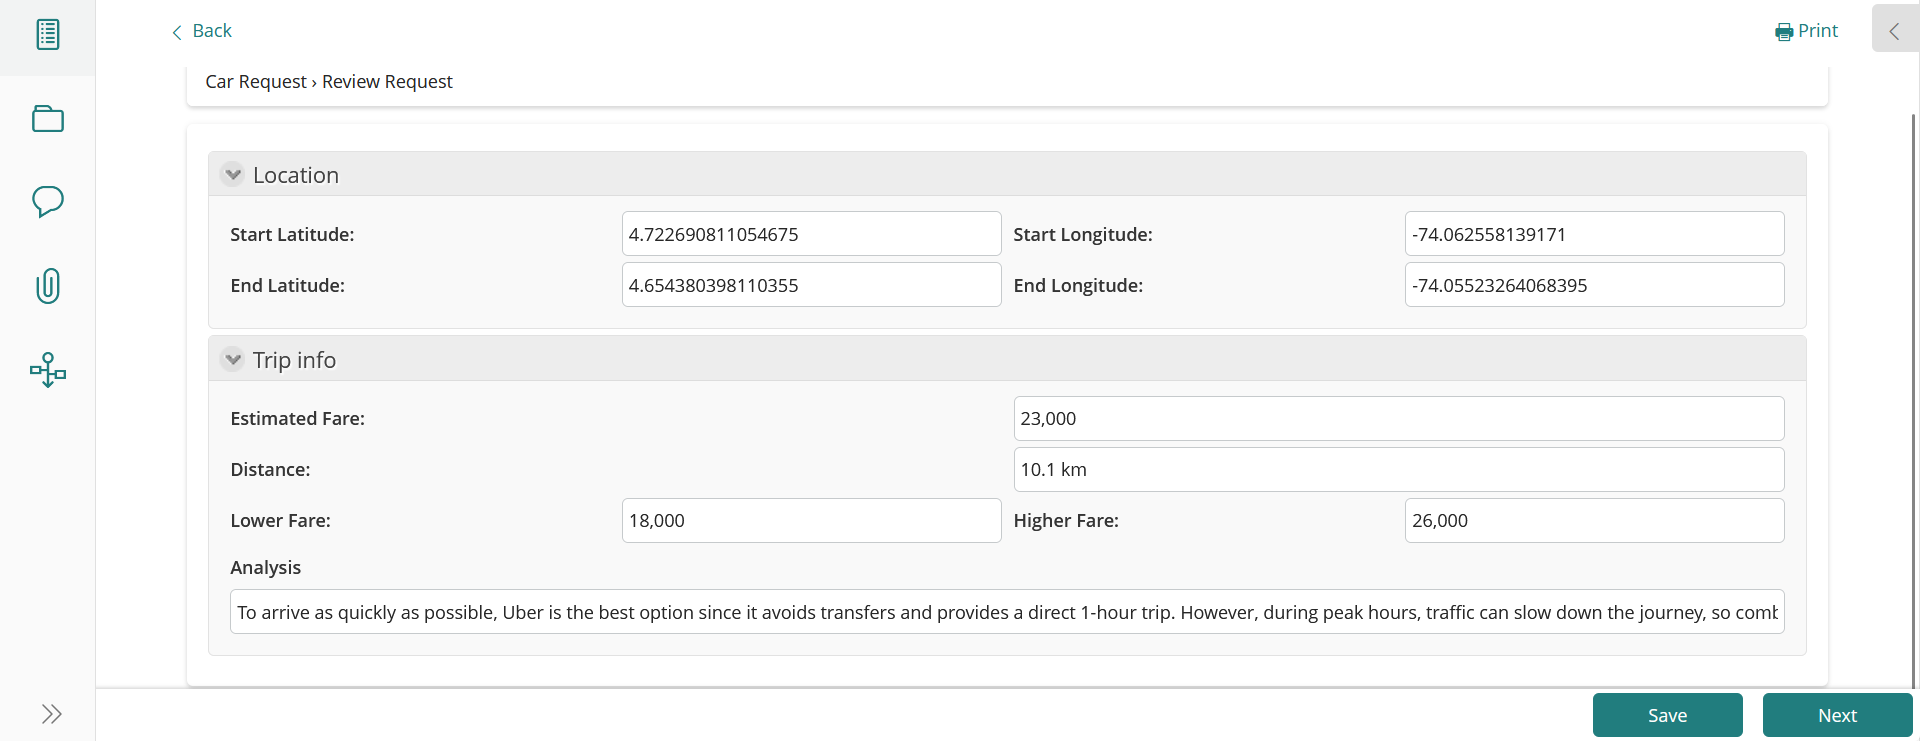
The next example will showcase how to implement an AI Agent using AI Actions. This is done through the AI Agent Transport Analysis Agent, the AI Agent will use the get-price-estimate AI Action to gather trip cost details to give us an analysis. This helps us know our ride options and decide whether to use the service.
The prompt for the AI Agent is shown in the image below.
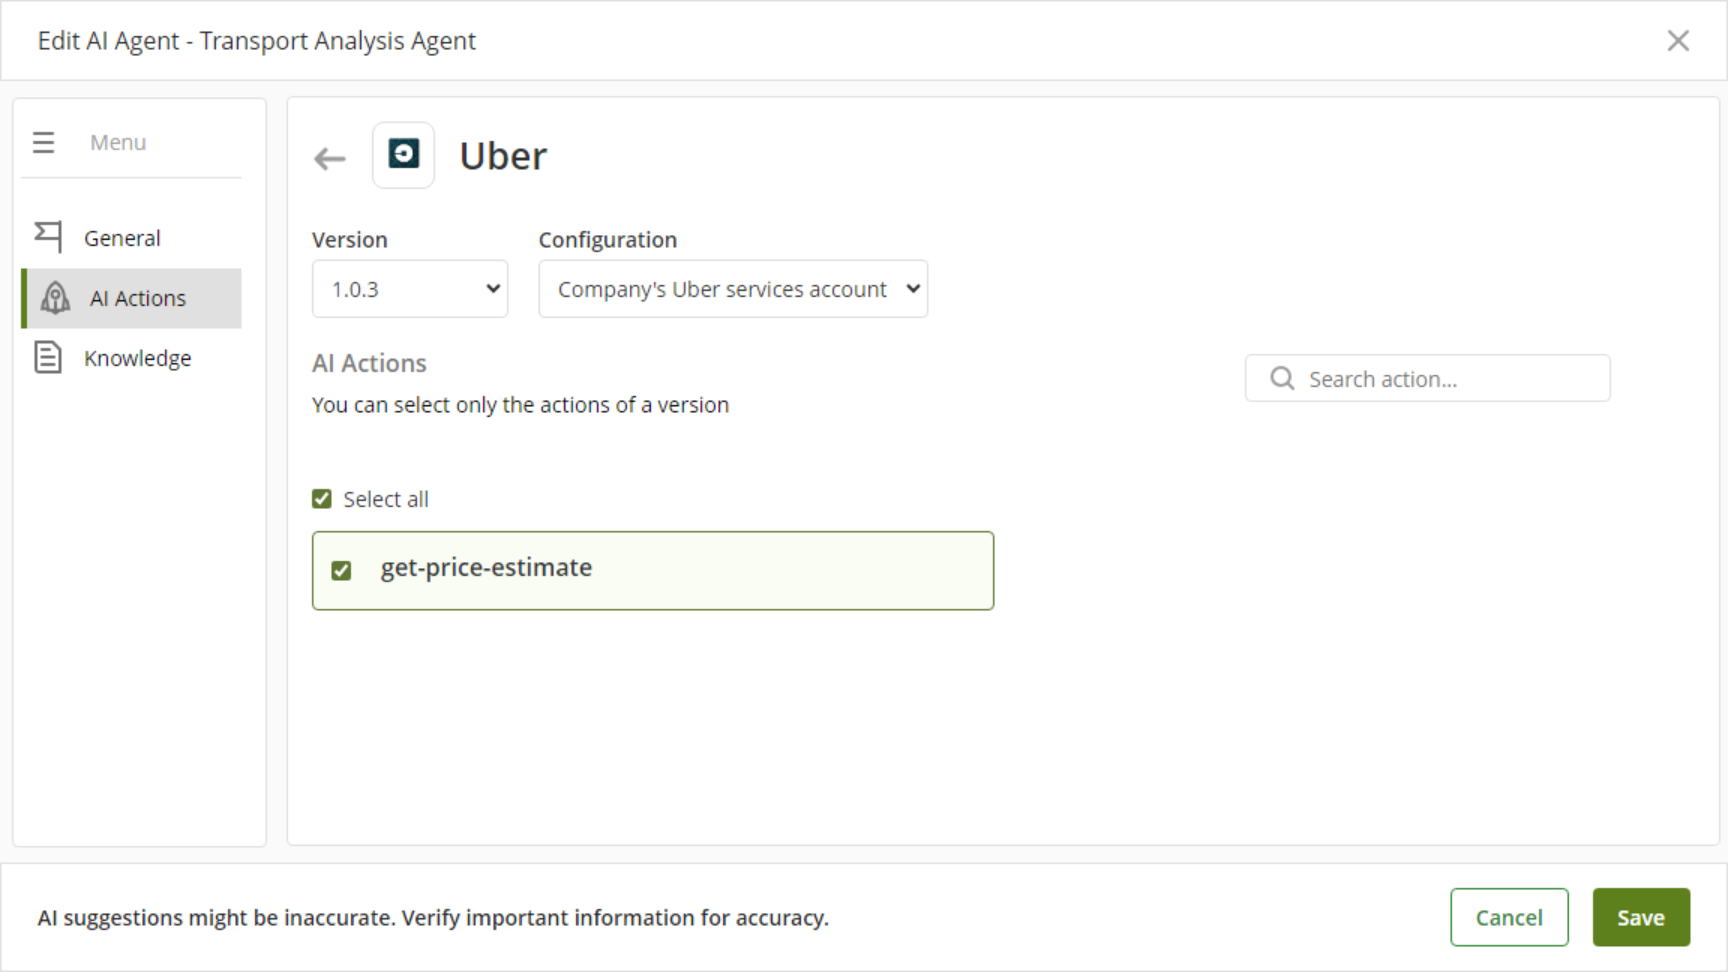
The AI Action for this AI Agent is shown in the image below.
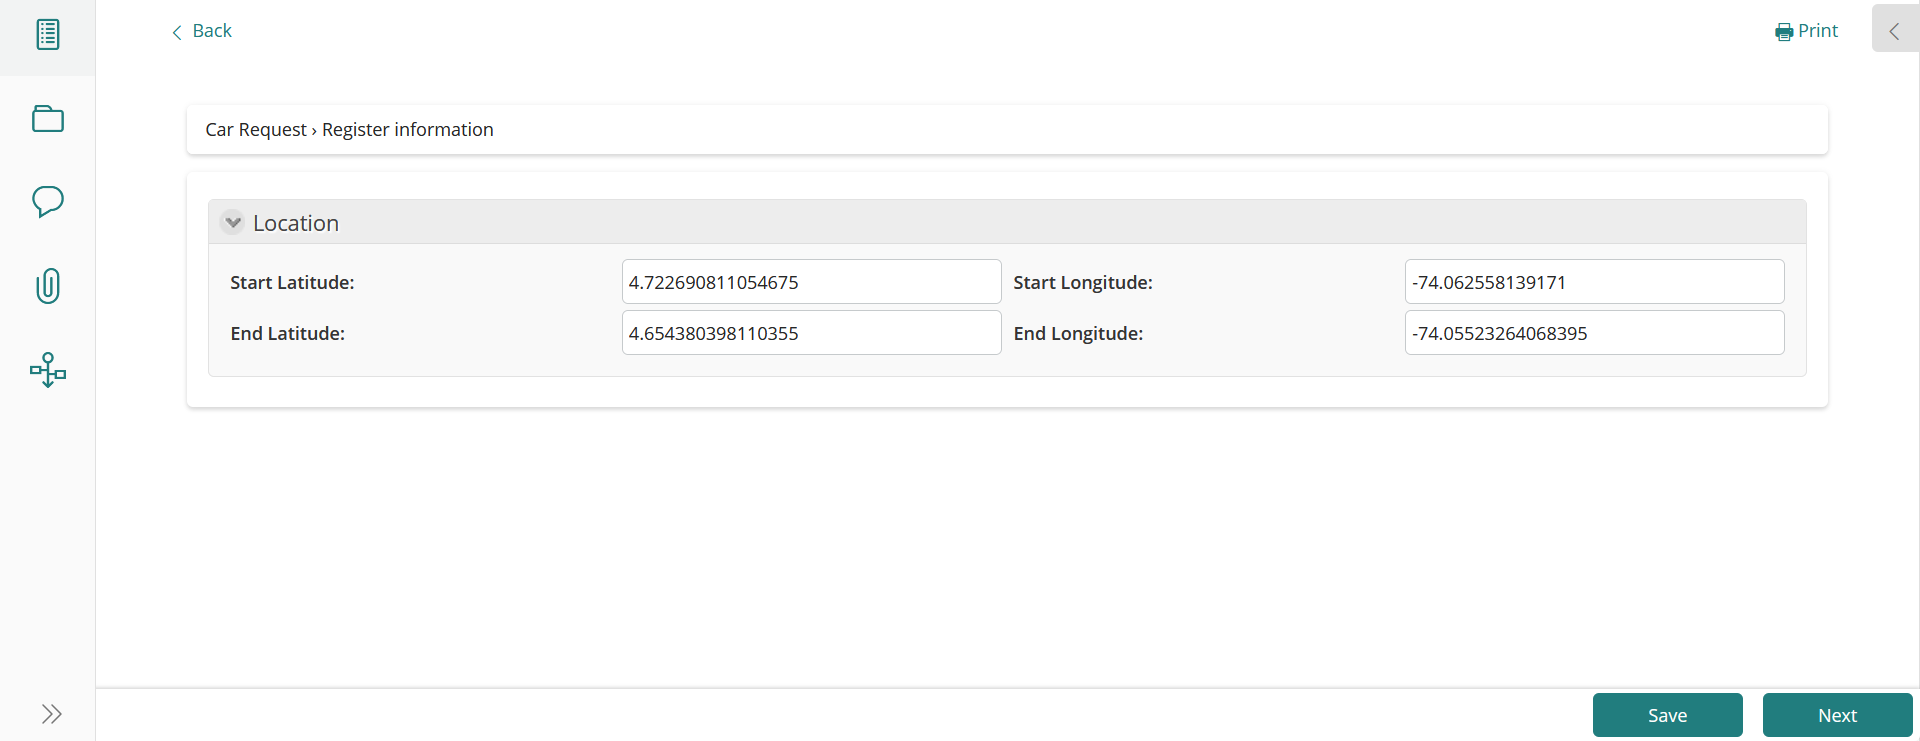
The configuration made for the Car Request process was as follows.
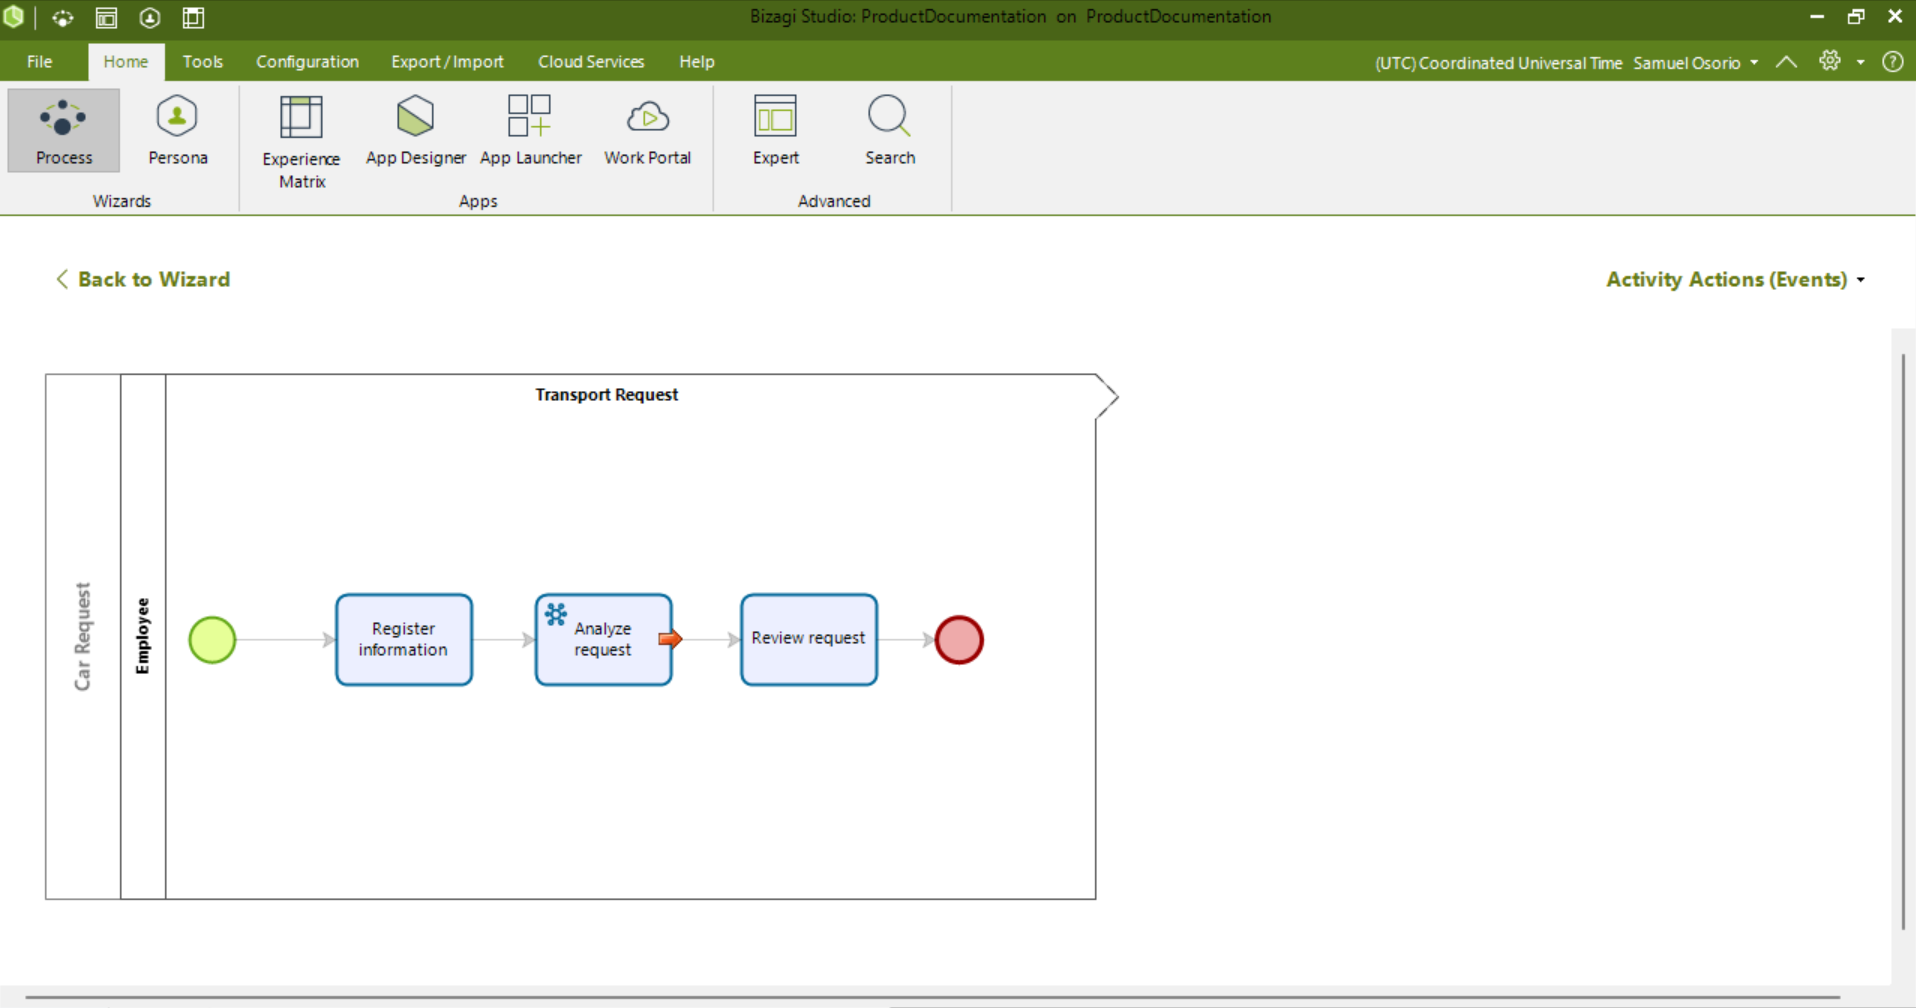
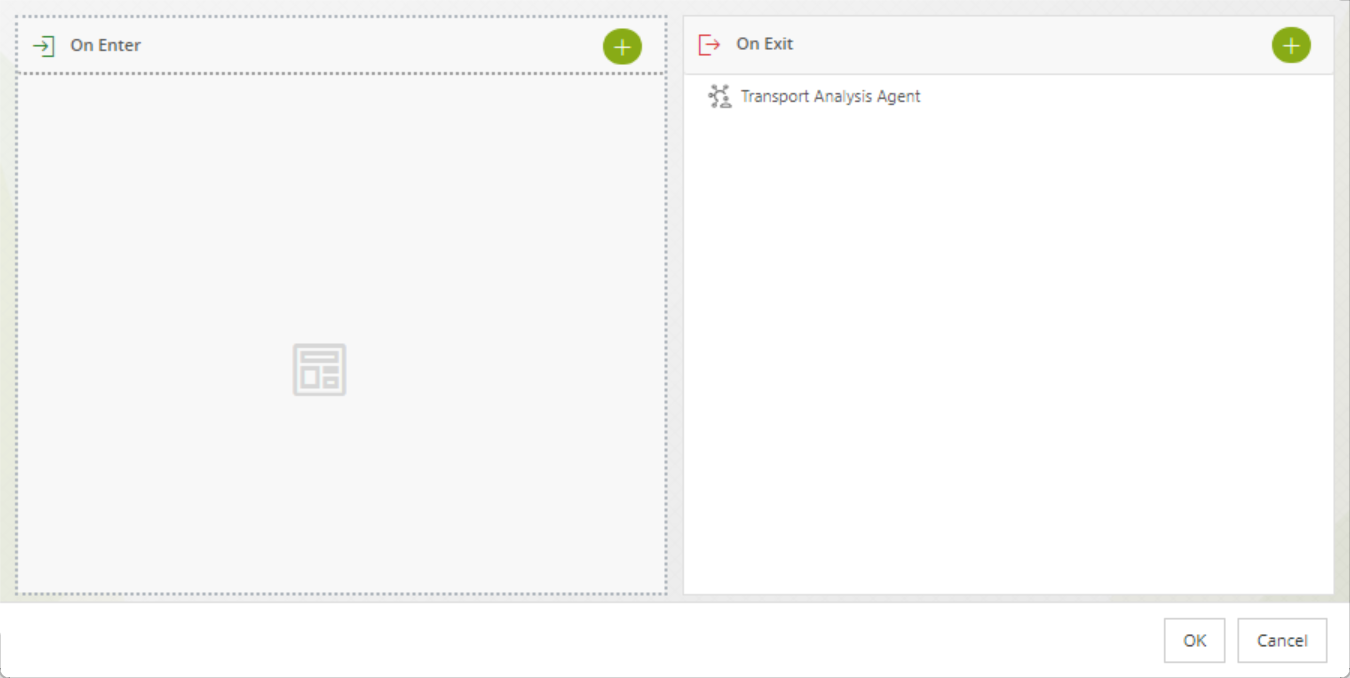
The AI Agent was configured as an On exit action.
Once the AI Agent is configured, we can proceed to execute the process from the Work Portal.
Using the coordinates of our trip, the Uber Connector makes several calculations such as estimated cost and distance.
The result of using this information is the analysis done by the AI Agent, informing us if we should take the Uber trip or use public transportation.
Last Updated 11/18/2025 11:49:18 PM